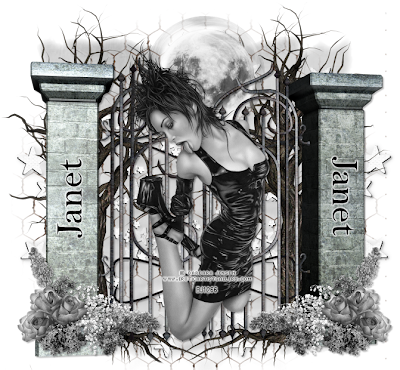
 I am using the art of Barbara Jensen which you can find HERE
I am using Redbutterfly's part of the Exclusive Store Collab Lughnassad, you can find this HERE
Mask of Choice
Font of Choice
Open a new image 700x700
Open Element 6 and paste as a new layer on your canvas
Position in the centre of your canvas
Open Element 5 and paste as a new layer
Place behind Element 6 on the right hand side
Duplicate - Image - Mirror
Grab your eraser tool and erase the bottom of the roots
Merge the tree layers together
Open Element 12 and paste as a new layer
Resize by 40 and Sharpen
Position on the bottom right of the gate
Layers - Duplicate - Image - Mirror
When happy with positioning Merge the 2 flower layers together
Adjust - Hue and Saturation - Colorise - Both boxes to 0
Open your tube and paste as a new layer
Position in the middle of the canvas
See my tag for placement
I colorised mine to match my tube
Open Element 27 and paste as a new layer
Position on the bottom of your layers
Again, i colourised my tube to match my tag
Layers - Duplicate - Image - Mirror
When happy with positioning Merge the 2 star layers together
Open Element 27 and paste as a new layer
Position on the bottom of your layers
Resize by 70 and sharpen
Position in the centre
Open Element 8 and paste as a new layer
Send to above the tree layers
Resize by 70 - Sharpen
Position in the centre
Open Element 7 and paste above the moon on your canvas
Resize as before and place over the top of the moon
Open Paper 5 and paste as a new layer
Move to the bottom
Colorise and Apply a mask of choice
Merge Group
Apply drop shadows to your layers
Merge Visible
Apply your correct copyright and licence info
Save as a png
Done
Thursday, 11 August 2011
Haunting Leap - PTU
 I am using the art of Barbara Jensen which you can find HERE
I am using Redbutterfly's part of the Exclusive Store Collab Lughnassad, you can find this HERE
Mask of Choice
Font of Choice
Open a new image 700x700
Open Element 6 and paste as a new layer on your canvas
Position in the centre of your canvas
Open Element 5 and paste as a new layer
Place behind Element 6 on the right hand side
Duplicate - Image - Mirror
Grab your eraser tool and erase the bottom of the roots
Merge the tree layers together
Open Element 12 and paste as a new layer
Resize by 40 and Sharpen
Position on the bottom right of the gate
Layers - Duplicate - Image - Mirror
When happy with positioning Merge the 2 flower layers together
Adjust - Hue and Saturation - Colorise - Both boxes to 0
Open your tube and paste as a new layer
Position in the middle of the canvas
See my tag for placement
I colorised mine to match my tube
Open Element 27 and paste as a new layer
Position on the bottom of your layers
Again, i colourised my tube to match my tag
Layers - Duplicate - Image - Mirror
When happy with positioning Merge the 2 star layers together
Open Element 27 and paste as a new layer
Position on the bottom of your layers
Resize by 70 and sharpen
Position in the centre
Open Element 8 and paste as a new layer
Send to above the tree layers
Resize by 70 - Sharpen
Position in the centre
Open Element 7 and paste above the moon on your canvas
Resize as before and place over the top of the moon
Open Paper 5 and paste as a new layer
Move to the bottom
Colorise and Apply a mask of choice
Merge Group
Apply drop shadows to your layers
Merge Visible
Apply your correct copyright and licence info
Save as a png
Done
Subscribe to:
Post Comments (Atom)

ty hun i have link the tut to my blog here
ReplyDeletehttp://redbutterfly78tutorials.blogspot.com/2011/08/haunting-leap-ptu.html
tysm :)
ReplyDelete