Thursday 29 September 2011

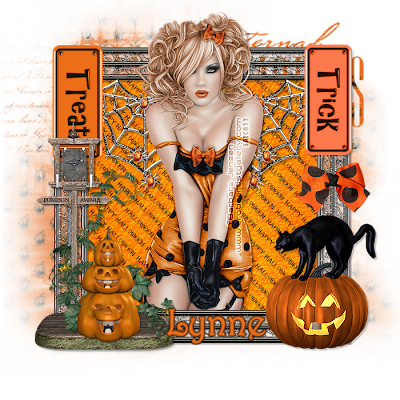
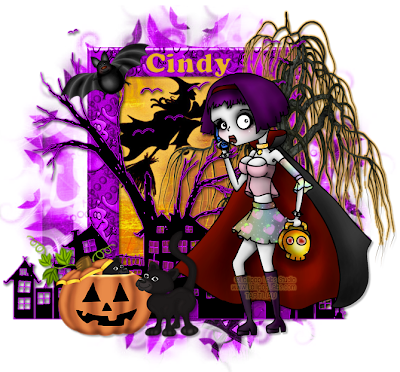
Treat or Trick - PTU

I am using the art of Lollipop Labs which i purchased at MyTagArt and you can now find her HERE I am using Puddicat Design's part of the HUGE collab Pumpkins and Candy by the awesome designers of Heartbeatz Creationz and you can find that HERE - Free with a $10 Purchase :) Mask of Choice Font of Choice Filters Used: Eye Candy Gradient Glow - Orange - 3 Xero - Radiance - 128, 50, 128, 45 Open a new layer 700x700 Open Frame 1 and paste as a new layer Resize by 70 and Sharpen I colourised mine to match my tube Click inside with your magic wand Modify by 4 and Open Paper 3 as a new layer Position so you can see the witch in the top left of the frame Resize and Sharpen if necessary When happy - Selections - Invert - Delete - Select None Move under the frame Open Spookytown 1 and paste as a new layer Position at the bottom of the frame I colourised mine to match my tag Open Tree 1 and paste as a new layer Image - Mirror Position to the right of the tag See my tag for placement When happy - Move under the town layer Erase any roots that may be showing through the bottom Apply Gradient Glow at the settings above Open Bat 1 and paste as a new layer Resize by 40 and Sharpen Move to the top left of the frame Using your deform tool, move it until you are happy Open your tube as a new layer Position on the right of the tag Apply Xero Radiance at the settings above Open CatnPumpkin 1 and paste as a new layer Resize by 50 and Sharpen Position to the left of the tube Open Paper 2 and paste as a new layer Send to the bottom and colourise Apply a mask of choice - Merge Group - Apply drop shadows to your layes Merge Visible - Add your correct copyright and licence information Merge all - Save as a png - Add your name - Save again - Done

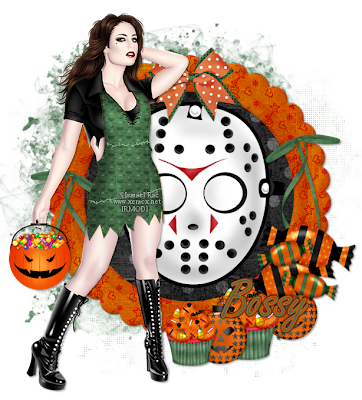
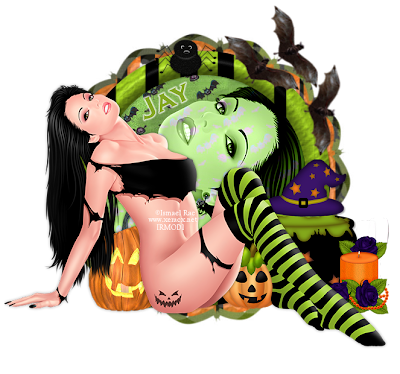
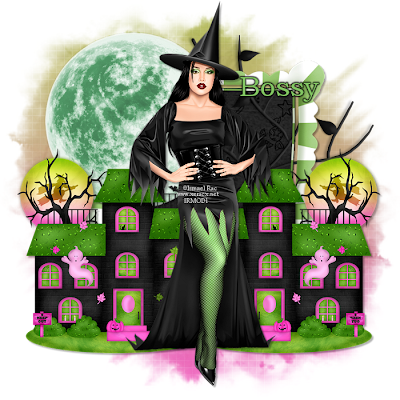
Sexy Witch - PTU

I am using the art of Ismael Rac which you can find HERE I am using Bossy's part of the collab Witches of Xeracx which you can no longer find in the store, it was a limited edition collab kit for Halloween Mask of Choice Font of Choice Open a new image 700x700 Open Haunted House and paste as a new layer Resize by 70 and Sharpen Position to the bottom left of the canvas Layers - Duplicate - Image - Mirror - Merge Down Open Frame 3 and paste as a new layer Send to the bottom and resize by 60 - Sharpen Position in the centre Click inside with your magic wand Modify by 5 Open Paper 1 on your canvas Selections -Invert - Delete - Select None Move under the frame Making sure the paper is your active layer Open tree on your canvas Position to the right of the frame Open moon on your canvas I colourised mine to match my tag Paste on your canvas and resize by 80 - Sharpen Send to below the house layer and position on the top left of the frame Open your tube and paste as a new layer Position in the centre of your tag Open Paper 10 and paste as a new layer Send to the bottom and apply a mask of choice Merge Group - Apply drop shadows to your layers Merge Visible - Apply correct copyright and licence info Merge Down - Save as a png - Add your name - Save again - Done
Wednesday 28 September 2011

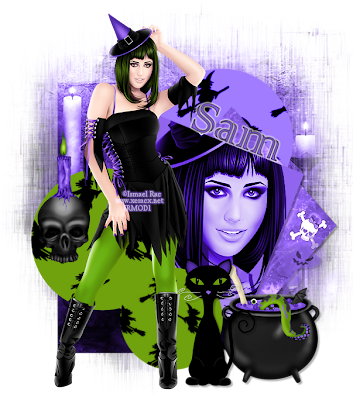
Witchy Emo - PTU

I am using the art of Ismael Rac which you can find HERE I am using my part of the collab Witches of Xeracx which is no longer available, it was a LE Collab kit for Halloween 2 Masks of Choice Font of Choice Open a new image 700x700 Open Paper 7 onto your canvas Apply a mask of Choice - Merge Group Open Paper 3 onto your canvas Apply a different mask of Choice - Merge Group Open your tube onto your canvas Position - When happy - Duplicate and hide for now Apply the same mask as before to your tube Merge Group Unhide the duplicated one and erase parts of your tube so its not so square at the bottom Open Element 13 and paste as a new layer Resize by 90 and Sharpen Position on the top left of the tag Open Element 30 and paste as a new layer Resize by 50 and Sharpen Place on the left of the tag underneath the moon layer Open Element 15 and paste as a new layer Resize by 70 and Sharpen Position on the left of the tube Open Element 7 and paste as a new layer Image - Mirror Position on the mask layer under the element and tube layers Resize by 70 and Sharpen Change the blend mode to Luminance Legacy Open Element 1 and paste as a new layer Resize by 40 and Sharpen Position next to the cauldron Layers - Duplicate - Resize by 80 and Sharpen - Position next to the original Open Element 14 and paste as a new layer Resize by 60 and Sharpen Position on the left of the cauldron Open Element 10 and paste as a new layer Resize by 50 - Sharpen - Image - Mirror Position behind the tube layers Open Element 8 and paste as a new layer Resize by 40 and Sharpen Position on the right of the tube Layers - Duplicte - Resize by 80 - Sharpen Position next to the original Apply drop shadows to your layers Merge Visible Apply correct copyright and licence numbers Merge Down - Save as a png - Add your name - Save again - Done
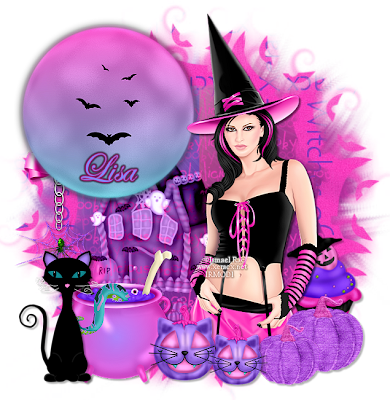
Sweet Lolly - PTU

I am using the art of Ismael Rac which you can find HERE I am using the fabby HD Pack that has been made to match the tube, these packs are made by Jenn and Sam, you can find the HD Pack HERE and more awesome stuff by the 2 ladies HERE Mask of Choice Font of Choice Open a new image 700x700 Open Frame and paste as a new layer Position on the right of your canvas Click inside the centre with your magic wand Modify by 4 Open Paper 2 and paste as a new layer Position - Selections - Invert - Delete - Keep Selected Open a close up of your tube and position When happy - Selections - Invert - Delete - Select None Move both layers under the frame Open Element 3 and paste as a new layer Resize by 90 and Sharpen Position under the frame and to the left Open your tube and paste on your canvas Position on the left of the tag Open Element 1 and paste as a new layer on your canvas Resize by 70 and Sharpen Position on the right of your tag Open Element 5 and paste as a new layer Resize by 40 and Sharpen Position in front of the candles Using the colours from your tube - Create a gradient Layers - New Raster Layer - Floodfill with your gradient Apply a mask of choice and merge group Send to the bottom Open Element 2 and paste as a new layer above the mask Position and duplicate and move to the top Erase any bits that are over the mask Apply drop shadows to your layers Merge Visible Add your correct copyright and licence numbers Merge down - Save as a png - Add your name - Save again - Done
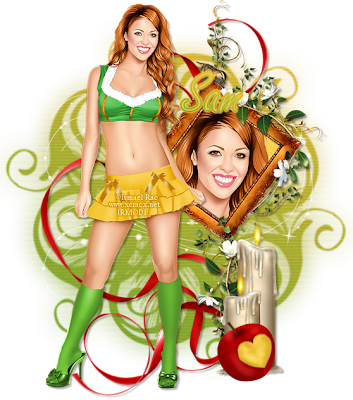
Halloween Tease - PTU

I am using the art of Ismael Rac which you can find HERE I am using P&A Dezign's part of the HUGE collab Pumpkins and Candy by the awesome designers of Heartbeatz Creationz and you can find that HERE Mask of Choice Font of Choice Filters Used: Xero - Radiance - 128, 30, 128, 37 Open a new image 700x700 Open Element 10 and paste as a new layer on your canvas Position just above the centre Open Element 27 and paste as a new layer Using your deform tool - Angle it to the right a bit Send under the fence See my tag for placement Open the tube you are using and paste as a new layer Position so she is lying on the coffin Apply Xero Radiance at the settings above Open Element 6 and paste as a new layer Image - Mirror - Resize by 50 and Sharpen Position on top of the pumpkin Open Paper 3 as a new layer Send to the bottom and apply a mask of choice Merge Group Apply drop shadows to your layers Merge Visible Apply correct copyright and licence numbers Merge Down - Save as a png - Add your name - Save again - Done

Monday 26 September 2011

2 Show Off Tags by Vicky : )

Vicky has made a gorgeous tag and a gorgeous forum set for me using my new PTU kit Halloween Night which you can find HERE You can find more of Vicky's tags and tuts on her blog HERE

Halloween Treats - PTU

I am using the art of Lollipop Labs Studios which i purchased when she was at MyTagArt, you can now find her HERE I am using Lysira's part of the HUGE collab Pumpkins and Candy by the awesome designers of Heartbeatz Creationz and you can find that HERE Mask of Choice Font of Choice Open a new image 700x700 Open Frame 3 and paste as a new layer Resize by 70 and Sharpen Position in the centre of your canvas Grab your magic wand and select inside the middle Modify by 3 - Open Paper 2 on your canvas I colourised mine to match my tube Position and resize if necessary When happy - Selections - Invert - Delete - Keep Selected Open Fence and paste on your canvas Resize by 80 and Sharpen Position towards the bottom of the frame Selections - Invert - Delete - Keep Selected Open Ghost - Image - Mirror Paste as a new layer Position under the frame on the left hand side Selections - Invert - Delete - Select None Move the layers under the frame Open Spooky Tree and paste as a new layer Position on the left of the canvas Resize by 90 - Sharpen Place under the frame Duplicate - Image - Mirror - Position on top of the frame Open the tube you are using Position on the right of the tag Open Bag 1 and paste as a new layer I colourised mine Resize by 40 - Position on the left of the tag Open Pumpkin 2 and paste as a new layer Resize by 30 and Sharpen Position on the right of the bag Layers- Duplicate - Image - Resize by 80 and Sharpen - Position next to the original Open Paper 3 and paste as a new layer Send to the bottom and apply a mask of choice Merge Group Layers - Duplicate - Resize by 90 and colourise Add drop shadows to your layers Merge Visbible Apply Correct copyright and licence numbers Merge Down - Save as a png - Add your name - Save again - Done

Halloween Witch - PTU

I am using the art of Nicholas Garton aka GartArtPinUps which you can find HERE I am using Laura's Designz part of the HUGE collab Pumpkins and Candy by the awesome designers of Heartbeatz Creationz and you can find that HERE Mask of Choice Font of Choice Open a new image 700x700 Open Element 10 and paste as a new layer Resize by 80 and Sharpen Position in the centre Open Element 34 and paste as a new layer Resize by 90 and Sharpen Position over the orange frame Click inside the purple frame with your magic wand Modify by 3 - Copy and Paste Paper 1 as a new layer Selections - Invert - Delete - Select None - Move under the frame Click inside the orange frame with your magic wand Modify by 3 and paste Paper 3 as a new layer Position - Selections - Invert - Delete - Select None Move under the frame Effects - Texture Effects - Blinds - Width 5 - Opacity 11 - Black - Horizontal Open Element 38 and paste as a new layer Resize by 70 and Sharpen Duplicate about 6 times and position inside the purple paper Merge them down when happy Open Element 4 and paste as a new layer Image - Mirror - Resize by 30 and Sharpen Position on the bottom left of the frame Open Element 12 and paste as a new layer Resize by 50 and Sharpen Position along the bottom of the frames Duplicate and position next to the original See my tag for placement Merge the candy layers Down Open Element 13 and paste as a new layer Resize by 30 and Sharpen Position on the cat on the left of the tag Open Element 19 and paste as a new layer Resize by 30 and Sharpen Position on the right of the tag Open your tube as a new layer Position in the centre - resizing if necessary Open Element 17 and paste as a new layer Image - Mirror - Resize by 50 and Sharpen Position on the right of the frames Using your deform tool - angle it so it goes along with the frame Open Element 43 and paste as a new layer Resize by 40 and Sharpen Using your deform tool - angle it to the left so it fits the frame Open Paper 4 and paste as a new layer Send to the bottom and apply a mask of choice Merge Group - Apply drop shadows to your layers Merge Visible Add correct copyright and licence numbers - Merge Down - Save as a png - Add your name - Save again - Done

Wednesday 21 September 2011

Fall Days - PTU

I am using the art of Ismael Rac which you can find HERE I am using the PTU kit Autumn Days by Rieka, i purchased this from her store which has closed down but you can find her HERE Mask of Choice Font of Choice Open a new image 700x700 Open Frame 2 onto your canvas and paste as a new layer Image - Resize by 80 and Sharpen Position in the centre of your canvas Click inside the frame with your magic wand Selections - Modify - Expand by 3 Open Paper 6 as a new layer Selections - Invert - Delete - Keep Selected Open the tube you are using and paste on your canvas Position in the frame When Happy - Duplicate and hide for now Selections - Invert - Delete - Select None - Move both the tube and paper layer underneath the frame Unhide your duplicated tube and using your eraser tool - Erase the bottom part of the tube Open Fence and paste as a new layer Resize by 60 and Sharpen Position towards the bottom left of the frame See my tag for placement Open Squirrel and paste as a new layer Resize by 40 and Sharpen Position on the right side of the fence Open Pumpkins and paste as a new layer Resize by 40 and Sharpen Image - Mirror - Position under the fence on the left hand side Duplicate and position next to the original Open WordArt 1 and paste as a new layer Resize by 50 and Sharpen Position on the fence Open Twig 1 and paste as a new layer Image - Rotate - Free Rotate - 90 Right Image - Resize by 50 and Sharpen Position behind the pumpkins - Duplicate and position on the right behind the squirrel Open Paper 15 and paste as a new layer Send to the bottom and apply a mask of choice - Merge Group Add drop shadows to your layers - Merge Visible Apply correct copyright and licence numbers Merge Down - Save as a png - Add your name - Save again - Done

Monday 19 September 2011

Pretty Witchy - PTU

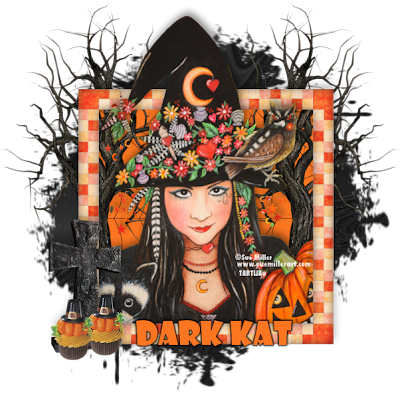
I am using the art of Sue Miller which i purchased whenshe was at MyTagArt and you can now find her HERE I am using Dark Kat Kreationz part of the HUGE collab Pumpkins and Candy by the awesome designers of Heartbeatz Creationz and you can find that HERE Mask of Choice Font of Choice Open a new image 700x700 Open Element 32 and paste on your canvas Position in the centre of your canvas Click inside with your magic wand Selections - Modify - Expand by 4 Open Paper 5 on your canvas Position inside the frame Selections - Invert - Delete - Keep Selected Open your tube and paste as a new layer Position - When happy - Duplicate and hide for now Selections - Invert - Delete - Select None Move both the paper and tube layer under your frame Unhide the duplicated tube Use your eraser tool to erase the overhanging bits of the tube Open Element 19 and paste as a new layer Resize by 90 and sharpen Send to above the paper layer Layers - Duplicate - Image - Mirror - Merge Down Using your eraser tool, erase the roots of the trees Open Element 16 and paste as a new layer Resize by 40 and Sharpen Image - Mirror - Position on the bottom left of the frame Open Element 23 and paste as a new layer Resize by 40 and Sharpen Position on the gravestone Duplicate - Place next to the original and move down Open Paper 1 and paste as a new layer Send to the bottom and apply a mask of choice Merge Group Apply drop shadows to your layers Merge together Add your correct copyright and licence numbers Merge Visible - Save as a png - Add your name - Done

Halloween Bite - PTU

I am using the art of Steve Baier which you can find HERE I am using Emjay's part of the HUGE collab Pumpkins and Candy by the awesome designers of Heartbeatz Creationz and you can find that HERE Mask of Choice Font of Choice Filters Used: Eye Candy - Gradient Glow - Orange and Black - 3 Open a new image 700x700 Open your image and paste on your canvas Apply a mask of choice - A square sided one works best Merge Group I duplicated mine 3 times - I merged the original and the 1st duplicate On the 3rd duplicate - i changed the blend mode to Darken Open Element 29 and paste as a new layer Image - Resize by 60 and Sharpen Position on the top of the masked tube layer Duplicate and position at the bottom Duplicate - Again - Image - Rotate - Free Rotate - 90 Left Position on the left of the masked tube layer Duplicate - Image - Mirror - Position on the right Merge these layers together Open Element 6 and paste as a new layer Resize by 50 and Sharpen Position on the top right of the tag Apply Radiance - Black at the settings above Open Element 5 and paste as a new layer Resize by 40 and Sharpen Position on the top left of the tag Apply Radiance - orange at the settings above Open Element 12 and paste as a new layer Resize by 40 and Sharpen I colourised mine to match my tag Position on the bottom left of the tag Layers -Duplicate - Image - Resize by 80 - Sharpen Position next to the original Merge Down - Apply Radiance - Orange at the settings above Duplicate - Image - Mirror - Position - Merge the candle layers together Apply drop shadows to your layers Merge Visible Apply your correct copyright and licence information Merge Down Save as a png - Add your name - Save again - Done
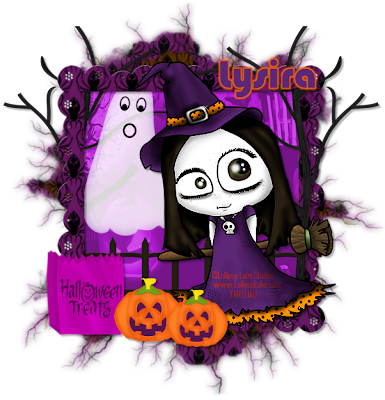
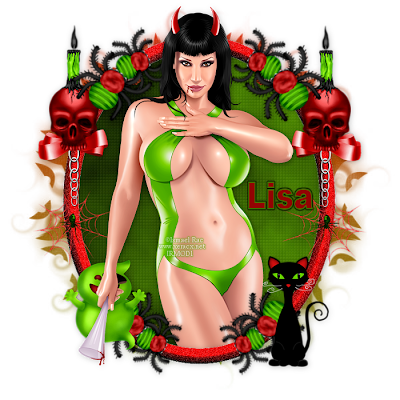
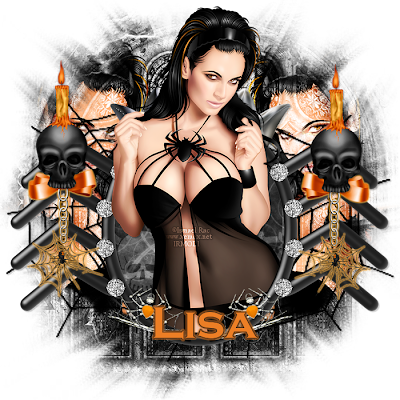
Gothic Lisa - PTU

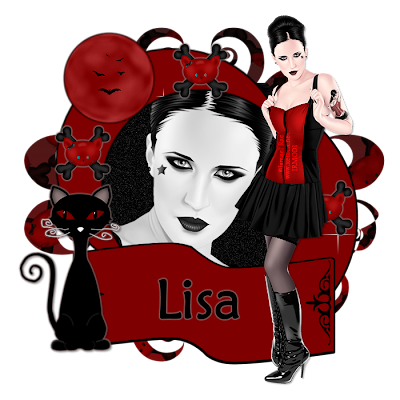
I am using the art of Ismael Rac which you can find HERE I am using the fabby HD Plus Pack that has been made to match the tube, you can find it HERE Mask of Choice Font of Choice Filters Used: Eye Candy Gradient Glow - 3, black and grey VM Natural - Sparkle - Default Open the template onto your canvas Shift - D to duplicate Erase Layers 4,5 and 6 Image - Canvas Size - 700x700 - Making sure its in the centre Open your tube as a new layer Position on the right of the template Click on Raster 14 and using your magic wand Click inside and open a close up of your tube Paste on your canvas and position When happy - Selections - Invert - Delete - Select None Change the blend mode of the close up to Luminance Legacy Making sure Raster 14 is your active layer Adjust - Add/Remove Noise - Add Noise - Gaussian - Mono checked - 30 Open Element 4 and paste as a new layer Resize by 50 and Sharpen Position on the top left of the frame Apply Gradient Glow at the settings above Click on Raster 7 Selections - Select All - Float - Defloat - Modify by 3 Open Paper 2 and paste as a new layer Position - Selections - Select All - Float - Defloat - Select None Delete Raster 7 Open Element 3 and paste as a new layer Resize by 70 - Sharpen Image - Mirror Position on the left of Raster 9 Apply Gradient Glow at the settings above - grey Apply VM Natural to Raster's 2 and 3 Open Element 2 and paste as new layer Resize by 30 and Sharpen Position around the template and merge the layers together Add drop shadows to your layers Merge layers visible Apply correct copyright and licence numbers Merge Down Save as a png - Add your name - Save again - Done
Rieka Rafita $1 Dollar Sale!

Hi Everyone! Rieka is having a Dollar sale on all her retired kits, go n grab yourself a bargain!
Get them on HERE RR_Starlicious (TaggerSize)RR_Love Of Autumn (TaggerSize) RR_Goth Princess (TaggerSize)RR_Rock Star (TaggerSize) RR_Chocolate Lovers (TaggerSize) RR_Happy Halloween (TaggerSize) RR_BabyGirl (TaggerSize)RR_Summerlicious (TaggerSize)

Friday 16 September 2011

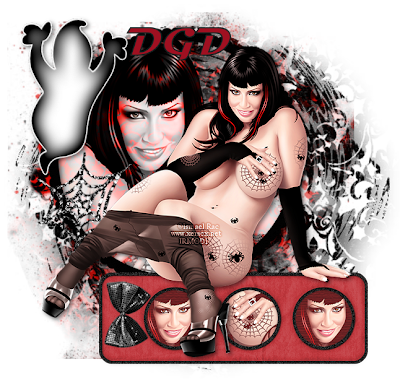
Dark Lady - PTU

I am using the art of Ismael Rac which you can find HERE I am using DGD's part of the HUGE collab Pumpkins and Candy by the awesome designers of Heartbeatz Creationz and you can find that HERE Mask of Choice Font of Choice Filters Used: Xero - Radiance - 128, 50, 128, 30 Open a new image - 700x700 Open Frame and paste as a new layer Position in the centre and resize by 80 - Sharpen Position to the top left of your canvas Click inside the frame with your magic wand Selections - Select All - Float - Defloat - Selections - Modify -Expand by 4 Open a close up of your tube Position in the frame When happy -Selections - Invert - Delete - Select None Move under the frame layer Open Ghost and paste as a new layer Resize by 90 and Sharpen Using your deform tool - Angle it to the right Position on the top left of the frame See my tag for placement Open 3 Circle Frame and paste on your canvas Image - Rotate - 90 - Right Move to the bottom of the black frame I colourised mine to match my tag Selections - Select All - Float -Defloat Selections - Modify - Expand by 5 Choose a dark colour from your tube - Add a new raster layer Floodfill - Select None Making sure the red frame is your active layer Click inside each hole Selections - Select All - Float -Defloat Selections - Modify -Expand by 3 Open Paper 9 on your canvas Position - Selections - Invert - Delete - Keep Selected Position a close up of your tube in all 3 When happy -Selections - Invert - Delete - Select None Merge the tube layers together and move both layers under the frames I colourised the Paper to match my tag Change the blend mode of the tubes to Lighten Open your tube as a new layer Position on top of the red frame - Resize if necessary Apply Xero - Radiance at the settings above Open Paper 4 and paste as a new layer Send to the bottom Image - Resize by 120 Apply a mask of choice Merge group Move so its mainly under the black frame Change the blend mode of the close up tube to Luminance Legacy Open Spiderweb and paste as a new layer Resize by 90 - Sharpen Position on the bottom left of the black frame Using your deform tool, angle it so it fits on the frame Open Bow and paste as a new layer Image - Rotate -Free Rotate - 90 Right Position on the left of the red frame Open Paper 7 and paste as a new layer Send to the bottom - Resize by 120 Apply a mask of choice - merge group Apply dropshadows to your layers Merge layers visible - Add your correct copyright and licence numbers Merge again - Save as a png - Add your name - Save again -Done

Tuesday 13 September 2011

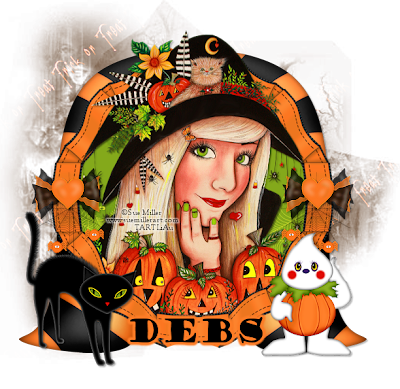
Pumpkin Smile - PTU

I am using the art of Sue Miller which i purchased when she was at MyTagArt and you can now find her HERE I am using Debs Design's part of the HUGE collab Pumpkins and Candy by the awesome designers of Heartbeatz Creationz and you can find that HERE Mask of Choice Font of Choice Link Open Frame 1 and paste as a new layer Position in the centre of your canvas Click inside the frame with your magic wand Modify by 4 Open Paper 1 and paste on your canvas Position - Selections - Invert - Delete - Keep Selected Open your tube on your canvas Position in the frame - When happy Layers - Duplicate - Hide for now Selections - Invert - Delete - Select None Move the original tube and paper layer under the frame Un hide the duplicated tube Grab your eraser tool and erase the overhanging parts of the tube Open Candy 1 on your canvas Resize by 40 and Sharpen Position on the middle left of the frame Duplicate - Image - Mirror - Merge Down Open Swirl 1 and paste on your canvas Send to the bottom and position on the right of the canvas Duplicate - Image - Mirror - Merge Down Open SpiderWeb 2 and paste on your canvas Resize by 40 - Sharpen Position under the bow on the left of the canvas Duplicate - Image - Mirror - Merge Down Open Cat and paste on your canvas Resize by 80 - Sharpen Mirror and position on the left of your canvas Open Ghost Pumpkin and paste as a new layer on your canvas Resize by 40 and Sharpen Position on the bottom right of your canvas Open Paper 9 and paste on your canvas I colourised mine to match my tag Send to the bottom and apply a mask of choice Merge Group Apply drop shadows to your layers Merge layers visible - Add your correct copyright and licence numbers Save as a png - Add your name - Save again - Done
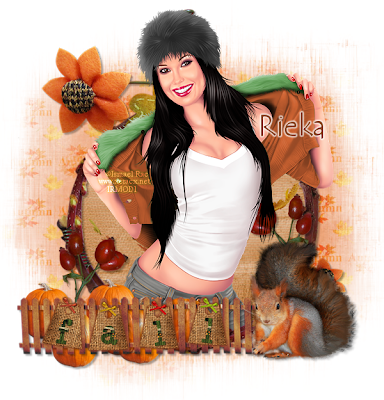
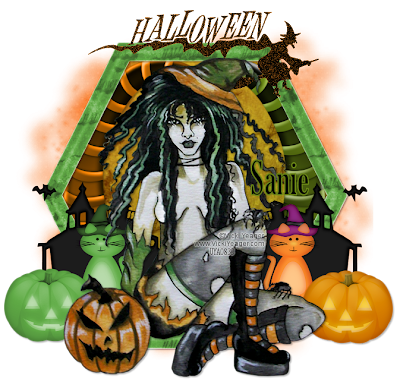
Halloween Stare - PTU

I am using the art of Vicki Yeager which you can find HERE I am using Creation by Sanie's part of the HUGE collab Pumpkins and Candy by the awesome designers of Heartbeatz Creationz and you can find that HERE Mask of Choice Font of Choice Filters Used: Xero - Radiance - 128, 50, 128, 35 Xero - Porcelain - Default (set blue to 0) Open a new image 700x700 Open Frame 2 on to your canvas Resize by 90 - Sharpen I colourised mine to match my tube Click inside the frame with your magic wand Selections - Modify - Expand by 3 Open Paper 10 and paste on your canvas Position - Selections - Invert - Delete - Keep Selected Open Halloween Candy 1 and paste as a new layer Resize by 80 and Sharpen Position on the middle of the left side of the frame Duplicate - Image - Mirror - Merge Down Selections - Invert - Delete - Select None Move both the paper and Candy layers under the frame I colourised the left Candy to match my tag Open Haunted House 1 and paste as a new layer on your canvas Position on the right hand side of the frame See my tag for placement Layers - Duplicate - Image - Mirror - Merge Down Open Cat and paste as a new layer Resize by 60 and Sharpen Position on the right of the frame on the house See my tag for placement Layers - Duplicate - Image - Mirror I colorised the left cat - Merge Down Apply Xero Porcelain at the settings above Open Pumkin 1 and paste on your canvas Resize by 50 and Sharpen Position on the right side of the tag Duplicate - Image - Mirror I colourised the left pumkin Merge Down Apply Xero Porcelain at the settings above Open Word and paste as a new layer I colourised it to match my tag Position on the top of the frame Open your tube onto your canvas Resize if necessary Position in the middle of the frame Apply Xero Radiance at the settings above Open Paper 3 and paste as a new layer Send to the bottom and apply a mask of choice Apply drop shadows to your layers Merge Visible Apply correct copyright and licence numbers Merge Down Save as a png - Add your name - Save again - Done
New tut with my FTU Scrapkit

This is a gorgeous tut made by Cathy aka LadyHawwk Designs This is called Spry Devil which you can find HERE And the link to my kit is HERE Thank you Cathy!!

Monday 12 September 2011

Fright Night - PTU

I am using the art of Ismael Rac which you can find HERE I am using the fabby HD Pack that has been made to match the tube, these packs are made by Jenn and Sam, you can find the HD Pack HERE and more awesome stuff by the 2 ladies HERE Mask of Choice Font of Choice Open a new image 700x700 Open Frame and paste on your canvas Resize by 70 and Sharpen Position in the centre of your canvas Clicn inside with your magic wand Selections - Modify - Expand by 4 Open Paper 4 on your canvas Image - Resize by 70 - Sharpen - Selections - Invert - Delete - Select None Open Mask and paste on your canvas Position in the frame Image - Resize by 70 and Sharpen Position in the centre of the frame Open Sweet 1 and paste on your canvas Image - Resize by 50 and then by 70 - Sharpen Position on the bottom right of the frame Duplicate and move above the original Open Bow 2 and paste on your canvas Image - Resize by 40 and Sharpen Image - Mirror - Position on the right of the frame Move under the sweet layers Layers - Duplicate - Image - Mirror Merge Down Open Bow and paste as a new layer Resize by 40 and Sharpen Position at the top of the frame Open Spooky Cuppy and paste as a new layer Image - Resize by 40 and then by 70 - Sharpen Position on the bottom of the canvas Duplicate - Resize by 80 Move to the right slightly See my tag for placement Open Lantern on your canvas Resize by 30 and Sharpen Position between the Cuppie layers Duplicate and position between the sweets and the cuppy Erase some of the chain to fit your tag See my tag for placement Open Paper 2 on your canvas Send to the bottom - Apply a mask of choice Merge Group Add drop shadows to your layers Merge layers visible Apply correct copyright and licence numbers Merge layers visible - Save as a png - Add your name - Save again - Done

Halloween Siren - PTU

I am using the art of Ismael Rac which you can find HERE I am using Jay's aka Bello Scarto's part of the HUGE collab Pumpkins and Candy by the awesome designers of Heartbeatz Creationz and you can find that HERE Mask of Choice Font of Choice Open a new image 700x700 Open Element 33 on your canvas Position in the centre Click inside the frame with your magic wand Modify by 3 Open Paper 3 on your canvas Position inside the frame When happy with positioning Selections - Invert - Delete - Keep Selected Open a close up of your tube Position in the frame and When Happy Selections - Invert - Delete - Select None Move both the tube and paper layer underneath the frame Apply Blinds to the paper layer Open your main tube on your canvas Position to the left - See my tag for placement Open Element 38 and paste as a new layer on your canvas Image - Mirror and position on the top right of the frame Duplicate and position and Duplicate again Use the deform tool to angle it where you think looks best Open Element 17 and paste as a new layer Resize by 60 and Sharpen Position under the tube on the right hand side Open Element 1 (spider) and paste as a new layer on your canvas Resize by 40 - Sharpen - Position on the top of the frame Open Element 34 and paste as a new layer on your canvas Resize by 30 and Sharpen Image - Mirror - Position on the right side of the Cauldron making sure its under the tube layer Open Element 27 and paste on your canvas Resize by 30 - Sharpen Position under the tube and place on left of the Cauldron - See my tag for placement Open Element 35 and paste as a new layer Resize by 60 - Sharpen Send below the tube and position on the left hand side of the frame Open Paper 1 and paste on your canvas Position at the bottom and apply a mask of choice Merge Group Apply a drop shadow to your layers Merge layers visible Apply your correct copyright and licence numbers Merge Down Save as a png - Add your name - Save again - Done!

Friday 9 September 2011

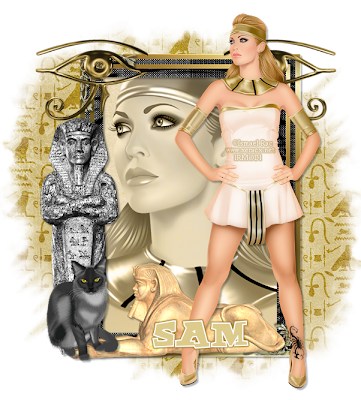
Walk like an Egyptian - PTU

I am using the art of Ismael Rac which you can find HERE I am using the fabby HD Pack that has been made to match the tube, these packs are made by Jenn and Sam, you can find the HD Pack HERE and more awesome stuff by the 2 ladies HERE Mask of Choice Font of Choice Open a new image 700x700 Open Frame onto your canvas Resize by 70 and Sharpen Position in the centre of your canvas Click inside the frame with your magic wand Modify by 3 and Open Paper 3 on your canvas Selections - Invert - Delete - Keep Selected Open a close up of your tube and paste as a new layer Position and when happy Selections - Invert - Delete - Select None Move both layers under the frame Change the blend mode of the close up to Luminance Legacy Open Element 4 and paste on your canvas Resize by 80, Sharpen and position on the bottom of the frame Open Element 5 and paste as a new layer Repeat the above steps and position under Element 4 on the left side of the tag Open Element 2 and paste as a new layer Resize by 60 and Sharpen Position on the top right of the frame Duplicate - Image - Mirror - Merge Down Open Element 1 and paste as a new layer Resize by 40 and Sharpen Position on the bottom left of the frame Open the full length layer tube and paste on your canvas Position on the right of the tag Apply Xero - Porcelain - Default - Blue set on 0 Open Paper 1 on your canvas Send to the bottom and apply a mask of choice Merge group - Apply drop shadows to your layers Merge all Visible Apply correct copyright and licence numbers Merge again - Save as a png - Add your name - Done

Hot Pirate - PTU

I am using the art of Ismael Rac which you can find HERE I am using the fabby HD Pack that has been made to match the tube, these packs are made by Jenn and Sam, you can find the HD Pack HERE and more awesome stuff by the 2 ladies HERE Mask of Choice Font of Choice Open the Template on your canvas Shift - D to duplicate and close the original Delete the Copyright layer and Raster 5 Click on Raster 8 - Selections - Select All - Float - Defloat Open Paper 1 and paste as a new layer Selections - Invert - Delete - Select None Delete Raster 8 Click on Raster 7 - Selections - Select All - Float - Defloat Open Paper 2 and paste as a new layer Selections - Invert - Delete - Select None Delete Raster 7 Open Element 6 and paste as a new layer Resize by 70 and Sharpen Position in the centre - See my tag for placement Click on Raster 6 - Selections - Select All - Float - Defloat Open Paper 3 and paste as a new layer Selections - Invert - Delete - Select None Delete Raster 6 Click on Raster 3 - Selections - Select All - Float - Defloat Open Paper 1 and paste as a new layer Selections - Invert - Delete - Select None Delete Raster 3 Click on Raster 4 - Selections - Select All - Float - Defloat Open Paper 1 and paste as a new layer Selections - Invert - Delete - Keep Selected Open a close up of your tube and position in the frame Back on the original close up tube Image - Paste on your canvas and position in the other frame When happy - Selections - Invert - Delete - Select None Make sure the tube and paper layers are under the frame Delete Raster 4 and change the blend mode of the tubes to Luminance Open Element 7 and paste on your canvas Resize by 30 and then by 40 - Sharpen Position on the right corner of the frame Duplicate - Image - Mirror - Merge Down Click on Raster 1 - Selections - Select All - Float - Defloat Open Paper 1 and paste as a new layer Selections - Invert - Delete - Select None Delete Raster 1 Using your deform tool - make the frame a little thicker Click on Raster 2 - Selections - Select All - Float - Defloat Open Paper 2 and paste as a new layer Selections - Invert - Delete - Select None Delete Raster 2 Open Element 1 and paste as a new layer Resize by 40 and Sharpen Position on the right of the tag Duplicate - Image - Mirror - Merge Down Open your main tube and paste as a new layer Move under the bottom rectangle frame Apply drop shadows to your layers Merge Visible Add your correct copyright and licence numbers Merge Down - Save as a png - Add your name - Save again - Done
Yummy Devil - PTU

I am using the art of Ismael Rac which you can find HERE I am using the fabby HD Pack that has been made to match the tube, these packs are made by Jenn and Sam, you can find the HD Pack HERE and more awesome stuff by the 2 ladies HERE Mask of Choice Font of Choice Filters Used: Xero - Fritillary - Default This is a very easy and quick tutorial Open a new image 700x700 Open the Cluster Frame on your canvas Paste as a new layer Position in the centre Click inside the frame with your magic wand Modify by 4 Open Paper 4 and paste on your canvas Position in the frame When happy - Selections - Invert - Delete - Keep Selected Open the tube on your canvas Position in the frame - When happy - Duplicate and hide for now Selections - Invert - Delete - Select None Move the paper and tube layer under the frame Un hide the duplicated tube and using your eraser tool erase any overhanging parts of the tube Apply Xero Fritillary to the paper layer at the settings above Open Paper 1 and paste as a new layer on your canvas Send to the bottom and apply a mask of choice Merge group Apply drop shadows to your layer Merge Visible - Apply correct copyright and licence numbers Merge Down - Save as a png - Add your name - Done

Tuesday 6 September 2011

New PTU tut - Trick or Treat

I am using the art of Barbara Jensen, this is an exclusive tube for SATC which you can find HERE You can find more of Barbara's art HERE I am using Lynne's aka Baby Cakes Scraps part of the HUGE collab Pumpkins and Candy by the awesome designers of Heartbeatz Creationz and you can find that HERE Mask of Choice Font of Choice Open a new image 700x700 Copy and paste Web Frame on your canvas Resize by 60 and Sharpen Position in the centre Using your selections tool Draw around the frame Open Paper 6 and paste on your canvas Position inside the frame Selections - Invert - Delete - Keep Selected Open the tube you are using Position in the frame - When happy - Duplicate and hide for now Selections - Invert - Delete - Select None Move both the paper and tube layer under the frame Un hide the duplicate and erase the overhanging parts of the tube Open Punkin and paste as a new layer on your canvas Resize by 60 and Sharpen Position on the bottom right of the frame Open Sign and paste as a new layer on your canvas Resize by 70 and Sharpen Position on the left side of the canvas Open Stacked and paste as a new layer Resize by 60 and position on the sign See my tag for placement Open Label 2 and paste as a new layer Resize by 35 and Sharpen Image - Rotate - Free Rotate - 90 right Position on the top left of the frame Open Label as a new layer Resize as above Rotate - But this time Rotate to the left Position on the top right side of the frame I colourised mine to match my tube Open bow 2 and paste on your canvas Resize by 70 and Sharpen Position in the centre of the right side of the frame Open Paper 5 and paste on your canvas Position at the bottom and apply a mask of choice Merge Group Apply drop shadows to your layers Merge layers visible Add your correct copyright and licence numbers Merge Down Save as a png Add your name - Save again - Done

New tut by Heidi using my Scrapkit!

This is a gorgeous tut by Heidi using my Only Darkness Remains PTU Scrapkit which you can find HERE HERE is the link to the tut Thanks so much Heidi!!

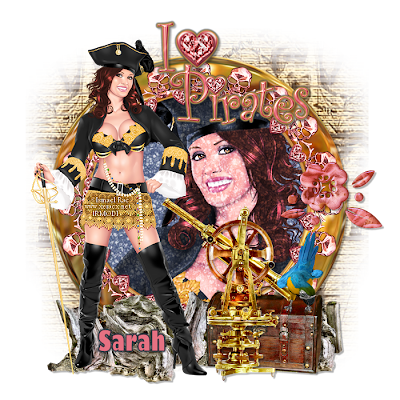
New PTU tut - I Love Pirates

I am using the art of Ismael Rac which you can find HERE I am using the PTU Scrapkit Pearl of the Caribbean Megakit by Hungry Hill which you can find HERE Font of Choice Filters Used: Xero - Radiance - 128, 50, 128, 76 Eye Candy - Gradient Glow - Default and colours of your choice Open a new image 700x700 Open Frame - Skulls on your canvas Resize by 90 and Sharpen Position in the centre of your canvas Click inside the frame with your magic wand Selections - Modify - Expand by 4 Open Paper 12 and paste on your canvas Position in the frame When happy - Selections - Invert - Delete - Keep Selected Open a close up of your tube I mirrored mine Position in the frame When happy - Repeat steps as before and Select None Move both layers underneath the frame layer Open Driftwood and paste on your canvas Resize by 40 and Sharpen Position on the bottom left of the frame See my tag for placement Duplicate and position next to the original Duplicate again and repeat steps as before Merge the 3 Driftwood layers together Open Cache and paste as a new layer Resize by 40 and Sharpen Position on the right of the tag Open Astrolabe and paste as a new layer on your canvas Resize by 50 and Sharpen Position to the left of the Cache Open Parrot 2 and paste as a new layer on your canvas Resize by 30 and Sharpen Position on the right of the Cache See my tag for placements Open your tube on your Canvas Position on the left of the frame Apply Xero Radiance at the settings above Open Mother of Pearl tiny trim and paste on your canvas Resize by 60 and Sharpen Position on the middle right of the frame Open WordArt 1 and paste on your canvas Resize by 50 and Sharpen Position at the top of your tag Open WordArt 2 and paste on your canvas Repeat the above steps and move below the 1st wordart When happy - merge down Apply Gradient Glow twice using colours from your tag at the settings above Open Map Mask on your canvas Send to the bottom Apply drop shadows to your layers Merge Visible Apply correct copyright and licence numbers Merge Down - Save as a png Add your name - Save again - Done

Monday 5 September 2011

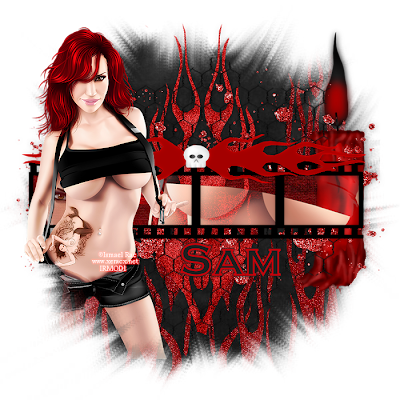
Flame - PTU

I am using the art of Ismael Rac which you can find HERE I am using the fabby HD Pack that has been made to match the tube, these packs are made by Jenn and Sam, you can find the HD Pack HERE and more awesome stuff by the 2 ladies HERE Mask of Choice Font of Choice Filters Used: Xero - Radiance - 128, 50, 128, 75 Open a new image 700x700 Open the Frame on your canvas Resize by 90 and Sharpen Open the tube on your canvas Paste on the frame and position on the left hand side Duplicate and hide for now Apply a round mask of choice to the tube Merge Group - Unhide the duplicated tube Erase the legs of the tube so they look rounded Click inside the 4 frames with your magic wand Selections - Modify - Expand by 4 Paste a close up of your tube on the canvas Position where you like When happy - Selections - Invert - Delete -Select None - Move under the frame layer Open Element 3 and paste as a new layer Position towards the right of the frame Move under the frame Resize by 90 - Sharpen Using your eraser tool, erase a little off the bottom right of the candle Open Element 1 and paste as a new layer Resize by 90 - Position in the centre Move under the frame - I erased the pointy bit off the flame Click inside all 4 frames with your magic wand Modify by 4 Open Paper 4 and paste as a new layer Position - Selections - Invert - Delete - Select None Move under the frame and close up tube layers Change the blend mode of the close up tube layers to Open Paper 1 and paste as a new layer on your canvas Send to the bottom and Apply a mask of choice Merge Group Apply Radiance to the tube and the frame layers at the settings above Apply a drop shadow to your layers Add your correct copyright and licence numbers Merge Visible Save as a png Add your name Save again - Done

Tag or Trick - PTU

I am using the art of Ismael Rac which you can find HERE I am using Bluebird's Part of the HUGE Collab Pumpkins and Candy by the designers of Heartbeatz Creationz which you can find HERE Mask of Choice Font of Choice Filters Used: Cybia - Imboss Works - Hard Glass - Default Gregs Factory Output Volume 2 - Spotlight - Default Open a new image 700x700 Copy and Paste Frame 1 on your canvas Position in the centre Click inside the frame with your magic wand Modify by 3 Open Paper 4 on your canvas Paste and position in the frame I moved it up so i could see the pumpkins through Selections - Invert - Delete - Keep Selected Open the tube you are using and paste on your canvas Position in the frame When happy - Duplicate and hide for now Selections - Invert - Delete - Select None Move the paper and the tube layer under the frame Unhide the duplicated tube and grab your eraser tool Erase the bottom part of the tube Open Ribbons Using your selection tool Draw around one of the ribbons Edit - Cut - Paste on your working canvas Position at the top and re size by 80 - Sharpen Duplicate and position on the bottom of the frame See my tag for placement Erase any overhanging parts Select None on the Ribbons and repeat the above steps This time, rotate by 90 to either left or right Position on the left side of the frame Re size by 80 - Sharpen Duplicate and position on the right Erase any overhanging parts Open JackOLanterns Using your selection tool Set on Freehand Selection Draw around the pumpkin you would like to use Edit - Cut Paste on your working canvas Position to the bottom right of the frame Select None on the JackOLanterns and repeat, choosing another pumpkin to use Paste on your working canvas and position on the bottom left of the frame Open Lollies and repeating the above steps Draw around and cut and paste them to your working canvas Position where you think looks best Open Paper 7 and paste on your canvas Send to the bottom and apply a mask of choice Merge Group Apply drop shadows to your layers Merge Visible Apply correct copyright and licence numbers Save as a png Add your name - Save again - Done

Sunday 4 September 2011

New Cluster Frame - FTU

A new FTU Cluster Frame using the gorgeous PTU Scrapkit Pearl of the Caribbean by Hungry Hill which you can find HERE The link to download is HERE

Spider Beauty -PTU

I am using the art of Ismael Rac which you can find HERE I am using the fabby HD Pack that has been made to match the tube, these packs are made by Jenn and Sam, you can find the HD Pack HERE and more awesome stuff by the 2 ladies HERE Mask of Choice Font of Choice Filters Used: Eye Candy - Gradient Glow - Orange - 3 Xero - Radiance - 128, 50, 128, 45 Open a new image 700x700 Open Frame on your canvas Resize by 90 and Sharpen Position in the centre Click inside the frame with your magic wand Selections - Select All - Float - Defloat Open Paper 5 on your canvas Position - When happy - Selections - Invert - Delete - Keep Selected Open the tube you are using and paste in the frame When happy - Duplicate and hide for now Selections - Invert - Delete - Select None Move the paper and the tube layer underneath the frame Unhide the duplicated tube - Grab the eraser tool and erase the overhanging parts of the tube Apply Radiance to both tube layers at the settings above Open Element 4 and paste as a new layer Resize by 45 and Sharpen Position in the middle of the left side of the frame Duplicate - Image - Mirror - Merge Down Apply Gradient Glow at the settings above Open Element 2 and paste as a new layer Resize by 40 and Sharpen Position on top of the bow on the left hand side Duplicate - Image - Mirror - Merge Down Open Element 3 and paste as a new layer Resize by 20 and Sharpen Position to the bottom of the frame Using the deform tool - Angle it to the right Duplicate - Image - Mirror - Merge Down Open a close up of your tube and paste on your canvas Position to the left and send to the bottom Duplicate - Image - Mirror - Move under the original - Merge Down Apply a circle mask of choice - Merge Group Open Paper 4 on your canvas Send to the bottom Apply the same mask as before Merge Group Apply Drop Shadows to your layers Merge Visible Apply your correct copyright and licence numbers Save as a png Add your name - Save again - Done

Friday 2 September 2011

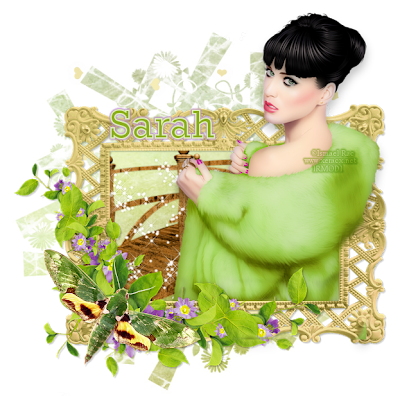
Meadow Fun - PTU

I am using the art of Ismael Rac which you can find HERE I am using the gorgeous PTU scrapkit In the Meadow by Hungry Hill which you can find HERE Mask of Choice Font of Choice Open a new image 700x700 Open Vine Frame on your canvas Resize by 80 and position in the centre Click inside the frame with your magic wand Selections - Modify - Expand by 4 Open Paper 2 on your canvas Position in the frame When happy - Selections - Invert - Delete - Keep Selected - Move under the frame Open Bridge and Paste on your canvas Resize by 55 and Sharpen Position under the frame and to the left Selections - Invert - Delete - Keep Selected - Move under the frame Open Sparkles and paste as a new layer Position above the Bridge layer Selections - Invert - Delete - Keep Selected Open the tube you are using and position on the right of the frame When happy - Duplicate and hide for now Selections - Invert - Delete - Select None Move under the frame Unhide the duplicate - Making sure its at the top Grab your eraser tool and erase the overhanging parts Open Heartfall and paste on your canvas Resize by 80 and Sharpen Send to the bottom Open Bug onto your canvas Resize by 40 and Sharpen Position on the left of the frame Open Paper 8 on your canvas Send to the bottom and Apply a mask of choice Merge Group Apply drop shadows to your layers Merge Visible Add your copyright and licence numbers Merge again Save as a png Add your name Save again - Done

Thursday 1 September 2011

Witchy Attitude - PTU

I am using the art of Ismael Rac which you can find HERE I am using the fabby HD Pack that has been made to match the tube, these packs are made by Jenn and Sam, you can find the HD Pack HERE and more awesome stuff by the 2 ladies HERE Mask of Choice Font of Choice Filters Used: Xero - Radiance - 128,50,128,73 Open your template and paste on your canvas Shift - D to duplicate Delete Raster 8 and 9 Open Paper 3 in PSP Click on Raster 4 Selections - Select All - Float - Defloat - Paste Paper 3 on your canvas Position - When happy - Selections - Invert - Delete - Select None Delete Raster 4 Open Paper 5 into PSP Click on Raster 6 Selections - Select All - Float - Defloat - Paste Paper 5 on your canvas Position - When happy - Selections - Invert - Delete - Select None Delete Raster 6 Open Paper 4 into PSP Click on Raster 3 Selections - Select All - Float - Defloat - Paste Paper 4 on your canvas Position - When happy - Selections - Invert - Delete - Select None Delete Raster 3 Layers Duplicate - Image - Resize by 80 and position where Raster 7 is When happy - Delete Raster 7 Click on Raster 5 Selections - Select All - Float - Defloat Layers - New Raster Layer Floodfill with a colour of your choosing Keep Selected Open a close up tube and position in the box When happy - Selections - Invert - Delete - Select None Delete Raster 5 and change the Blend mode of the close up to Luminance Open the main tube on your canvas Position on the right hand side of the tag resizing if needed Apply Radiance at the settings above Open Element 3 and paste on your canvas Resize by 40 and Sharpen Position on the right of the tube Open Element 4 and paste on your canvas Resize by 45 and Sharpen Position on the top left of the tag Open Element 2 and paste on your canvas Resize by 40 and Sharpen Position under the cat on the right hand side Open Paper 3 on your canvas Send to the bottom and apply a mask of choice Merge Group Apply drop shadows to your layers Merge Visible Apply correct copyright and licence numbers Save as a png Add your name - Save again - Done!