Monday 30 July 2012

Fun in the Sun - PTU

I am using the art of PinUpToons which you can find HERE
I am using the gorgeous PTU Scrapkit made to match the PUT package 146 by Hungry Hill and you can find that HERE - You can only use this Scrapkit with PinUpToons tubes
Mask of Choice
Font of Choice

Filters Used:
Xero - Clarity - Default

This is a very quick tut so here we go :)
Open a new image 600x600
Open WordArt 3 and paste as a new layer
Resize by 90 - Sharpen
Selections - Select All - Float - Defloat
Open a close up of your tube and position - When happy - Selections - Invert - Delete - Select None
Change the blend mode of the tube to Luminance and merge down to the wordart layer
Open your main tube as a new layer
Position on the right side of the tag
Apply Clarity at the settings above
Open Wordart 1 and paste as a new layer
Resize by 45 and Sharpen
Position on the top left hand side of the tag and move under the main tube
Open Umbrella and paste as a new layer
Resize by 80 - Sharpen - Image - Mirror and send to the bottom

Open Waves 1 and paste as a new layer - Resize by 80 and Sharpen
Position at the bottom of the tag - See my tag for placement
Add drop shadows to your layers - Merge Visible
Add correct copyright and licence numbers - Merge Down
Save as a png - Add your name - Save again - Done
Saturday 28 July 2012

Lifes a Beach - PTU

I am using the art of PinUpToons which you can find HERE
I am using the gorgeous PTU Scrapkit made to match the PUT package 146 by Hungry Hill and you can find that HERE - You can only use this Scrapkit with PinUpToons tubes
Font of Choice

Open a new image 600x600
Open Frame 3 and paste as a new layer
Image - Resize by 70 and Sharpen
Position in the centre of your canvas
Open Word Art 2 and paste as a new layer
Resize this by 80 and Sharpen
Position on top of the frame
Open the tube you are using - Position on the right of the tag
Click inside the frame with your magic wand
Modify by 5 - Open Paper 3 and position in the frame
When happy - Selections - Invert - Delete - Select None
Move under the frame

Open Bubbles and paste as a new layer
Image - Flip - Position under the wordart but above the frame - Position towards the top
See my tag for placement
Open Beach Fence and paste as a new layer
Resize by 40 - Sharpen and position below your frame but above your paper
Position at the bottom
Open Pail and paste on your canvas - Resize by 40 and Sharpen
Position in front of the beachball the tube is sitting on
Open Ribbon 1 and paste as a new layer
Resize by 80 and Sharpen
Position above the frame - See my tag for placement
Duplicate - Image - Mirror - When happy - Merge Down

Add drop shadows to your layers - Merge Visible
Apply correct copyright and licence numbers - Merge Down
Save as a png - Add your name - Save again - Done

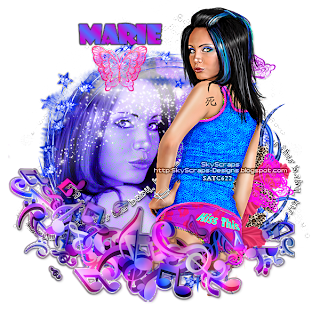
Kiss This - PTU

I am using the PTU art of Marie aka SkyScraps which you can find HERE
I am using the PTU Scrapkit Kiss my Azz by Bibi which was made to match the tube and you can find that HERE
Font of Choice

Filters Used:
Xero - Clarity - Default

Open a new image 600x600
Open Element 69 and paste as a new layer
Resize by 80 and Sharpen
Click inside with your magic wand
Selections - Modify - Expand by 20
Open Paper 2 and paste as a new layer
Position - Open your tube and position in the frame
I mirrored mine before placing on the working canvas
Position in the frame - When happy - Selections - Invert - Delete on both the paper and tube layers - Move both the layers under the frame
Change the opacity of the tube layer to Luminance Legacy

Open Element 10 and paste as a new layer
Resize by 70 and Sharpen
Position on the top left of the frame - Duplicate - Image - Mirror and when happy - Merge Down
Open Element 15 - Image - Mirror - Position on the right side of the frame
Open Element 43 and paste as a new layer
Resize by 60 - Sharpen More
Position towards the bottom of the frame
Open Element 8 and paste as a new layer
Image - Mirror - Resize by 80 - Sharpen
Position on the bottom right of the frame
Open your tube as a new layer
Resize if necessary and position on the right of the frame
Open Element 63 and paste as a new layer
Resize by 70 and Sharpen
Position on the left of the frame
Using your eraser tool - Erase the parts of the tube that are showing underneath the notes
Apply Xero - Clarity to your tube layer

Add drop shadows to your layers - Merge Visible
Add correct copyright and licence numbers - Merge Down
Save as a png - Add your name - Save again - Done
Friday 13 July 2012

Classified Army Babe - PTU

I am using the art of Danny Drake which you can find HERE
I am using the gorgeous PTU Scrapkit made to match the tube package 4 by Hungry Hill and you can find that HERE - You can only use this Scrapkit with Danny Drake's tubes
Mask of Choice
Font of Choice

Open a new image 600x600
Open Frame 4 and paste as a new layer
Resize by 75 and Sharpen
Position in the centre
Click inside the frame with your magic wand
Selections - Modify - Expand by 4
Open Army Girl and paste on your canvas
Position and duplicate - hide for now
Selections - Invert - Delete - Select None
Move under the frame
Unhide the duplicated tube and erase the overhanging parts
Click inside the frame again with your magic wand
Modify by 4 and Open Paper 10 - Position in the frame
When happy - Selections - Invert - Delete - Select None
Move under the frame and the original tube

Open Ribbon Tag 2 and paste as a new layer
Resize by 30 - Sharpen and position on the right of the frame
Open Target 1 and paste as a new layer
Resize by 40 - Sharpen
Send to above the paper layer
Open Paper 11 and paste as a new layer
Send to the bottom and apply a mask of choice - Merge Group
Add drop shadows to your layers - Merge visible - Add correct copyright and licence numbers - Merge down - Save as a png - Add your name - Save again - Done

Thursday 12 July 2012

Sexy Sailor - PTU

I am using the art of Danny Drake and the gorgeous PTU Scrapkit made to match the tube package 4 by Hungry Hill and you can find that HERE - You can use this Scrapkit with any of Danny's tubes :)
Mask of Choice
Font of Choice

This is a quickie tut

Open a new image 600x600
Open the tube you are using - For this tut i am using Nikky the Sailor
Paste on your Canvas
Open Pilings and paste as a new layer
Resize by 50 - Sharpen and position on the left of the tag behind the tube so it looks as if she is leaning on it
Open Paddle and paste as a new layer
Resize by 40 - Sharpen
Position in front of the pilings and place across the centre
Open the seagull and paste as a new layer
Image - Mirror - Image - Resize by 20 - Sharpen and position on top of the lowest piling
Open Dinghy and paste as a new layer
Resize by 60 - Sharpen and position behind the pilings
Open Surf 2 and paste as a new layer
Resize by 80 - Sharpen and position at the bottom of the tag
Duplicate and slightly move above the original - Merge down when happy
Erase the parts of the surf that are on the left hand side - Send to the bottom
Open Paper 1 and paste on your canvas
Send to the bottom and apply a round mask of choice - Merge Group
Create a new layer above the paper layer - Floodfill with a light blue colour and apply the same mask - Merge Group when happy and resize by 90 - Change the blend mode of this to Lighten
Open Doodle 4 and paste as a new layer
Resize by 80 - Sharpen - Send to the above the blue mask layer and position at the top
Open Ship and paste as a new layer - Resize by 40 - Sharpen
Position behind the tube and in the centre - Duplicate - Resize by 80 - Sharpen - Position next to the original - See my tag for placement

Apply drop shadows to your layers - merge visible
Add correct copyright and licence information - Merge down - Save as a png - Add your name - Save again - Done

Tuesday 10 July 2012

Pixie Falls - PTU

I am using the PTU Tube Dark Pixie by Gemini Creationz which you can find HERE
I am using the PTU Scrapkit Darkness Falls which has been made to match the tube and you can find that HERE
You can buy the tube and kit together HERE
Mask of Choice
Font of Choice

Open a new image 600x600
Open Element 31 and paste on your canvas
Position in the centre and Open Element 29
Position over the previous Element
Click inside Element 31 with your magic wand
Selections - Modify - Expand by 3
Open Paper 3 and paste as a new layer
Selections - Invert - Delete - Select None
Move under the frame
Open Element 54 and paste as a new layer
Resize by 80 - Sharpen and move to above the paper layer
Open Element 50 and paste as a new layer
Resize by 85 - Sharpen and again position above the previous layer
Open Element 46 and paste as a new layer
Move to below the frame layers and position in the centre
Open Element 28 and paste as a new layer
Resize by 75 - Sharpen
Position between the lace frame and the metal frame and place at the top
Layers - Duplicate - Image - Flip - Image - Mirror
Position on the bottom left hand corner of the frame
When happy with positioning - Merge down
Open Element 53 and paste as a new layer
Resize by 60 - Sharpen and position on the top right of the frame
Open Element 10 and paste as a new layer
Resize this by 50 - Sharpen More and position on the bottom right side of the tag
Open your tube and paste as a new layer
Resizing if necessary and position on the left of the tag

Open Paper 1 and paste as a new layer
Send to the bottom and apply a mask of choice - Merge group
Add correct copyright and licence info - Merge Down
Save as a png - Add your name - Save again - Done

Inked - PTU

I am using the art of Janice aka Scrappers Delight, this is a FTU PU Only tube and you can find it HERE
I am using the PTU Scrapkit Dark Mood also by Janice and you can find that HERE,
also HERE and HERE
Mask of Choice
Font of Choice

Open a new image 600x600
Open Element 18 and paste as a new layer
Image - Rotate - Free Rotate - 40 - Right
Position to the top right just off centre
See my tag for placement
Click inside all the frame with your magic wand
Selections - Modify - Expand by 5
Using the close up tube - Position the tie inside the frame
Open up the full size tube and position over the tie part making sure her face is showing
Selections - Invert - Delete on both tube layers and move both underneath the frame
Change the blend mode of the full size tube to Hard Light

Open the full size tube and position to the left of the frame
Resize by 30 and then by 80 - Sharpen
Open Element 7 and paste as a new layer
Resize by 60 - Sharpen and send to the bottom
Open Element 84 and paste on your canvas
Send to the bottom and position below the frame
Layers - Duplicate - image - Flip - Image - Mirror
Position this one above the frame - Merge down when happy
Open Element 48 and paste as a new layer
Image - Mirror - Image - Resize by 40 and position at the bottom of the frame
Open Paper 5 and paste on your canvas
Send to the bottom and apply a mask of choice - Merge Group
Add correct copyright and licence information
Merge Down - Save as a png - Add your name - Save again - Done

Saturday 7 July 2012

Purple Passion - PTU

I am using the art of Jamie Kidd which you can find HERE
I am using the PTU Inspired By Kit by Schnegge which was made to match the tube and you can find that HERE
Mask of Choice
Font of Choice

Filters Used:
VideoRave - Noisy Blur - 247, 52, 138

Open a new image 600x600
Open Frame 2 and paste as a new layer
Position in the centre of your canvas
Click inside with your magic wand and modify by 4
Open your tube and position in the frame
Duplicate and hide for now
Selections - Invert - Delete - Select None
Move under the frame layer
Un-hide the duplicated layer and using your eraser tool
Erase the overhanging parts of your tube
Open Glitter Doodle and paste as a new layer
Image - Mirror - Image - Resize by 80 - Sharpen
Position to the right of the frame and move under the tube layer
Open Dragonfly and paste as a new layer
Resize by 40 - Sharpen - Image - Rotate - Free Rotate 40 - Right
Position on the top left of the frame - Making sure its under the tube layer
Open Heart 1 and paste as a new layer
Resize by 60 - Sharpen
Position between the top ribbon on the left hand side of the frame
Duplicate and position between the other ribbon - Merge down when happy

Click inside the frame with your magic wand
Selections - Modify - Expand by 4
Open Paper 3 and paste as a new layer
Position - Resize by 80 - Sharpen
Selections - Invert - Delete - Select None
Send to the bottom - Add Noisy Blur at the settings above
Open Paper 2 and paste as a new layer
Send to the bottom and apply a mask of choice - Merge Group
Add drop shadows to your layers - Merge visible
Add correct copyright and licence numbers
Merge down - Save as a png - Add your name - Save again - Done

Friday 6 July 2012

Midsummers Beauty - PTU

I am using the art of Jessica Dougherty which i purchased while she was at CILM you can now find her HERE
I am using the PTU Scrapkit Midsummer by Hungry Hill which you can find HERE
Mask of Choice
Font of Choice

Open a new image 600x600
Open Double Frame and paste on your canvas
Resize by 80 and Sharpen
Position in the centre
Open Cloud and paste on your canvas
Send to the bottom and arrange towards the top
Open the tube you are using and position in front of the frame
Resize and sharpen if necessary
Open the Gazebo and paste as a new layer
Image - Resize by 50 and Sharpen
Send to to below the frame layer and position towards the right

Open Bow 1 and paste as a new layer
Resize by 20 and Sharpen
Positon on the left top corner of the frame
Duplicate 3 more times and position around the frame
When happy - Merge these layers down
Move under the tube layer
Click inside the frames with your magic wand
Selections - Modify - Expand by 4
Open Paper 7 on your canvas
Position - When happy - Selections - Invert - Delete - Select None
Move under the frame and Gazebo layers

Open Paper 5 and paste as a new layer
Send to the bottom and apply a mask of choice - Merge Group
Add drop shadows to your layers - Merge Visible
Add correct copyright and licence information - Merge Down
Save as a png - Add your name - Save again - Done

True Blue - FTU

I am using the art of Marie aka SkyScraps which you can find HERE
I am using the FTU Scrapkit Always Blue by Randy's Sin which you can find HERE
Mask of Choice
Font of Choice

Open a new image 600x600
Open Frame 1 and paste on your canvas
Duplicate image - Image - Mirror  - Resize by 70 - Sharpen
Position to the top left - Position the duplicate to the bottom right
See my tag for placement
Open the tube you are using and paste on your canvas
Resize and Sharpen and position on the left of the frame
    Click inside the big frame with your magic wand
Selections - Modify - Expand by 4 - Paste a close up of your tube as a new layer and position - Selections - Invert - Delete and move under the frame
Repeat with the smaller circle layer using a different part of the tube
Open Rose 4 and paste as a new layer
Resize by 20 - Sharpen
Position where the 2 circles meet - See my tag for placement
Duplicate and position above - Merge down and move below the tube layer
Click inside the frames again with your magic wand
Modify by 5 and Open Paper 2
Position in the frame and when happy - Selections - Invert - Delete - Select None and move under the frame and close up tube layers
Change the blend mode of the tube in the large circle to Overlay and the blend mode in the smaller frame to Luminance Legacy

Open Love 1 and paste as a new layer
Resize by 30 and Sharpen
Position on the bottom of the tag
Open Arch 1 and paste as a new layer
Resize by 70 - Sharpen
Send to the bottom and position behind the frames
Open Paper 11 and paste as a new layer
Send to the bottom and apply a mask of choice - Merge group
Add drop shadows to your layers
Merge Visible - Add correct copyright and licence numbers
Merge Down - Save as a png - Add your name - Save again - Done

Thursday 5 July 2012

FTU Clusters :)

Here is a preview of some clusters i have made using the gorgeous Midsummer PTU Scrapkit by Hungry Hill, you can pick them up on her blog HERE