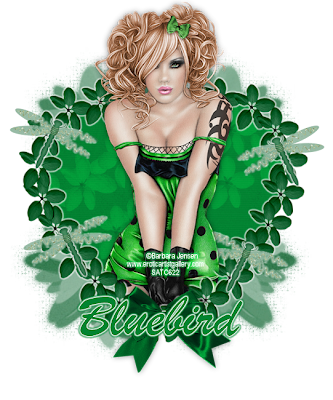
I am using the art of Barbara Jensen, this is an exclusive tube made for SATC which you can find HERE
I am using Bluebirds part of the Exclusive Store Collab Lughnassad, you can find this HERE
The Scrapkit i am using is for example only. Anyone wishing to use the kit in their own personal creation MUST purchase the kit
Mask of Choice
Font of Choice
Filters Used:
Eye Candy Gradient Glow - White 3
Open a new image 700x700
Open Frame 1 and paste as a new layer
Position in the middle of your canvas
Resize by 110
Open the tube you are using
Position in the centre of the frame
Layers - Duplicate and hide for now
Click inside the frame with your magic wand
Selections - Modify - Expand by 4
Selections - Invert - Delete - Select None
Move this layer underneath the frame
Un hide your duplicated tube
Grab your eraser tool and erase the bottom bit of the tube
Apply Gradient Glow to the frame at the settings above
Click inside the frame with your magic wand
Selections - Modify - Expand by 4
Copy and Paste Paper 7 on your canvas
I colourised mine to match my tag
Position in the frame
When happy Selections - Invert - Delete - Select None
Move this under the tube layers
Effects - Texture Effects - Blinds
Width 3, Opacity 2, Both Boxes Checked and Colour White
Open Dragonflowers into PSP
Using your selection tool, draw around the one you wish to use
Edit - Cut
Paste as a new layer onto your working canvas
Rssize by 40 and Sharpen
Position on the right hand side of the frame
Apply Gradient Glow at the settings above
Layers - Duplicate - Image - Mirror
Duplicate again and position on the right side of the frame
Layers - Duplicate - Image - Mirror
Position to suit
When happy merge these layers down
Open Bows into psp
Draw aound the one you wish to use using your freehand selection tool
Copy the step as before on the dragonflies
Resize by 40 and Sharpen
Position on the bottom of the frame
I colourised mine to match my tag
Open Paper 1 on your canvas
Resize by 120
Send to the bottom and apply a mask of choice
Merge group
Apply drop shadows to your layers
Merge Visible
Add the correct copyright and licence numbers
Merge Visible
Save as a png
Add your name
Done!

Fabulous tut Lisa, thanks the lovely new tag ♥
ReplyDeleteyoure very welcome!
ReplyDelete