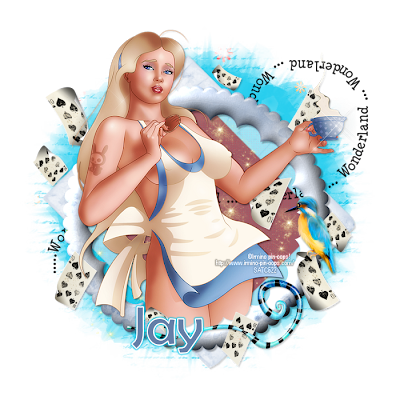
 I am using the art of Irmino Pin-Oops! Which you can find HERE
This is a freebie image!
I am using the PTU kit Futterwacken by Bello Scarto which you can find HERE
Mask of Choice
Font of Choice
Open a new image 700x700
Open Element 16 and paste as a new layer
Image - Rotate - Free Rotate - Right - 45
I colorised mine to match my tube
Position in the centre
Grab your magic wand and click inside of the frame
Selections - Modify - Expand by 3
Open Paper 9 and paste on your canvas
Position in the frame - When happy
Selections - Invert - Delete - Select None
Move under the frame layer
Open Element 17 and paste as a new layer
Position in the centre of the canvas
I colorised mine to match my tube
Grab your magic wand and click inside of the frame
Selections - Modify - Expand by 3
Open Paper 6 and paste on your canvas
Position in the frame - When happy
Selections - Invert - Delete - Keep Selected
Open the tube you are using and paste on your canvas
Position in the top frame
When happy - Duplicate and hide for now
Selections - Invert - Delete on the tube layer - Select None
Move both the paper and the tube layer under the frame
Unhide the duplicated tube and using your eraser tool, erase any overhanging parts of the tube
Change the opacity of the paper layer to about 35
Making sure the paper is the active layer
Open Element 53 and paste as a new layer
Position in the red part of the tag
Duplicate and reposition
Erase any stars that go over the frame
Open Element 26 and paste as a new layer
Position to the right of the tag
When happy - Duplicate - Image - Mirror
Merge Down
Open Element 34 and paste as a new layer
Position on the bottom of the frames
See my tag for placement
Open Element 42 and paste as a new layer
Resize by 40 and Sharpen
Image - Mirror and place on top of one of the cards
Making sure the rotated frame is the active layer
Copy and Paste Element 54 on your canvas
Position so it goes around the cup of tea in the tubes hands
Open Paper 5 and paste as a new layer on your canvas
Send to the bottom and apply a mask of choice
Merge group
Apply drop shadows to your layers
Merge visible
Add your correct copyright and licence numbers
Save as a png
Add your name Save again
Done!
Monday, 22 August 2011
Alice's Wonderland - PTU
 I am using the art of Irmino Pin-Oops! Which you can find HERE
This is a freebie image!
I am using the PTU kit Futterwacken by Bello Scarto which you can find HERE
Mask of Choice
Font of Choice
Open a new image 700x700
Open Element 16 and paste as a new layer
Image - Rotate - Free Rotate - Right - 45
I colorised mine to match my tube
Position in the centre
Grab your magic wand and click inside of the frame
Selections - Modify - Expand by 3
Open Paper 9 and paste on your canvas
Position in the frame - When happy
Selections - Invert - Delete - Select None
Move under the frame layer
Open Element 17 and paste as a new layer
Position in the centre of the canvas
I colorised mine to match my tube
Grab your magic wand and click inside of the frame
Selections - Modify - Expand by 3
Open Paper 6 and paste on your canvas
Position in the frame - When happy
Selections - Invert - Delete - Keep Selected
Open the tube you are using and paste on your canvas
Position in the top frame
When happy - Duplicate and hide for now
Selections - Invert - Delete on the tube layer - Select None
Move both the paper and the tube layer under the frame
Unhide the duplicated tube and using your eraser tool, erase any overhanging parts of the tube
Change the opacity of the paper layer to about 35
Making sure the paper is the active layer
Open Element 53 and paste as a new layer
Position in the red part of the tag
Duplicate and reposition
Erase any stars that go over the frame
Open Element 26 and paste as a new layer
Position to the right of the tag
When happy - Duplicate - Image - Mirror
Merge Down
Open Element 34 and paste as a new layer
Position on the bottom of the frames
See my tag for placement
Open Element 42 and paste as a new layer
Resize by 40 and Sharpen
Image - Mirror and place on top of one of the cards
Making sure the rotated frame is the active layer
Copy and Paste Element 54 on your canvas
Position so it goes around the cup of tea in the tubes hands
Open Paper 5 and paste as a new layer on your canvas
Send to the bottom and apply a mask of choice
Merge group
Apply drop shadows to your layers
Merge visible
Add your correct copyright and licence numbers
Save as a png
Add your name Save again
Done!
Subscribe to:
Post Comments (Atom)

No comments:
Post a Comment