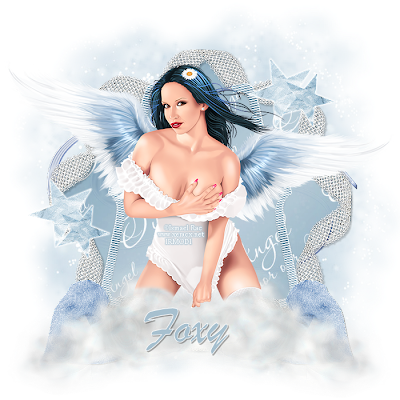
 I am using the art of Ismael Rac which you can find HERE
I am using the PTU kit Our Lil Angel by Foxy's Designs which is no longer available
Mask of Choice
Font of Choice
Filters Used:
Xero - Radiance - 128,50,128,79
Eye Candy 4 - Gradient Glow - Default on white
Open a new image 700x700
Open Element 33 and paste as a new layer
Resize by 75 and Sharpen
Position in the centre
Click inside with your magic wand
Modify by 4
Open Paper 4 on your canvas
Resize by 90 - Sharpen
Position in the frame
When happy - Selections - Invert - Delete - Keep Selected
Open the tube you are using and paste on your canvas
Position - Duplicate and hide for now
Selections - Invert - Delete - Select None
Move the paper and tube layer under the frame
Unhide the duplicated tube layer
Using your eraser tool erase the bottom part of the tube
Apply Radiance to the 2 tube layers at the settings above
Open Element 9 and paste on your canvas
Resize by 60 and Sharpen
Position at the bottom on the right hand side
Duplicate - Image - Mirror - Position - Merge Down
Open Element 15 and paste on your canvas
Resize by 40 and Sharpen
Position under the cloud on the right hand side
Duplicate - Image - Mirror - Position - Merge Down
Open Element 4 and paste on your canvas
Resize by 55 and Sharpen
Place underneath the heart layer and using your deform tool - angle it slightly to the right
Duplicate - Image - Mirror - Position - Merge Down
Open Element 30 and paste as a new layer
Resize by 30 and Sharpen
Position on the top right of the frame
Duplicate and Position on the left of the frame
Open Element 31 on your canvas
Repeat the above steps for Element 30 but resize by a furthur 80
Merge the 4 star layers together
Apply Gradient Glow at the settings above
Open Element 8 and paste as a new layer
Resize by 90 and position above the mask layer
Open Paper 10 on your canvas
Send to the bottom
Apply a mask of choice - Merge Group
Apply drop shadows to your layers
Merge Visible
Apply correct copyright and licence numbers
Merge Visible and Save as a png
Add your name - Save again - Done
Wednesday, 31 August 2011
Angelic - PTU
 I am using the art of Ismael Rac which you can find HERE
I am using the PTU kit Our Lil Angel by Foxy's Designs which is no longer available
Mask of Choice
Font of Choice
Filters Used:
Xero - Radiance - 128,50,128,79
Eye Candy 4 - Gradient Glow - Default on white
Open a new image 700x700
Open Element 33 and paste as a new layer
Resize by 75 and Sharpen
Position in the centre
Click inside with your magic wand
Modify by 4
Open Paper 4 on your canvas
Resize by 90 - Sharpen
Position in the frame
When happy - Selections - Invert - Delete - Keep Selected
Open the tube you are using and paste on your canvas
Position - Duplicate and hide for now
Selections - Invert - Delete - Select None
Move the paper and tube layer under the frame
Unhide the duplicated tube layer
Using your eraser tool erase the bottom part of the tube
Apply Radiance to the 2 tube layers at the settings above
Open Element 9 and paste on your canvas
Resize by 60 and Sharpen
Position at the bottom on the right hand side
Duplicate - Image - Mirror - Position - Merge Down
Open Element 15 and paste on your canvas
Resize by 40 and Sharpen
Position under the cloud on the right hand side
Duplicate - Image - Mirror - Position - Merge Down
Open Element 4 and paste on your canvas
Resize by 55 and Sharpen
Place underneath the heart layer and using your deform tool - angle it slightly to the right
Duplicate - Image - Mirror - Position - Merge Down
Open Element 30 and paste as a new layer
Resize by 30 and Sharpen
Position on the top right of the frame
Duplicate and Position on the left of the frame
Open Element 31 on your canvas
Repeat the above steps for Element 30 but resize by a furthur 80
Merge the 4 star layers together
Apply Gradient Glow at the settings above
Open Element 8 and paste as a new layer
Resize by 90 and position above the mask layer
Open Paper 10 on your canvas
Send to the bottom
Apply a mask of choice - Merge Group
Apply drop shadows to your layers
Merge Visible
Apply correct copyright and licence numbers
Merge Visible and Save as a png
Add your name - Save again - Done
Saturday, 27 August 2011
Strawberry Power - PTU

I am using the art of Ismael Rac which you can find HERE
I am using the fabby HD Pack that has been made to match the tube, these packs are made by Jenn and Sam, you can find the HD Pack HERE and more awesome stuff by the 2 ladies HERE
Font of Choice
Open the template as a new layer
Shuft - D to Duplicate and Delete the original
Delete Rasters 6, 7, 8, 9 and 5
Click on Raster 2
Selections - Select All - Float - Defloat
Selections - Modify by3
Copy and Paste Image 5 on your canvas
Position - When happy - Selections - Invert - Delete - Select None
Delete Raster 2
Using your rectangle tool
Foreground checked - Background - A red to match your tag
Draw out a rectangle that reaches from one side of the paper to the other
See my tag for placement
When happy - Convert to Raster
Open the tube on your canvas
Resize if needed
Position behind the rectangle you have just drawn out
Open Image 5 and paste as a new layer
Resize by 50 and Sharpen
Send to above Raster 3
Position to the left a little bit
Open Image 6 and paste as a new layer
Resize by 70 and Sharpen
Send to above the balloon layer and position to the right a little bit
Duplicate the balloons layer and send to above the bottle
Image - Mirror and position
Open Image 1 and paste on your canvas
Resize by 50 and Sharpen
Move under the tube layer and position to the left of the tag
See my tag for placements
Open Image 7 and paste on your canvas
Resize by 60 and Sharpen
Move under the tube layer and position to the right of the tag
Open Image 2 and paste as a new layer
Resize by 30 and Sharpen
Position under the tube and to the right
See my tag for placements
Apply Drop Shadows to your layers
Merge visible
Add your correct copyright and licence numbers
Save as a png
Add your name Save again
Done!
Jailbird - PTU
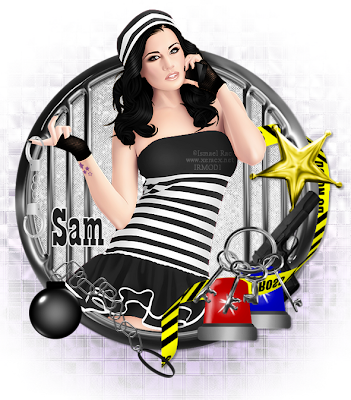 I am using the art of Ismael Rac which you can find HERE
I am using the fabby HD Pack that has been made to match the tube, these packs are made by Jenn and Sam, you can find the HD Pack HERE and more awesome stuff by the 2 ladies HERE
Mask of Choice
Font of Choice
Filters Used:
Xero - Radiance - 95
Open a new image 700x700
Copy and Paste Frame onto your canvas
Position in the centre and resize by 70 and Sharpen
Click inside the frame with your magic wand
Make sure you click in every bit
Modify by 6
Open Paper 2 onto your canvas
Position - When happy
Selections - Invert - Delete - Keep Selected
Open the tube and position in the frame
When happy - Duplicate and hide for now
Selections - Invert - Delete - Select None
Move the paper and tube layer under the frame
Unhide the duplicate tube
Grab your eraser tool and erase any overhanging parts
Open Element 3 and paste as a new layer
Resize by 40 and Sharpen
Position on the right of the frame
Open Element 4 and paste as a new layer
Resize by 50 and Sharpen
I colorised mine - Hue and Saturation set to 0
Position on the bottom left of the frame
Open Paper 1 on your canvas
Send to the bottom and apply a mask of choice
Merge group
Apply drop shadows to your layers
Merge visible
Apply correct copyright and licence numbers
Merge Visible
Save as a png
Add your name - Save again - Done!
Friday, 26 August 2011
Sweet Candy - PTU
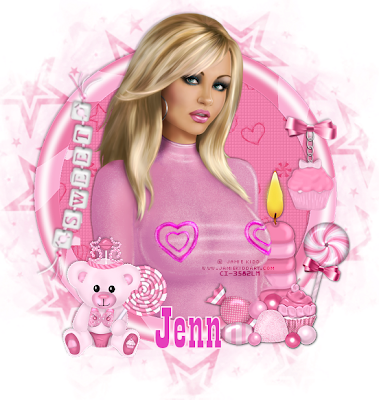 I am using the art of Jamie Kidd, i purchased this when she was at CILM but you can now find her HERE
I am using the PTU kit Hard Candy by CCO which you can find HERE
Mask of Choice
Font of Choice
Filters Used:
Xero - Radiance - 100
Xero - Fritillary - Default
Open a new image 700x700
Open Element 27 and paste as a new layer
Resize by 80 and Sharpen
Position in the centre of your canvas
Click inside the frame with your magic wand
Modify by 8
Open Paper 1 and paste on your canvas
Position - When happy - Selections - Invert - Delete - Keep Selected
Open your tube as a new layer
Position - When happy - Duplicate and hide for now
Selections - Invert - Delete - Select None
Move the paper and tube layers under the frame
Apply Fritillary to your paper layer
Unhide the duplicated tube
Erase the overhanging parts of the tube
Open Element 37 and paste as a new layer
Resize by 30 and Sharpen
Position on the top right of the frame
Open Element 30 and paste as a new layer
Resize by 40 and Sharpen
Position on the bottom left of the frame
Open Element 34 and paste as a new layer
Resize by 45 and Sharpen
Using your deform tool Move so it fits on the frame
See my tag for placement
Open Paper 5 and paste as a new layer
Resize by 90 and Sharpen
Send to the bottom and apply a mask of choice
Merge Group
Duplicate the mask layer
Apply drop shadows to your layers
Merge Visible
Apply correct copyright and licence numbers
Merge Down - Save as a png
Add your name - Done!
Wednesday, 24 August 2011
Mojo Keeper - PTU
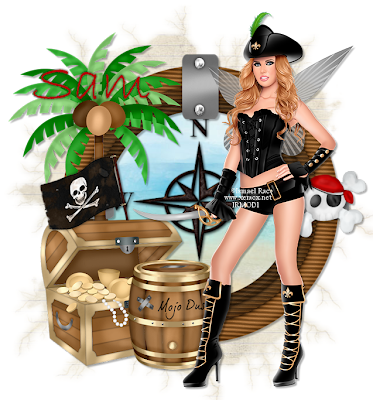
I am using the art of Ismael Rac which you can find HERE
I am using the fabby HD Pack that has been made to match the tube, these packs are made by Jenn and Sam, you can find the HD Pack HERE and more awesome stuff by the 2 ladies HERE
Mask of Choice
Font of Choice
Open a new image 700x700
Open Frame on your canvas and resize by 80 and Sharpen
Position in the centre of the canvas
Click inside the frame with your magic wand
Selections - Modify - Expand by 3
Open Paper 4 and paste as a new layer
Position in the frame
When happy - Selections - Invert - Delete - Select None
Move under the frame layer
Open your tube as a new layer
Position on the right hand side of the frame
Open Element 7 and paste as a new layer
Resize by 40 - Sharpen
Position under the tube layer and move to the left of the frame
See my tag for placement
Open Element 4 and paste as a new layer
Resize by 80 and Sharpen
Position in the centre of the frame
Open Element 3 and paste as a new layer
Resize by 30 - Sharpen
Position on the right hand side of the frame
Open Paper 1 and paste as a new layer
Send to the bottom and apply a mask of choice
Merge group - I duplicated mine
Apply drop shadows to your layers
Merge Visible
Apply correct copyright and licence information
Merge visible
Save as a png
Add ya name
Save again and done!
Devilish - PTU
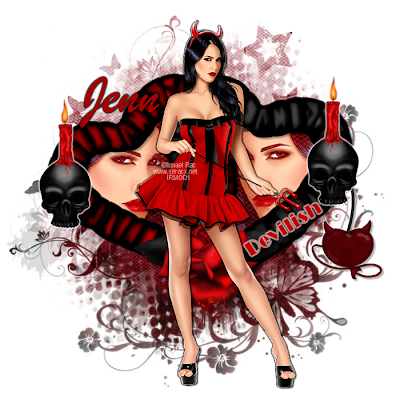 I am using the art of Ismael Rac which you can find HERE
I am using the fabby HD Pack that has been made to match the tube, these packs are made by Jenn and Sam, you can find the HD Pack HERE and more awesome stuff by the 2 ladies HERE
Mask of Choice
Font of Choice
Filters Used:
Eye Candy - Gradient Glow
White - 3 - on the skullcandle, cherry and wording
Black Halo - 3 - on the tube
Open a new image 700x700
Open the frame on your canvas
Resize by 80 and Sharpen
Position in the centre of your canvas
Click inside both parts of the frame with your magic wand
Modify by 3
Open Paper 2 as a new layer
Position - When Happy
Selections - Invert - Delete - Keep Selected
Open a close up of your tube on your canvas
Position in the left frame
Duplicate and position in the right frame
When happy merge the tube layers together
Selections - Invert - Delete - Select None
Move the paper and tube layers under the frame
Set the blend mode of the tubes to Luminance
Open Element 1 and paste as a new layer
Resize by 50 and Sharpen
Position on the left side of the frame
Duplicate and place on the right
When happy with positioning - Merge these 2 layers down
Apply Gradient Glow at the settings above
Open Element 6 on your canvas
Image - Mirror - Resize by 35 and Sharpen
Move below the skull candle on the right hand side
Apply Gradient Glow at the settings above
Using your Text Tool
Click on the frame and add a saying of choice or the one i used
Using your deform tool, position so it fits in the frame
Apply Gradient Glow at the settings above
Open your tube as a new layer
Position in the centre of the frame
Apply Gradient Glow at the settings above
Open Paper 1 and paste on your canvas
Send to the bottom and apply a mask of choice
Merge group
Apply drop shadows to your layers
Merge layers visible
Add correct copyright and licence numbers
Merge Visible
Save as a png
Add ya name
Save again and you are done!
The Lady is a Vamp - PTU
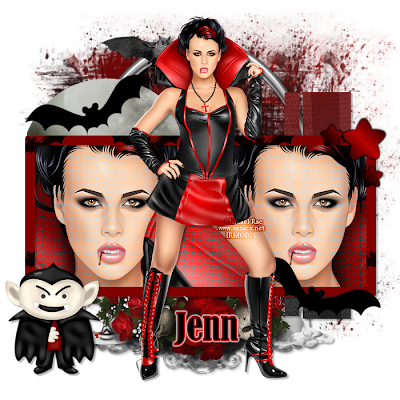
 I am using the art of Ismael Rac which you can find HERE
I am using the fabby HD Pack that has been made to match the tube, these packs are made by Jenn and Sam, you can find the HD Pack HERE and more awesome stuff by the 2 ladies HERE
Mask of Choice
Font of Choice
Filters Used:
Mura Meister - Copies - Tiling - Line - Tile - Normal - Everything else default
Open the template onto your canvas
Shift - D to Duplicate and close the original
Image - Canvas Size - 700x700 and make sure centre is checked
Erase Raster 2
Open the tube and paste on your canvas
Position in the centre of the template
Click on Bat 1 - Image - Rotate - Free Rotate - Right 25
Click on the Rectangle layer
Using a font of choice
Write out the words The lady is a Vamp
When happy
Apply Mura Meister Copies at the settings above
Click inside the rectangle with your magic wand
Selections - Invert - Delete - Select None
Change the blend mode to Color (L) on the word layer
Click inside the Frame with your magic wand
Modify by 3
Open a close up of your tube and position in the left hand side of the frame
Duplicate and position on the right hand side - Move under the first close up layer
When happy - Selections - Invert - Delete - Select None
Merge the close up layers together - Move under the frame and the word layer
Open Element 12 on your canvas
Send to the bottom and position
Open Element 6 and paste on your canvas
Resize by 70 and Sharpen
Position on the bottom left hand side of the tag
Click on circle
Selections - Select All - Float - Defloat
Open Paper 1 and paste on your canvas
Position - Selections - Invert - Delete - Select None
Delete Circle layer
Grab your magic wand and click on the Fat and Thin Rectangle layers
Selections - Modify - Expand by 1
Open Paper 3 on your canvas
Position - Selections - Invert - Delete - Select None
Delete the Fat and Thin Layers
Click on the stars layer
Selections - Select All - Float - Defloat
Get a foreground backround gradient that matches your tag
Make a new raster layer
Floodfill with the gradient
Delete the stars layer
Click on the frame layer
Grab your magic wand and click inside the white bit of the frame
Modify by 1
Open Paper 9 and paste on your canvas
Position - Selections - Invert - Delete - Select None
Delete the frame layer
Open Paper 2 and paste on your canvas
Send to the bottom and apply a mask of choice
Merge Group
Add drop shadows to your layers
Merge all visible
Add your correct copyright and licence numbers
Merge again
Save as a png
Add your name
Save again and youre done!
Monday, 22 August 2011
Cheer-ful - PTU
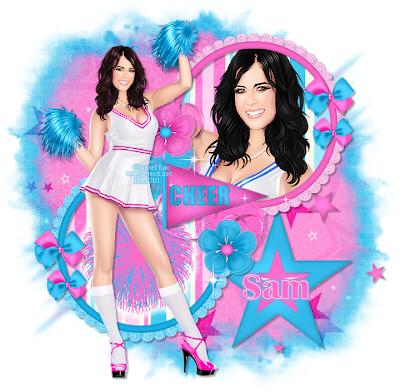 I am using the art of Ismael Rac which you can find HERE
I am using the fabby HD Pack that has been made to match the tube, these packs are made by Jenn and Sam, you can find the HD Pack HERE and more awesome stuff by the 2 ladies HERE
Mask of Choice
Font of Choice
Filters Used:
Xero - Radiance - 45
Eye Candy - Gradient Glow - White 6
Open a new image 700x700
Open Frame and paste as a new layer
Image - Resize by 80 and Sharpen
Position in the centre of the canvas
Click inside the frames with your magic wand
Selections - Modify - Expand by 3
Open Paper 3 on your canvas
Position inside the frames
When happy - Selections - Invert - Delete - Select None
Move the paper layer under the tube layer
Click inside the Pink frame with your magic wand
Selections - Modify - Expand by 3
Open a close up of your tube and position in the frame
When happy - Selections - Invert - Delete - Select None
Move under the frame layer
Apply a slight Radiance
Open Element 1 and paste as a new layer
Resize by 50 and Sharpen
Position in the centre of the blue frame
Apply Radiance at the settings above
Open Element 3 and paste as a new layer
Resize by 25 and Sharpen
Position on the pink frame
Duplicate and Resize by 80 - Sharpen
Position below the other bow
See my tag for placement
Duplicate each one once and position on the blue frame
Merge these 4 layers down
Open Element 4 and paste as a new layer
Resize by 80 and Sharpen
Position on the bottom right of the tag
Move under the paper layer
Open Paper 2 and paste as a new layer
Apply a mask and merge group
Duplicate the masked layer and resize by 85
Colorise pink to match the tag
Apply Drop Shadows to your layers
Merge visible
Add your correct copyright and licence numbers
Save as a png
Add your name Save again
Done!
Alice's Wonderland - PTU
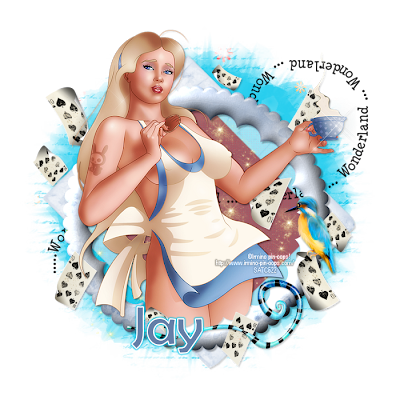 I am using the art of Irmino Pin-Oops! Which you can find HERE
This is a freebie image!
I am using the PTU kit Futterwacken by Bello Scarto which you can find HERE
Mask of Choice
Font of Choice
Open a new image 700x700
Open Element 16 and paste as a new layer
Image - Rotate - Free Rotate - Right - 45
I colorised mine to match my tube
Position in the centre
Grab your magic wand and click inside of the frame
Selections - Modify - Expand by 3
Open Paper 9 and paste on your canvas
Position in the frame - When happy
Selections - Invert - Delete - Select None
Move under the frame layer
Open Element 17 and paste as a new layer
Position in the centre of the canvas
I colorised mine to match my tube
Grab your magic wand and click inside of the frame
Selections - Modify - Expand by 3
Open Paper 6 and paste on your canvas
Position in the frame - When happy
Selections - Invert - Delete - Keep Selected
Open the tube you are using and paste on your canvas
Position in the top frame
When happy - Duplicate and hide for now
Selections - Invert - Delete on the tube layer - Select None
Move both the paper and the tube layer under the frame
Unhide the duplicated tube and using your eraser tool, erase any overhanging parts of the tube
Change the opacity of the paper layer to about 35
Making sure the paper is the active layer
Open Element 53 and paste as a new layer
Position in the red part of the tag
Duplicate and reposition
Erase any stars that go over the frame
Open Element 26 and paste as a new layer
Position to the right of the tag
When happy - Duplicate - Image - Mirror
Merge Down
Open Element 34 and paste as a new layer
Position on the bottom of the frames
See my tag for placement
Open Element 42 and paste as a new layer
Resize by 40 and Sharpen
Image - Mirror and place on top of one of the cards
Making sure the rotated frame is the active layer
Copy and Paste Element 54 on your canvas
Position so it goes around the cup of tea in the tubes hands
Open Paper 5 and paste as a new layer on your canvas
Send to the bottom and apply a mask of choice
Merge group
Apply drop shadows to your layers
Merge visible
Add your correct copyright and licence numbers
Save as a png
Add your name Save again
Done!
RockStar - PTU
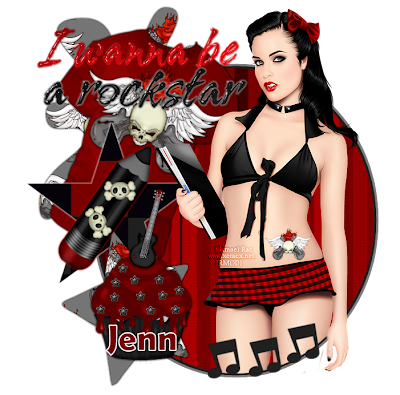
I am using the art of Ismael Rac which you can find HERE
I am using the PTU School of Rock HD Pack which you can find HERE
Font of Choice
Filters Used:
Eye Candy - Glass - Default settings, Set Glass Colour to White
Eye Candy - Gradient Glow - Default - Colours Black and White
Open the Template as a new layer
Shift - D to Duplicate
Close the Original
Make Raster 2 the active layer
Selections - Select All - Float - Defloat
Copy and Paste Paper 2 as a new layer
Selections - Invert - Delete
Keep Selected
Open the tube you are using and paste on your canvas
Position - When Happy - Duplicate and hide for now
Selections - Invert - Delete - Select None
Move both the paper and the tube layer underneath the original Raster 2
Delete Raster 2
Unhide the duplicated tube and using your eraser tool, erase any overhanging parts of the tube
Click on Raster 4 and resize by 30 - Sharpen
Duplicate twice and position near the bottom of the tube
See my tag for placement
Click on Raster 3
Selections - Select All - Float - Defloat
Copy and Paste Paper 1 as a new layer
Position - When Happy
Selections - Invert - Delete - Select None
Delete Raster 3
Repeat the last steps for Raster 6
When finished Delete Raster 6
Apply Gradient Glow to both of these layers - on Black
Click on Raster 5
Selections - Select All - Float - Defloat
Copy and Paste Paper 3 as a new layer
Position - When Happy
Selections - Invert - Delete - Select None
Delete Raster 5
Apply Gradient Glow using White
Open Element 1 and paste as a new layer
Resize by 50 and Sharpen
Position in the bottom Star
Open Element 3 and paste as a new layer
Resize by 60 - Sharpen
Image - Rotate - Free Rotate - 35 Right
Position on the middle star
Open Element 4 and paste as a new layer
Resize by 70 and Sharpen
Image - Rotate - Free Rotate - 20 Right
Position on the top of the tag
See my tag for placement
Click on Raster 7
Using the selection tool
Draw around 'a rockstar'
Edit - Cut
Paste as a new layer
Arrange the wording to suit your tag
Apply Eye Candy Glass to them
When happy with everything
Drop Shadow your layers
Merge all Visible
Add correct copyright and licence numbers
Save as a png
Add your name
Save again
Done!
Friday, 12 August 2011
Emo Terror-Tude - PTU
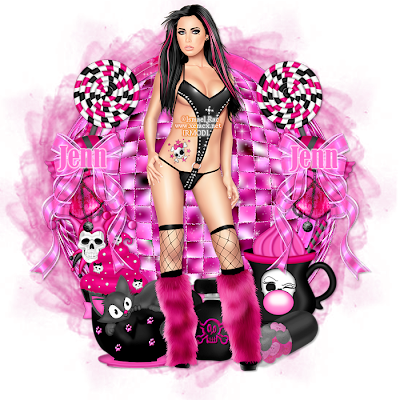 I am using the art of Ismael Rac which can be found HERE
I am using the gorgeous PTU kit Sweet Terror by CCO which can be found HERE
Have a look around, theres scripts, temps and freebies!
Mask of Choice
Font of Choice
Open a new image 700x700
Open Element 2 and paste as a new layer on your canvas
Resize by 90 and sharpen
Position in the centre of your canvas
Open Element 27 and paste as a new layer on your canvas
Send to the bottom and position
Open the tube you are using
Position in the centre of your canvas
Open Element 16 and paste as a new layer
Resize by 40 and sharpen
Position on the left side of the tube
Move under the tube layer
Open Element 12 and paste as a new layer
Image - Resize by 40 and Sharpen
Position on the left hand side of the frame in the middle
When happy - Duplicate - Image - Mirror - Merge Down
Open Element 64 and paste as a new layer
Resize by 40 and then by 80 - Sharpen
Position under the tube on the right hand side of the frame
Open Element 25 and paste as a new layer
Image - Resize by 30 and sharpen
Position under the tube layer and place in the gap
See my tag for placement
Open Paper 9 and paste as a new layer
Send to the bottom and apply a mask of choice
Merge Group
Apply drop shadows to your layers
Merge layers visible
Apply your correct copyright and licence numbers
Save as a png
Add your name
Save again
Done!
Thursday, 11 August 2011
Balungs Garden - PTU
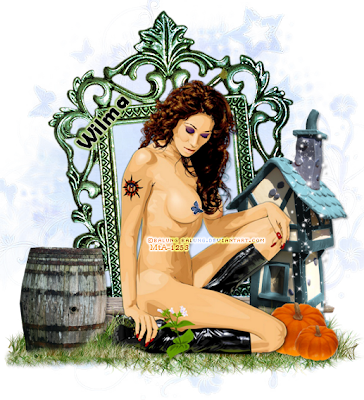 I am using the art of Balung which you can find HERE
I am using Wilma4ever's part of the Exclusive Store Collab Lughnassad, you can find this HERE
Mask of Choice
Font of Choice
Open a new image 700x700
Open Element 21 and paste as a new layer
Position on your canvas
Resize by 110 and Sharpen
Position in the centre
Open Element 14 and paste as a new layer
Resize by 40 and Sharpen
Position on the left side of the frame
Open Element 15 and paste as a new layer
Resize by 90 and Sharpen
Position to the bottom and move under the barrel
Open Element 18 and paste as a new layer on your canvas
Resize by 90 and Sharpen
Move below the grass and barrel layer
Open the tube you are using
Paste on your canvas and position
Resize if necessary
Open Element 8 and paste as a new layer
Resize by 40 and Sharpen
Position under the tube to the right hand side
See my tag for placement
Open Element 16 and paste as a new layer
Resize by 60 - Image - Mirror
Position under the tube and on top of the bench
Open Paper 8 and paste on your canvas
Send to the bottom
Apply a mask of choice - Merge Group
Appy drop shadow to your layers
Merge layers visible
Apply correct copyright and licence numbers
Merge Visible
Save as a png
Add ya name
Save again
Done!
Haunting Leap - PTU
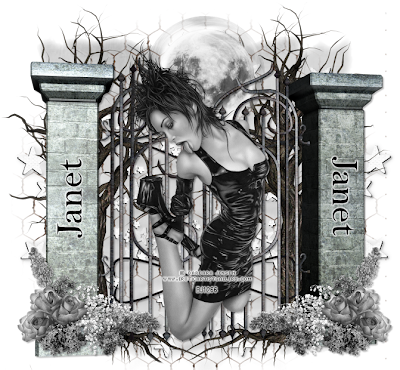 I am using the art of Barbara Jensen which you can find HERE
I am using Redbutterfly's part of the Exclusive Store Collab Lughnassad, you can find this HERE
Mask of Choice
Font of Choice
Open a new image 700x700
Open Element 6 and paste as a new layer on your canvas
Position in the centre of your canvas
Open Element 5 and paste as a new layer
Place behind Element 6 on the right hand side
Duplicate - Image - Mirror
Grab your eraser tool and erase the bottom of the roots
Merge the tree layers together
Open Element 12 and paste as a new layer
Resize by 40 and Sharpen
Position on the bottom right of the gate
Layers - Duplicate - Image - Mirror
When happy with positioning Merge the 2 flower layers together
Adjust - Hue and Saturation - Colorise - Both boxes to 0
Open your tube and paste as a new layer
Position in the middle of the canvas
See my tag for placement
I colorised mine to match my tube
Open Element 27 and paste as a new layer
Position on the bottom of your layers
Again, i colourised my tube to match my tag
Layers - Duplicate - Image - Mirror
When happy with positioning Merge the 2 star layers together
Open Element 27 and paste as a new layer
Position on the bottom of your layers
Resize by 70 and sharpen
Position in the centre
Open Element 8 and paste as a new layer
Send to above the tree layers
Resize by 70 - Sharpen
Position in the centre
Open Element 7 and paste above the moon on your canvas
Resize as before and place over the top of the moon
Open Paper 5 and paste as a new layer
Move to the bottom
Colorise and Apply a mask of choice
Merge Group
Apply drop shadows to your layers
Merge Visible
Apply your correct copyright and licence info
Save as a png
Done
Emo Lookin' - PTU
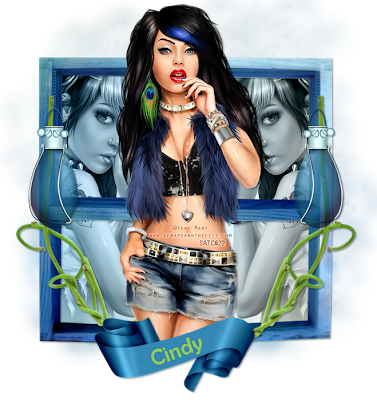 I am using the art of VeryMany, these are exclusive tubes for SATC which you can find HERE
I am using Puddicat Creations Scraps part of the Exclusive Store Collab Lughnassad, you can find this HERE
Mask of Choice
Font of Choice
Open a new image 700x700
Open Frame 1 and paste as a new layer
Resize by 80 and Sharpen
Position in the centre of your canvas
Open the tube you are using and paste as a new layer on your canvas
Resize if necessary and position in the centre of the frames
Grab your magic wand and click inside the 4 frames with your magic wand
Open another tube on your canvas
Position in your frame on the right hand side
Duplicate the tube layer
Position in the other side of the frame
Selections - Invert - Delete on both layers - Select None
Move the tube layers underneath the frame layer and Merge Down
Set the blend mode to Luminance Legacy
Click inside the frames again with your magic wand
Selections - Modify - Expand by 3
Open Paper 1 on your canvas
Resize if necessary
Selections - Invert - Delete -Select None
Move under the frame and tube layers
Open Curlie Branch 2 and paste as a new layer
Resize by 70 and Sharpen
Position on the bottom left side of the frame
When happy - Duplicate - Image - Mirror - Merge Down
Open Globe 1 and paste as a new layer
Resize by 70 and Sharpen
Position on the top right of the frame
See my tag for placement
Duplicate - Image - Mirror - Merge Down
Open Ribbon 1 and paste as a new layer
Resize by 70 and then by 90 and Sharpen
Position on the bottom of your tube so she looks as if she is under it
Open Paper 6 on your canvas
Send to the bottom
Apply a mask of choice and merge group
Add drop shadows to your layers
Merge Visible
Apply correct copyright and licence numbers
Save as a png
Add your name
Save again and Done!
Wednesday, 10 August 2011
Mermaid Fun - PTU
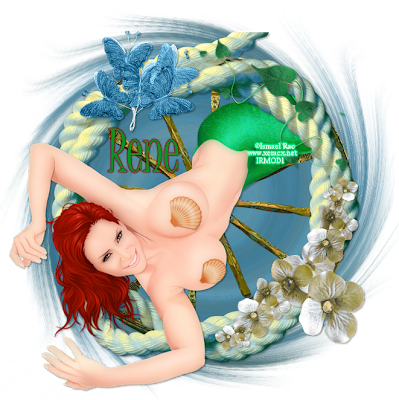 I am using the art of Ismael Rac which you can find HERE
I am using Rebel Dezigns part of the Exclusive Store Collab Lughnassad, you can find this HERE
Mask of Choice
Font of Choice
Filters Used:
Xero Radiance - Default, blue set to 0
Open a new image 700x700
Open Element 20 and paste as a new layer on your canvas
Position in the centre of your canvas
Open Element 23 and paste as a new layer
Position over the wheel (element 20)
Resize if necessary
Open the tube you are using and paste on your canvas
Resize if necessary and sharpen
Position on the frame
When happy - Duplicate and hide for now
Move the original tube layer under the frame
Grab your eraser tool - Unhide the duplicated tube
Erase the part of the tail that is over the frame
Apply Xero Porcelain to the duplicated tube
Open Element 30 and paste as a new layer
Resize by 40 and sharpen
Position on the top of the rope
Open Element 25 and paste as a new layer
Resize by 70 and Sharpen
Position to the right of the rope
Using your deform tool - angle it so it fits on the frame
Open Element 19 and paste as a new layer
Resize by 50 and Sharpen
Image - Flip
Position on the bottom right of the rope
Open Paper 4 and paste as a new layer on your canvas
Send to the bottom
Apply a round mask of choice
Merge Group
Effects - Distortion Effects - Twirl - 720 Degrees
Apply Drop shadows to your layers
Merge visible
Add your correct copyright and licence numbers
Save as a png
Add your name
Save again and Done!
Daisy Dares - PTU
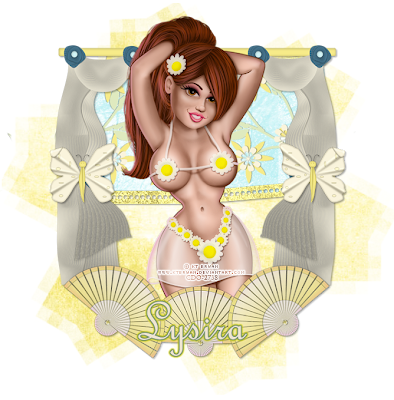 I am using the art of KT Bryan which you can find HERE
I am using Lysira's part of the Exclusive Store Collab Lughnassad, you can find this HERE
Mask of Choice
Font of Choice
Filters Used:
Xero - Porcelain, Default, set blue to 0
Open a new image 700x700
Open Curtain 1 and paste as a new layer on your canvas
Position towards the top of your canvas
See my tag for placement
Open Stamp Frame 2 and paste as a new layer
Image - Rotate - Free Rotate - 90 - Left
Resize by 80 and Sharpen
Position underneath the curtain and move towards the top so the frames look like windows
Erase the bits hanging over the edge of the curtains
Open the tube you are using and paste on your canvas
Position in the centre of the curtains
Apply Xero - Porcelain at the settings above
Open Fan 2 and paste on your canvas
Resize by 45 and Sharpen
Position on the bottom of the tube
Layers - Duplicate - Image - Rotate - Free Rotate - 40 Left
Position on the right hand side of the original frame
Duplicate again and rotate 40 to the right
When happy with positioning, Merge these layers together
Grab your selection tool
Click on the frame layer
Draw a rectangle selection covering the middle of the frames
Layers - New Raster layer - Floodfill with a pattern of Paper 6
When happy - Select None
Move under the frame layer
Open Harlequin Flower 1 on your canvas
Image - Rotate - Free Rotate - 45 - Left
Click on the paper layer and paste the harlequin flower on your canvas
Position in the frame on the right hand side
Layers - Duplicate - Image - Mirror
Grab the eraser tool and erase the sides of the flowers
Merge the flower layers together
Open Butterfly 2 onto your canvas
Resize by 70 and Sharpen
Position on the left side of the curtain
Layers - Duplicate - Image - Mirror
Merge these layers together
Copy and paste Paper 11 onto your canvas
Send to the bottom and apply a mask of choice
Merge Group
Duplicate
Merge Down
Apply drop shadows to your layers
Merge visible
Apply the correct copyright and licence numbers
Merge Visible
Save as a png
Add your name
Save again
Done!
Tuesday, 9 August 2011
Soft - PTU
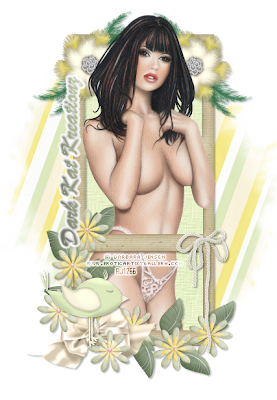 I am using the art of Barbara Jensen which you can find HERE
I am using Dark Kat Kreationz's part of the Exclusive Store Collab Lughnassad, you can find this HERE
Mask of Choice
Font of Choice
Open Element 3 and paste on your canvas
Position in the centre
Grab you magic wand and click inside the frames
Selections - Modify - Expand by 3
Open the tube you are using and position in the frame
When Happy - Duplicate and hide for now
Selections - Invert - Delete on the tube layer
Move under the frame
Unhide your duplicated tube
Grab your eraser tool and erase the bottom half of the tube
Grab your magic wand and making sure you are on the frame layer
Click inside the frames
Selections - Modify - Expand by 3
Open Paper 11 and position in the frame
Selections - Invert - Delete
Move under the frame and the original tube layers
Effects - Texture Effects - Blinds
Colour White, Width 5, Opacity 3, Both Boxes Checked
Open Element 14 and paste as a new layer
Image - Resize by 50 and Sharpen
Position under the frame on the top left
Duplicate - Image - Mirror
Merge these layers together
Open Element 28 and paste as a new layer
Image - Resize by 50 and Sharpen
Image - Mirror - Position on the bottom left corner of the frame
Open Element 25 and paste as a new layer
Image - Resize by 50 and Sharpen
Position on the right side of the frame
See my tag for placement
Open Paper 7 and paste on your canvas
Image - Rotate - Free Rotate - Left 20
Apply a mask of choice
Merge group
Apply drop shadows to your layers
Merge Visible
Apply your correct copyright and licence numbers
Save as a png
Add your name
Save again
Done!
Monday, 8 August 2011
Smoulder in Green - PTU
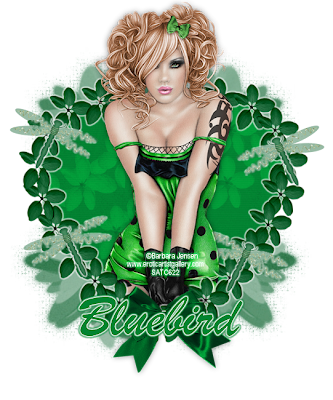
I am using the art of Barbara Jensen, this is an exclusive tube made for SATC which you can find HERE
I am using Bluebirds part of the Exclusive Store Collab Lughnassad, you can find this HERE
The Scrapkit i am using is for example only. Anyone wishing to use the kit in their own personal creation MUST purchase the kit
Mask of Choice
Font of Choice
Filters Used:
Eye Candy Gradient Glow - White 3
Open a new image 700x700
Open Frame 1 and paste as a new layer
Position in the middle of your canvas
Resize by 110
Open the tube you are using
Position in the centre of the frame
Layers - Duplicate and hide for now
Click inside the frame with your magic wand
Selections - Modify - Expand by 4
Selections - Invert - Delete - Select None
Move this layer underneath the frame
Un hide your duplicated tube
Grab your eraser tool and erase the bottom bit of the tube
Apply Gradient Glow to the frame at the settings above
Click inside the frame with your magic wand
Selections - Modify - Expand by 4
Copy and Paste Paper 7 on your canvas
I colourised mine to match my tag
Position in the frame
When happy Selections - Invert - Delete - Select None
Move this under the tube layers
Effects - Texture Effects - Blinds
Width 3, Opacity 2, Both Boxes Checked and Colour White
Open Dragonflowers into PSP
Using your selection tool, draw around the one you wish to use
Edit - Cut
Paste as a new layer onto your working canvas
Rssize by 40 and Sharpen
Position on the right hand side of the frame
Apply Gradient Glow at the settings above
Layers - Duplicate - Image - Mirror
Duplicate again and position on the right side of the frame
Layers - Duplicate - Image - Mirror
Position to suit
When happy merge these layers down
Open Bows into psp
Draw aound the one you wish to use using your freehand selection tool
Copy the step as before on the dragonflies
Resize by 40 and Sharpen
Position on the bottom of the frame
I colourised mine to match my tag
Open Paper 1 on your canvas
Resize by 120
Send to the bottom and apply a mask of choice
Merge group
Apply drop shadows to your layers
Merge Visible
Add the correct copyright and licence numbers
Merge Visible
Save as a png
Add your name
Done!
Friday, 5 August 2011
Party Popping - PTU
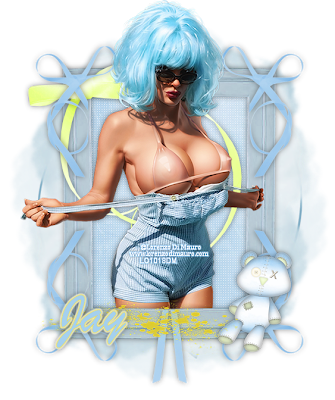
I am using the PTU art of Lorenzo Di Mauro which you can find it HERE
I am using Jay's aka Bello Scarto's part of the Exclusive Store Collab Lughnassad, you can find this HERE
TY so much Jay for allowing me to use this set of Scrapkits!
Mask of Choice
Font of Choice
Filters Used:
Xero Radiance - 128, 50, 128, 51
Open a new image 700x700
Open Element 7 and paste as a new layer
Position in the centre
Click inside the frame with your magic wand
Selections - Modify - Expand by 4
Open Paper 6 as a new layer
Position in the frame
When happy - Selections - Invert - - Keep Selected
Open your tube as a new layer
Position in the frame
When happy - Selections - Invert - Delete on both layers
Move both layers under the frame
Apply Xero Radiance to the tube at the settings above
Effects - Texture Effects - Weave on the paper layer
Open Element 18 and paste as a new layer
Image - Resize by 95
Send to the bottom
Open Element 9 and paste as a new layer
Resize by 90
Move to the top of the frame
Send to above layer 5
Layers - Duplicate 3 times
On the first duplicate - Image - Mirror
On the second
Image - Rotate - Free Rotate - 90 Left
On the 3rd - Rotate to the Right
Merge these layers together
Open Element 13 and paste as a new layer
Resize by 80 - Sharpen
Position on the top left side of the frame
Layers - Duplicate - Image - Mirror
Merge Down
Erase the parts over the tube
Layers - Duplicate - Image - Flip
Open Element 17 and paste as a new layer
Resize by 40 and Sharpen
Position on the bottom right of the frame
Click on the frame layer
Copy and Paste Element 12 as a new layer
Place on the left hand side of the frame
See my tag for placement
Open Element 28 and paste as a new layer
Resize by 90 and Sharpen
Move to the bottom of the frame
Apply drop shadows to your layers
Merge layers visible
Apply your correct copyright and licence numbers
Save as a png
Add your name
Save again
Done!
Subscribe to:
Comments (Atom)


