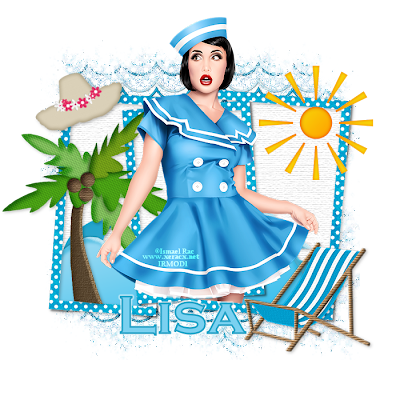
I am using the art of
Ismael Rac which you can find
HERE
The scrapkit i am using is by Jill and is called Splish Splash Splosh which you can find
HERE
Mask of choice
Font of Choice

Filters Used:
Xero - Radiance - 128,50,128,55
Ok, lets go!
Open a new image 700x700
Open Frame 3 and paste on your canvas
Grab your magic wand
Selections - Modify - Expand by 3
Copy and paste Paper 1 onto your canvas
Selections - Invert - Delete
Keep Selected
Copy and paste Wave Border as a new layer
Position at the bottom and resize by 70 - Sharpen
Selections - Invert - Delete - Select None
Move both under the frame and make sure the wave is above the paper layer
Open Palm Tree and paste on your canvas
Image - Mirror
Resize by 65 and Sharpen
Place on the first frame
See my tag for placement
Grab your selections tool
Making sure its on Freehand Selection draw around the overhanging tree trunk
Press delete - Select None
Open Beach hat and paste on your canvas
Resize by 40 and sharpen
Move to the top of your first frame
Grab your deform tool and move around to the left a little bit
See my tag for placement
Copy and Paste the sun on your canvas
Resize by 50 and sharpen
Position on the top right of the 3rd frame
Open the tube you are using
Duplicate and hide for now
Grab your magic wand and click inside the 2nd and 3rd frame
Modify by 3
Selections - Invert - Delete on the tube layer
Unhide the duplicated tube and with your eraser tool erase the overhanging parts of the tube
Apply Xero Radiance at the settings above on both tube layers
Open Chair and paste on your canvas
Image - Mirror
Resize by 50 and sharpen
Place on the bottom 3rd frame
Open Paper 2 and paste on your canvas
Send to the bottom
Apply a mask of choice and merge group
Open Paper 9 and paste on your canvas
Send to above the mask layer
Add the same mask you used before
Change the blend mode to dissolve
Add drop shadows to every layer
Merge layers visible
Add your copyright and licence numbers
Save as a png
Done!
 I am using the art of Ismael Rac which you can find HERE
The scrapkit i am using is by Jill and is called Splish Splash Splosh which you can find HERE
Mask of choice
Font of Choice
 Filters Used:
Xero - Radiance - 128,50,128,55
Ok, lets go!
Open a new image 700x700
Open Frame 3 and paste on your canvas
Grab your magic wand
Selections - Modify - Expand by 3
Copy and paste Paper 1 onto your canvas
Selections - Invert - Delete
Keep Selected
Copy and paste Wave Border as a new layer
Position at the bottom and resize by 70 - Sharpen
Selections - Invert - Delete - Select None
Move both under the frame and make sure the wave is above the paper layer
Open Palm Tree and paste on your canvas
Image - Mirror
Resize by 65 and Sharpen
Place on the first frame
See my tag for placement
Grab your selections tool
Making sure its on Freehand Selection draw around the overhanging tree trunk
Press delete - Select None
Open Beach hat and paste on your canvas
Resize by 40 and sharpen
Move to the top of your first frame
Grab your deform tool and move around to the left a little bit
See my tag for placement
Copy and Paste the sun on your canvas
Resize by 50 and sharpen
Position on the top right of the 3rd frame
Open the tube you are using
Duplicate and hide for now
Grab your magic wand and click inside the 2nd and 3rd frame
Modify by 3
Selections - Invert - Delete on the tube layer
Unhide the duplicated tube and with your eraser tool erase the overhanging parts of the tube
Apply Xero Radiance at the settings above on both tube layers
Open Chair and paste on your canvas
Image - Mirror
Resize by 50 and sharpen
Place on the bottom 3rd frame
Open Paper 2 and paste on your canvas
Send to the bottom
Apply a mask of choice and merge group
Open Paper 9 and paste on your canvas
Send to above the mask layer
Add the same mask you used before
Change the blend mode to dissolve
Add drop shadows to every layer
Merge layers visible
Add your copyright and licence numbers
Save as a png
Done!

very cute!!!
ReplyDeletetyvm!
ReplyDelete