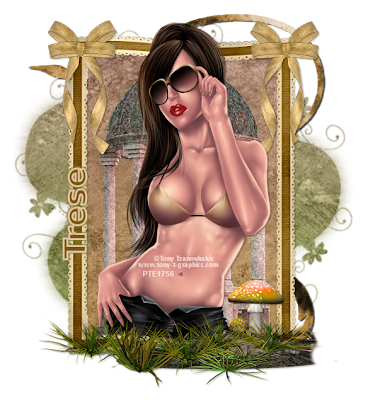
 I am using the art of Tony Tzanoukakis which you can find HERE
I am using the FTU kit Midsummers Dream by Em which you can find HERE
Mask of Choice
Font of Choice
Open a new image 700x700
Open Frame 2 and paste as a new layer
Image - Resize by 90 - Sharpen
Position in the centre of the canvas
Click inside the frame with your magic wand
Selections - Modify - Expand by 3
Open Paper 2 and paste as a new layer
Position in the frame - When Happy
Selections - Invert - Delete - Select None
Copy and Paste Marble Gazebo onto your canvas
Position in the frame
Sharpen
Click on your frame layer
Grab your magic wand and click inside the frame
Selections - Modify - Expand by 3
Open the tube you are using
When happy with positioning
Duplicate and hide for now
Selections - Invert - Delete - On the tube layer
Move under the frame layer
Un-hide your duplicated tube and making sure she is at the top
Grab your eraser tool and erase the bottom part of the tube
Open Mushroom 1 and paste as a new layer on your canvas
Resize by 70 and Sharpen
Position on the right side of the frame
I erased the right hand side corner
Open Grass 1 and resize by 80 - Sharpen
Paste on your canvas and position on top of the mushroom layer
Open Bow 2 and paste as a new layer on your canvas
Resize by 50 and Sharpen
Position on the top right of the frame
Layers - Duplicate - Image - Mirror
Merge these layers together
Open Doodle 1 and paste as a new layer
Resize by 80 and Sharpen
Send to the bottom and position to the right
See my tag for placement
Open Paper 1 and paste as a new layer
Send to the bottom
Apply a mask of choice
Merge Group
Merge layers Visible
Add your correct copyright and licence numbers
Save as a png
Done!
Saturday, 30 July 2011
Midsummer's Beauty - FTU
 I am using the art of Tony Tzanoukakis which you can find HERE
I am using the FTU kit Midsummers Dream by Em which you can find HERE
Mask of Choice
Font of Choice
Open a new image 700x700
Open Frame 2 and paste as a new layer
Image - Resize by 90 - Sharpen
Position in the centre of the canvas
Click inside the frame with your magic wand
Selections - Modify - Expand by 3
Open Paper 2 and paste as a new layer
Position in the frame - When Happy
Selections - Invert - Delete - Select None
Copy and Paste Marble Gazebo onto your canvas
Position in the frame
Sharpen
Click on your frame layer
Grab your magic wand and click inside the frame
Selections - Modify - Expand by 3
Open the tube you are using
When happy with positioning
Duplicate and hide for now
Selections - Invert - Delete - On the tube layer
Move under the frame layer
Un-hide your duplicated tube and making sure she is at the top
Grab your eraser tool and erase the bottom part of the tube
Open Mushroom 1 and paste as a new layer on your canvas
Resize by 70 and Sharpen
Position on the right side of the frame
I erased the right hand side corner
Open Grass 1 and resize by 80 - Sharpen
Paste on your canvas and position on top of the mushroom layer
Open Bow 2 and paste as a new layer on your canvas
Resize by 50 and Sharpen
Position on the top right of the frame
Layers - Duplicate - Image - Mirror
Merge these layers together
Open Doodle 1 and paste as a new layer
Resize by 80 and Sharpen
Send to the bottom and position to the right
See my tag for placement
Open Paper 1 and paste as a new layer
Send to the bottom
Apply a mask of choice
Merge Group
Merge layers Visible
Add your correct copyright and licence numbers
Save as a png
Done!
Friday, 29 July 2011
Hot Cherry - PTU
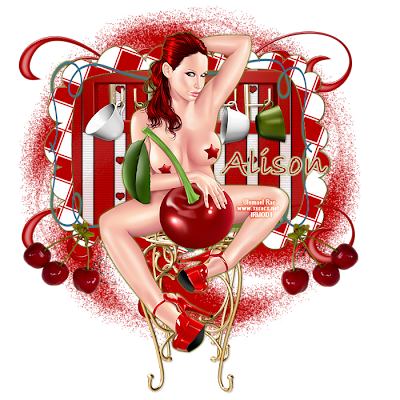
I am using the art of Ismael Rac which you can find HERE
I am using the PTU kit Cherry Pie by Hungry Hill which i purchased at Digifox Scraps but is no longer available
Mask of Choice
Font of Choice
Open a new image 700x700
Open Checkered Frame and paste as a new layer on your canvas
Resize by 80 and Sharpen
Position up from the centre
See my tag for placement
Grab your magic wand
Selections - Select All - Float -Defloat
Open Paper 9 and paste as a new layer
When happy with positioning
Selections - Invert - Delete - Select None
Move the paper under the frame
Open Cuprack and paste as a new layer
Image - Resize by 60 and sharpen
Place towards the top of the frame
See my tag for placement
Move under the frame
Open Doodle and paste as a new layer
Image - Resize by 80 - Sharpen
Move towards the bottom of the frame
Send to the bottom and position - When happy
Layers - Duplicate
Move the copy to the top of the frame
See my tag for placement
Merge Down these 2 layers
Open Cherries and paste as a new layer
Resize by 20 and Sharpen
Move to the right side of the frame
Layers - Duplicate - Image - Mirror
Move if necessary
Merge these 2 layers down
Open Cafe Table and paste as a new layer
Resize by 50 and Sharpen
Position on the bottom of the frame
Open the tube you are using and place her so she is sitting on the table
Open Paper 9 and paste as a new layer
Send to the bottom
Apply a mask of choice
Merge Group
Apply a drop shadow to your layers
Merge Visible
Add correct copyright and licence numbers
Save as a png
Add your name
Save again
Done!
Thursday, 28 July 2011
Sweet Taylor - PTU
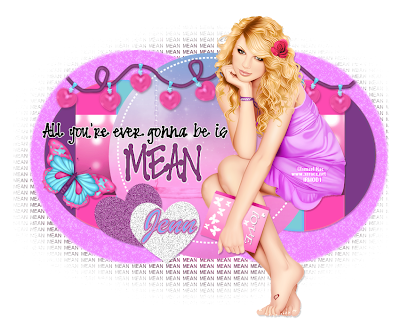
I am using the art of Ismael Rac which you can find HERE
I am using the FTU Template by Sarah which you can find HERE
Font of Choice
Filters Used:
Alien Skin Xenofex Sparkle - Click on keep original image - Default
Xero - Iridium - Default
Xero Radiance - 128,50,128,97
Open your template
Shift - D to Duplicate and delete the original
Delete the copyright info
Click on Raster 5
Selections - Select All - Float - Defloat
Copy and Paste Paper 4 on your template
When happy with positioning
Selections - Invert - Delete - Select None
Layers - Duplicate - Image - Mirror
Delete Raster 5 and Copy of Raster 5
Apply Xero - Iridium at the settings above
Copy and paste your tube as a new layer
Position her so it looks as if she is sitting on Raster 2
Apply Xero Radiance at the settings above
Open Element 4 and paste as a new layer below the tube layer
Image - Resize by 70 and Sharpen
Place towards the top and erase any overhanging parts of the string
Click on Raster 9 - Resize by 70 and Sharpen
Move towards the right of the tube so you can see the whole wordart
Click on Raster 10
Move under Raster 9 to the right of the tube
I used the deform tool to make it shorter and a little taller
Click on Raster 10
Grab your magic wand and click inside all of the letters
Layers - New Raster Layer - Floodfill with a colour from your tube
Merge Down the 2 layers
Click on Raster 3
Selections - Select All - Float - Defloat
Copy and Paste Paper 2 onto your template
Resize if necessary
When happy with the positioning
Selections - Invert - Delete - Select None
Delete Raster 3
Click on Raster 2
Selections - Select All - Float - Defloat
Copy and Paste Paper 1 onto your template
Resize if necessary
When happy with the positioning
Selections - Invert - Delete - Select None
Delete Raster 2
Click on Raster 6
Selections - Select All - Float - Defloat
Layers - New Raster Layer
Floodfill with a colour from your tube
Selections - Select None
Layers - Duplicate - Image - Mirror
Delete Raster 6 and Copy of Raster 6
Apply Xenofex Sparkle at the settings above
Open Element 5 and paste on your template
Image - Resize by 30 and Sharpen
Using your deform tool
Angle it to the right a little
See my tag for placement
Click on Raster 4
Colourise to a colour from your tube
Apply drop shadows to your layers
Merge all Visible
Add your correct copyright and licence numbers
Save as a png
Add your name
Save again
Done!
Wednesday, 27 July 2011
Goth Attitude - PTU
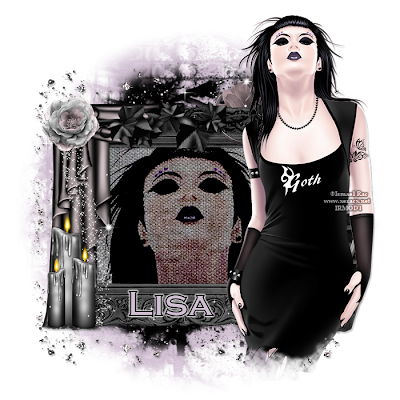 I am using the art of Ismael Rac which you can find HERE
I am using GothHD Plus Pack which is PTU and you can find that HERE
Mask of Choice
Font of Choice
Open a new image 700x700
Open Frame 1 and paste on your canvas
Resize by 70 and Sharpen
Position just below the centre of your canvas
Click inside the frame with your magic wand
Selections - Modify - Expand by 7
Open Paper 2 on your canvas
Position in the frame
When happy - Selections - Invert - Delete - Keep Selected
Open a close up of your tube and position in the frame
Resize if needed
Selections - Invert - Delete - Select None
Change the blend mode to Burn or one of your choice
Move the paper and tube layers under the frame
Open your main tube and paste on your canvas
Resize if necessary and position on the right hand side of the frame
Layers - Duplicate and hide for now
On the original tube layer
Apply a mask of choice
Merge Group
Send to the bottom
Un-Hide your duplicated tube
Making sure its at the top
Grab your eraser tool and erase the bottom bit of the tube
See my tag for reference
Open Element 4 and paste on your canvas
Image - Rotate - Free Rotate - 90 Left
Image - Flip
Position on the top of the frame
Move under the tube layer
Open Element 5 and paste as a new layer
Image - Resize by 75 twice - Sharpen
Position on the top left hand side of the frame
Open Paper 1 and paste as a new layer
Move to the bottom and add a mask of choice
Merge Group
Add a new raster layer above your mask layer
Floodfill with black or a colour of your choice
Apply the same mask as before
Merge Group
Resize by 90
Add drop shadows to your layers
Merge layers visible
Add your correct copyright and licencing information
Save as a png
Add ya name
Save again
Done!
Woof - FTU
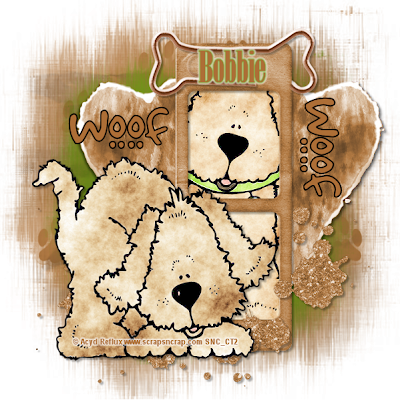
I am using the art of Acyd Reflux which you can find HERE
I am using the FTU Scrapkit Cats and Dogs by PolkaDot Scraps which you can find HERE
Mask of Choice
Font of Choice
Filters Used:
Xero - Radiance -128,50,128,57
Open a new image 700x700
Open Frame 13 and paste as a new layer
Resize by 80 and Sharpen
Place on the right hand side of the frame, slightly off centre
See my tag for placement
I Colourised mine to match my tubes
Click inside both of the frames with your magic wand
Modify by 3
Copy and Paste Paper 12 onto your canvas
Position
Selections - Invert - Delete - Keep Selected
Copy and paste a tube into the frame
When happy with positioning
Selections - Invert - Delete - Select None
Move the paper layer and the tube layer under the frame
Apply Radiance at the settings above
Open Element 33 and paste on your canvas
Image - Flip - Image - Mirror - Image - Resize by 90
Open Element 8 and paste on your canvas
I colourised mine
Resize by 90
Place underneath the frame on the right hand side
Duplicate - Image - Mirror - Merge Down
Open Element 3 and paste as a new layer
Image - Rotate - 90 Left
Place on top of the frame
Erase any part of the paperclip you like, i erased some of the middle part
Open Paper 13 and paste as a new layer
Send to the bottom
Colourise to suit your tag
Apply a mask of choice
Merge Group
Apply the same paper again
I colourised mine again to match the collar
Apply the same mask
Resize by 80
Merge down with the other mask layer
Open Element 58 and paste as a new layer
Image - Mirror - Colourise
Move under the mask layer
Duplicate and Mirror
Add a drop shadow to your layers
Merge layers visible
Add your correct copyright and licencing information
Save as a png
Add ya name
Save again!
Tuesday, 26 July 2011
New Cluster Frame - FTU
Friday, 22 July 2011
Hope for Autumn - PTU
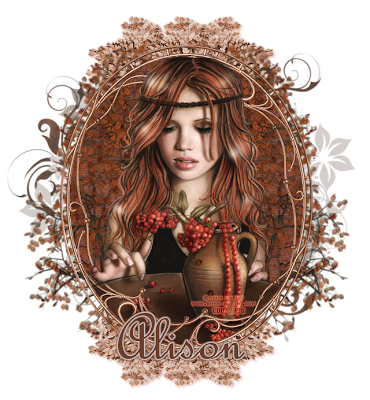
I am using the art of Anna Marine which you can find HERE
I am using the PTU kit Subtle Autumn by Hungry Hill which you can find HERE
Mask of Choice
Font of Choice
Open a new image 700x700
Open Frame 1 and paste as a new layer on your canvas
Resize by 90 and Sharpen
I colorised mine to match my tube
Grab your magic wand
Click inside all bits of the frame - apart from the edge
Selections - Modify - Expand by 3
Copy and Paste Paper 7 as a new layer
Position and when happy
Selections - Invert - Delete - Keep Selected
Open the tube you are using
Resize if necessary
Position - When happy
Duplicate and hide for now
Selections - Invert - Delete - Select None
Move the paper layer and the tube layer under the frame layer
Un hide the duplicated tube layer
Making sure she is at the top of the layers
Using your eraser tool, erase the overhanging parts at the bottom of the tube
On the Paper Layer
Effects - Texture Effects - Blinds
Width 3 - Opacity 10 - Both boxes Checked - Colour White
Click on the paper layer
Open Tree 2 and paste on your canvas
Resize by 90 and Sharpen
Position to the left of the frame
See my tag for placement
When happy - Layers - Duplicate - Image - Mirror - Merge Down
Erase the tree trunks at the bottom
Open Leaf Pile
I colourised mine to match my tube
Image - Resize by 60 and Sharpen
Position to the right side of the frame
Duplicate and Mirror
Duplicate again and position that one in the middle
Merge all 3 down when happy
Send to the bottom of the layers
Layers - Duplicate - Image - Flip
Merge these 2 layers down when you are happy
Open Paper 9 on your canvas
Colourise to match your tube
Send to the bottom of your layers
Apply a mask of choice
Merge Group
Add a drop shadow to your layers
Merge Visible
Add your correct copyright information and licence numbers
Save as a png
Add ya name
Save again
Done!!
Thursday, 21 July 2011
Tude - PTU
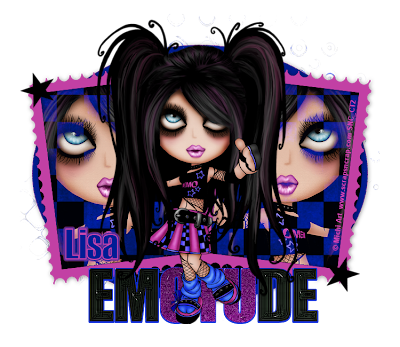 I am using the art of Michi Art which you can find HERE
I am using the Emotude HD Plus pack by Jenn and Sam which you can find HERE
Font of Choice
Filters Used:
Eye Candy 4 - Glass
Xero - Radiance
Open Emotude Template in PSP
Shift - D to Duplicate and delete the original
Delete Raster layers 6, 7 and 13
Copy and paste your tube as a new layer
Position - Resizing if necessary
Apply Xero Radiance - 128,50,128,94
Make Raster 4 the active layer
Selections - Select All - Float - Defloat
Selections - Modify - Expand by 2
Click on your floodfill tool
Choose a colour from your tube
Fill the layer - Select None
Delete Raster 4
Click on Raster 2
Grab your magic wand
Use the same steps as before but choose a different colour from your tube
Click on Raster 11
Repeat the same steps as before
Floodfill with the same colour as your frames or a colour of your choice
Click on Raster 5
Grab your magic wand and click inside the frame
Selections - Modify - Expand by 2
Copy and Paste Paper 1 as a new layer
I colourised mine to match my tube
When happy with positioning
Selections - Invert - Keep Selected
Open a close up of your tube
Paste on your canvas
Position and resize if necessary
On the original close up tube - Image - Mirror
Paste on your canvas and position in the other frame
When happy - Selections - Invert - Delete on both layers - Select None
Delete Raster 5
Merge the 2 close up layers together and change the blend mode to Lighten
Click on Raster 11
Selections - Select All - Float - Defloat
Add a new raster layer
Floodfill using a darker colour from your tube
Delete raster 11
Merge this layer down with layer 9
Apply Eye Candy Glass at the default settings
Make Raster 8 your active layer
Colourise using a colour from your tube
I resized mine by 90
Add a drop shadow to your layers
Merge layers visible
Save as a png
Add your correct copyright and licence numbers
Save again
Add ya name
Done!
Wednesday, 20 July 2011
Wytchy Angel - PTU
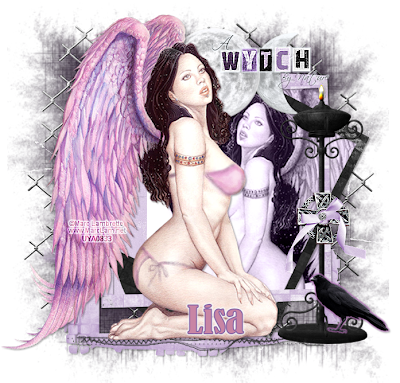
I am using the art of Marc Lambrette which you can find HERE
I am using the PTU kit Gothic Wytch by Rotten Apple Scraps, which i purchased when she was at DSI, but is no longer available now
Mask of Choice
Font of Choice
Open a new image 700x700
Open Frame 3 and paste on your canvas
Resize by 90 - Sharpen
Position towards the bottom of your canvas
Open Frame 5 and paste on your canvas
Position in the centre of your canvas
See my tag for placement
Grab your magic wand and click inside Frame 5
Make sure you click in all parts
Selections - Modify - Expand by 5
Copy and Paste Paper 2 on your canvas
Position - Selections - Invert - Keep Selected
Open an image or a close up of the tube you are using
Position in the frame
Selections - Invert - Delete - Select None
Move the paper layer under the frame
Next move the tube layer under the frame
Change the blend mode to Luminance
Open Triple Moon and paste as a new layer on your canvas
Resize by 80 and Sharpen
Position at the top of your frame
Open the main tube you are using
Resize if necessary and position to the left of the frame
Open Wordart 2 and paste as a new layer
Resize by 50 and Sharpen
Position to the right of the tube
See my tag for placement
Open Candle 2 and paste on your canvas
Resize by 90
Position on the right of your frame
Open Brooch 2 and paste as a new layer
Resize by 55 and Sharpen
Position in the centre of the candle
Open Bow 1 and paste on your canvas
Resize by 60 and Sharpen
Position on top of the brooch
See my tag for placement
Open Crow and paste as a new layer on your canvas
Resize by 70 and Sharpen
Position on the bottom of the candle
Open Backdrop 1 and paste as a new layer on your canvas
Resize by 90 - Sharpen
Move to the bottom of your layers
Open Paper 6 as a new layer
Send to the bottom
Apply a mask of choice
Merge Group
Add a drop shadow to every layer
Merge Visible
Add your correct copyright and licence numbers
Merge Visible - Save as a png
Done!
Monday, 18 July 2011
Fallen Angel - PTU
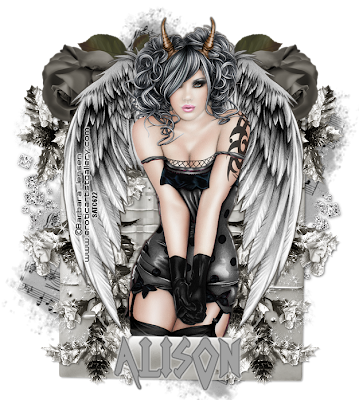
I am using the art of Barbara Jensen which you can find HERE
This is an exclusive tube for SATC and you can find it HERE
I am using the PTU kit Fallen by Hungry Hill with you can find HERE
Font of Choice
Filters Used:
Xero - Radiance - 128, 50, 128, 88
Eye Candy Gradient Glow - On the tube and Name
Open a new image 700x700
Open Frame 2 and paste on your canvas
Resize by 90 and Sharpen
Position in the centre of your canvas
Grab your magic wand and click inside the frame
Selections - Modify - Expand by 3
Open Paper 3 and paste on your canvas
Position - Selections - Invert - Delete
Keep Selected
Open Sparkles and paste as a new layer
Position in the frame
Selections - Invert - Delete - Keep Selected
Open the tube you are using
Resize if needed
Position in the frame
When happy - Duplicate and hide for now
Selections - Invert - Delete on the tube layer
Select None
Move the paper and tube layer under the frame
Unhide your duplicated tube
Grab your eraser and erase any overhanging parts of the tube
Apply Xero Radiance to both tube layers
Apply Gradient Glow to the layers aswell - use a darker colour from your tube
Erase any glow that has appeared on your top tube
Open Angel Twig and paste on your canvas
Image - Flip - Image - Resize by 95
Place on the left hand side of the frame
Duplicate - Image - Mirror - Merge Down
Make sure its under the tube layer
Open Rose and paste as a new layer
Resize by 40 and Sharpen
Position on the top left of the frame, on top of the Angel Twig
Move under the tube layer
Duplicate - Image - Mirror - merge down
Open Music Mask and paste as a new layer
Send to the bottom
Resize by 90
Open Circle and paste as a new layer
Send to the bottom
Resize by 90
Apply Drop shadows to your layers
Merge Visible
Add your correct copyright and licence numbers
Merge Visible - Save as a png
Add ya name - Save again
Done!
Sunday, 17 July 2011
Cluster Frame Tag Show off's!
These 2 Clusters were made using my Sea Breeze Cluster Frame which you can find HERE
The first is by Bossy, gorgeous taggie :)

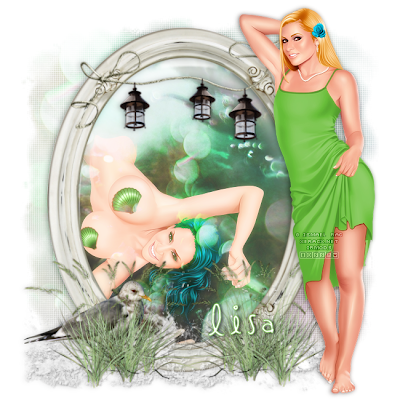 and the second is by Kim, ty so very much Kim, love it!!
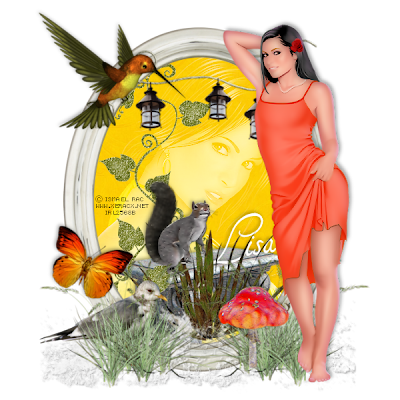 TY so much Bossy and Kim!

 and the second is by Kim, ty so very much Kim, love it!!
 TY so much Bossy and Kim!
Saturday, 16 July 2011
Eva of the Night - PTU
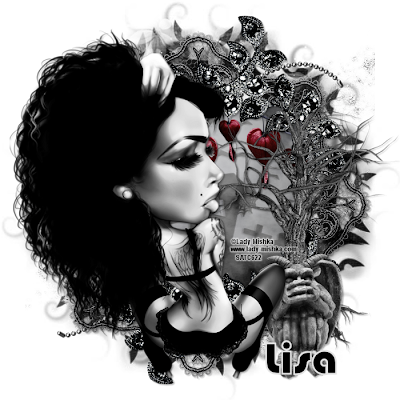
I am using a tube by Lady Mishka which i purchased when she was at SATC, you can now find her HERE
I am using the PTU kit Whatza Ghoul To Do by Hungry Hill which you can find HERE
Mask of Choice
Open a new image 700x700
Open Frame 1 and Paste as a new layer
Position in the centre of your canvas
Click inside with your magic wand
Selections - Modify - Expand by 3
Open Paper 3 and paste as a new layer
When happy with the position
Selections - Invert - Delete - Select None
Open the tube you are using
Resizing if necessary
Position on the left hand side of the frame
Adjust - Hue and Saturation - Both set to 0
Open Tree 1 and paste as a new layer on your canvas
Resize by 80 and Sharpen
Place under the tube layer and position on the right hand side
Open Gargoyle and paste as a new layer
Resize by 40 and Sharpen
Position under the tube layer and place on top of the tree
Open Fog 1 and paste as a new layer
Position on top of the paper layer
Click inside your frame with your magic wand
Modify by 3
Copy and Paste Bleeding-Heart Vine as a new layer
Position inside the frame
Resize by 80 - Sharpen
Selections - Invert - Delete - Select None
I kept the same colour to make an impact but you can colorise if you like!
Open Ballchain and paste as a new layer
Send to the bottom
Resize by 90 and Sharpen
Duplicate - Image - Mirror
Merge these 2 layers together
Open Star Spill and Paste as a new layer
Send to the bottom and move above the ball chain layer
Open Paper 11 and paste as a new layer
Send to the bottom and add a mask of choice
Merge group
Add a drop shadow to every layer
Save as a png
Add correct copyright and licence numbers
Save as a png
Add ya name
Save again and youre done!!
Friday, 15 July 2011
Emo Kitty - PTU
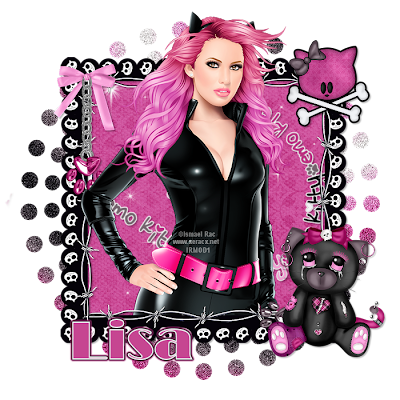 I am using the art of Ismael Rac which you can find HERE
I am using the gorgeous PTU kit Emo Kitty by Jenn and Sam which you can find HERE
Font of Choice
Filters Used:
Xero - Radiance - 128, 50, 128, 78
Open a new image 700x700
Open element 10 and paste as a new layer
Resize by 60 and Sharpen
Position in the centre of your canvas
Grab your magic wand and click inside every part of the frame
Selections - Modify - Expand by 4
Open Paper 8 and paste on your canvas
Selections - Invert - Delete - Keep Selected
Move under the frame
Open the tube you are using and paste on your canvas
Position - When happy - Duplicate and hide for now
Selections - Invert - Delete - Select None
Move under the frame layer
Unhide the duplicate
Making sure its the top layer
Erase the over hanging parts of the tube
Apply Radiance at the settings above to both tube layers
Select the paper layer
Effects - Texture Effects - Blinds - Black - Both boxes checked - OK
Open Element 1 and paste on your canvas
Resize by 40 and sharpen
Position on the bottom right side of the frame
See my tag for placement
Open Element 27 and Paste as a new layer
Send to the bottom
Resize by 80 and Sharpen
Open Element 44 and paste as a new layer
Resize by 80 twice and sharpen
Position below the frame and above the paper layer
Erase any overhanging parts
Grab your magic wand and click inside the frame
Modify by 3 and paste Element 5 as a new layer
Selections - Invert - Delete - Select None
Move under the frame and wordart layers
Open Element 16 and paste as a new layer
Resize by 30 and Sharpen
Position on the top right of the frame
Add a drop shadow to your layers
Merge layers visible
Add your correct copyright and licence numbers
Save as a png
Add your name
Save and your done!!
I have done another tag using the same elements but using a different tube below
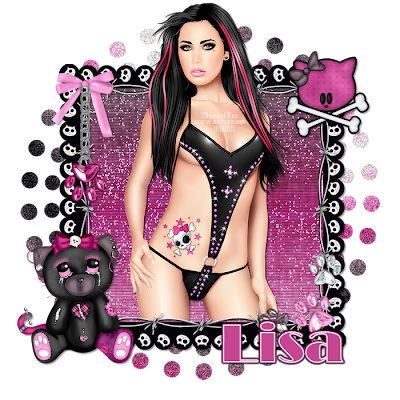
Sunday, 10 July 2011
Sea Siren - PTU

I am using the art of Nicole Brune which you can find HERE
I am using the PTU kit Sea Breeze by Hungry Hill which you can find HERE
Mask of Choice
Font of Choice
Filters Used:
Xero - Radiance - 128,50,128,85
Open a new image 700x700
Copy and Paste Frame 3 as a new layer
I colorised mine to match my tube
Image - Resize by 80 and Sharpen
Position in the centre of the canvas
Click inside the frame with your magic wand
Selections - Modify - Expand by 4
Copy and Paste Paper 2 as a new layer
When happy with positioning
Selections - Invert - Delete - Select None
Move under the frame layer
Change the blend mode to Difference
Effects - Texture Effects - Blinds - Default - White
Click inside the frame with your magic wand
Selections - Modify - Expand by 4
Copy and paste the Boat as a new layer
Resize by 60 and Sharpen
Move towards the bottom of the frame
Selections - Invert - Delete - Select None
Copy and paste the Rocks as a new layer
Resize by 80 and Sharpen
Move below the frame layer and towards the bottom
See my tag for placement
Open Beach Grass 2 and paste as a new layer
Resize by 50 and Sharpen
Move this layer to the top and position on the right hand side of the frame
Click on the paper layer
Copy and paste Anchor as a new layer
Image - Mirror
I colorised mine to match my tag
Resize by 90
Position to the left of the frame
Erase any overhanging parts of the rope at the top
Open Splashes and paste as a new layer
Resize by 80 - Sharpen
Position on the rocks layer towards the bottom
Duplicate and move up
Duplicate again and move up slightly
Open your main tube and paste on your canvas
Position in the centre of the frame
When happy with placement
Duplicate and hide for now
Click the frame layer
Grab your magic wand
Selections - Modify - Expand by 4
Selections - Invert - Delete - Select None
Move this under the frame layer
Unhide your duplicated tube
Make sure she is at the top
Erase a little bit of the tube to make it look as if she is coming out of the frame
Open Sand and paste as a new layer
Send to the bottom
Apply a mask of choice - Merge Group
Apply some wordart of choice
Apply Drop shadows to your layers
Merge Visible
Add your correct copyright information and licence numbers
Save as a png
Add your name
Done!
Sea Breeze Cluster Frame - FTU
Aloha - PTU
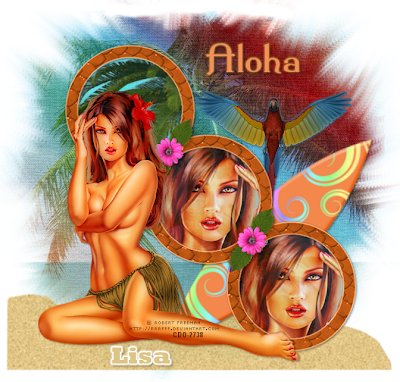 I am using the art of Robert Freeman which you can find HERE
I am using the PTU Scrapkit Aloha by Le Paradis Du Scrap which you can find HERE
Mask of Choice
Font of Choice
Filters Used:
Eye Candy 4 - Gradient Glow
Open a new image 700x700
Copy and Paste Papier 1 as a new layer
Apply a mask of Choice
Merge Group
Copy and Paste Papier 6 as a new layer
Image - Mirror
Apply the same mask as before
Merge Group
Change the blend mode to Multiply
Image - Resize by 90
Copy and Paste Cadre 1 as a new layer
Image - Resize by 65 and Sharpen
Position in the middle of the mask layers
See my tag for placement
Grab your magic wand and click inside all 3 frames
Selections - Modify - Expand by 3
Copy and Paste Papier 11 as a new layer
Position in the frames
When Happy - Selections - Invert - Delete
Keep selected
Open a close up of your tube
Position in your second frame
Duplicate and postion in the third frame
Selections - Invert - Delete on both the tube layers
Merge the 2 tube layers together
Move the paper layer below the frame
Change the opacity to about 80
And then move the tube layers under the frame
Change the opacity to 82
Open Planche 2 and paste as a new layer
Resize by 60 and Sharpen
Image - Rotate - Free Rotate - 45 Right
Move this underneath the frame layer
See my tag for placement
Adjust - Softness - Soften
Open Peroquet 1 and paste as a new layer above the surfboard layer
Resize by 20 and then by 60 - Sharpen
Place next to the surfboard
Apply Gradient Glow, 3 - Blue
Open Sable and paste as a new layer
Image - Mirror
Image - Resize by 80 - Sharpen
Send to above the mask layer
Adjust - Soften - Soften More
Open your main tube and paste on your canvas
Position on the left side of the tag
Make sure she is at the top
Add your correct copyright and licence numbers
Save as a png
Add your name
Done!
Friday, 8 July 2011
Rock Calling - PTU

I am using the art of Marsha aka FallnAngel which i purchased when she was at MPT, you can find her HERE
I am using the PTU kit Rock Love also by Marsha which is no longer available
Mask of Choice
Font of Choice
Open a new image 700x700
Open Element 49 and paste on you canvas
Position in the centre of your tag
Grab your magic wand
Click inside the frame
Selections - Modify - Expand by 4
Open Paper 5 and paste as a new layer
Position inside the frame
Keep Selected
Open Element 17 and paste as a new layer
Position in the centre of the frame
Selections - Invert - Delete on both layers - Select None
Move both layers under the frame making sure the paper is the bottom layer
Open Element 45 and paste as a new layer
Resize by 50 and sharpen
Place on the right hand side of the frame
See my tag for placement
Layers - Duplicate - Image - Mirror
When happy with placement merge these layes together
Open your tube and paste on your canvas
Resize if needed
Position in the centre of the frame
Open Element 12 as a new layer
Resize by 60 and Sharpen
Position on the jeans of the tube
See my tag for placement
Open Element 20 as a new layer
Resize by 80 and Sharpen
Position on the left hand side of the tag
Move this below the eye layers
See my tag for placement
Open Element 26 and paste as a new layer
Position on the left side of the frame
Resize by 70 and Sharpen
Duplicate - Image - Mirror
Position the duplicated tube lower than the one on the left and using your deform tool move it so it angles the heart a little bit
Open Paper 6 and paste as a new layer
Send to the bottom
Apply a mask of choice - Merge Group
Add correct copyright and licence numbers
Save as a png
Done!
Lingering Sadness - PTU
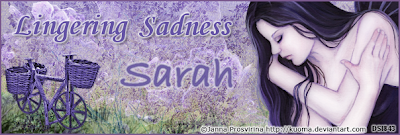
I am using the art of Janna Prosvirina which you can find HERE
I am using the scrapkit Dewdrop Inn by Sarah aka Hungry Hill which you can find HERE
My Wordart which you can find HERE
Font of Choice
Filters Used:
Xero - Porcelain - Set Blue to 0, Softness 48, Strength 38
Open a new image 600x200
Open Paper 1 on your canvas
Paste as a new layer
Move the paper up so the grass bit shows
Open Paper 7 on your canvas
Paste as a new layer
I colorised mine to match my tube
Chnge the blend mode to Darken
Open your tube on to your canvas
Paste as a new layer and position to the right of your tag
Layers - Duplicate - Image - Mirror
Move to the left of the tag
I moved it up so you could see the flowers
Using your eraser tool, erase the bits over your main tube
Change the blend mode to Screen on the duplicated tube
Apply Xero Porcelain at the settings above to the main tube
Open Tree and paste as a new layer
Move to the left of the tag
Change the blend mode to Difference
Layers - Duplicate
Move to the right of the tag
Erase any deeper colour bits you may have
Open Woven Bicycle and paste as a new layer
I colorised mine
Resize by 40 twice and sharpen
Move to the left of the tag so it looks as if its on the grass
See my tag for placement
Open the wordart i have supplied
Paste on your canvas and position towards the top
Add drop shadows to your layers
Image - Add Borders - Colour to match your tag - Size 2
Add your correct copyright and licence numbers
Save as a png
Add your name
For the Avatar:
Open a new image 150x150
On your main tag select a section in the middle
Edit - Copy
Go back to your avatar
Selections - Select All
Edit - Paste into selection
Select None
Open your main tube
Copy and Paste into the avatar
Position
When happy crop your image
Image - Add border - Same as before
Add your copyright and correct licencing information
Save as a png
Add your name
Done!
Sunday, 3 July 2011
Saturday, 2 July 2011
To the Night - PTU
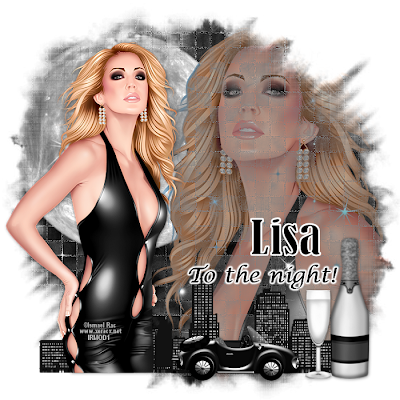
I am using the art of Ismael Rac which you can find HERE
I am using the PTU kit Night Out by Creative Candy Obsessions which you can find HERE
This was exclusively made for Ismaels Store
Mask of Choice
Font of Choice
Filters Used:
Xero - Radiance - 128,50,128, 73
Open a new image 700x700
Open Element 1 and paste as a new layer
Resize by 75 and Sharpen
Position to the bottom of the Canvas
Open your tube and place to the left of the skyline
Apply Xero Radiance - settings above
Open Paper 1 and paste on your canvas
Send to the bottom and add a mask of choice
Merge Group
Open a close up of your tube
Place on the right side of the frame
Apply the same mask as before
Make sure its above the other mask layer
Change the blend mode of the close up to Exlclusion and reduce the opacity to 74
Click on your mask layer
Selections - Select all - Float - Defloat
Copy and Paste Element 2 as a new layer
Selections - Invert - Delete - Select None
I erased the star that was on the close up's face
Open Element 26 and paste as a new layer
Resize by 40 and Sharpen
Position on the bottom right hand side of the tag
See mine for placement
Open Element 27 and paste as a new layer
Resize by 50 and sharpen
Position next to the champagne bottle
Open Element 3 and paste on your canvas
Move to above the mask layer
Apply the same mask as before
Merge Group
Erase any parts of the mask that are on the close up
Open Element 39 and paste as a new layer
Resize by 40 and sharpen
Position between your main tube and the glass
I added some Word Art to my tag but of course its up to you!
Apply drop shadows to every layer
Merge Visible
Add your correct licence information and the correct copyright
Save as a png
Done!
Emo Pink - PTU
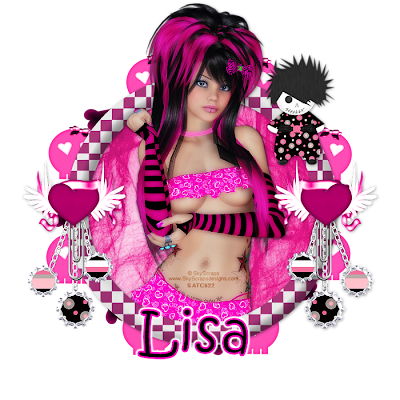 I am using the art of Marie aka SkyScraps which you can find HERE
I am using the PTU kit Rise of the Emo by Bello Scarto which you can find HERE
Font of Choice
Filters Used:
Xero - Moonlight
Open a new image 700x700
Open Element 27 and paste on your canvas
Open the tube you are using
Resize if necessary
When happy with placement
Duplicate and hide for now
Grab your magic wand
Click inside the frame
Selections - Modify - Expand by 3
Selections - Invert - Delete on your tube layer
Move under the frame
Unhide the duplicated tube
Using your eraser tool, erase any overhanging parts of the tube
Click inside your frame with your magic wand
Selections - Modify - Expand by 3
Open Paper 5 and paste as a new layer
Selections - Invert - Delete - Select None - Move under the frame and original tube layer
Apply Xero - Moonlight at the default settings
Open Element 42 and paste as a new layer on your canvas
Resize by 50 and Sharpen
Position in the middle left hand side of the frame
Duplicate - Image - Mirror - Merge Down
Open Element 8 and paste on your canvas
Send to the bottom
I colourised mine to match my tag
Open Element 12 and paste as a new layer
Image - Resize by 50 and Sharpen
Move under the Paperclip layer
Layers - Duplicate - Image - Mirror
Merge Down
Open Element 56 and paste as a new layer
Image - Resize by 40 and Sharpen
Place on the top right of the frame
See my tag for placement
Open Element 52 and paste as a new layer
Image - Resize by 40
Position on the left side of the frame
Duplicate - Image - Mirror
Merge Down
I colourised mine to match my tag
Add drop shadow to every layer
Merge Visible
Add your copyright and licence numbers
Save as a png
Done!
New Cluster Frame - FTU
Subscribe to:
Comments (Atom)


