I am using the art of Ismael Rac which you can find HERE
I am using the gorgeous FTU kit Music Princess Mini which you can find HERE
Font of Choice
Filters Used:
Penta - Dot and Cross
Xero - Radiance
Open a new image 700x700
Open element 8 and paste as a new layer
Position in the centre of your canvas
Open element 9 and paste on your canvas
Image - Rotate - Free Rotate - 40 left
Open the tube you are using and paste on your canvas
Resize by 90 if using the same tube as me - Sharpen
Place on the 1st frame
Click inside the frame with your magic wand
Modify by 3
Duplicate your tube and hide for now
Selections - Invert - Delete - Select None
Move under the frame
Unhide the duplicated tube and erase any overhanging parts
Click inside the frames with your magic wand
Modify by 3
Paste paper 2 on your canvas
Selections - Invert - Delete - Select None
Move under the frame and original tube layer
Apply Penta Dot and Cross - Default settings
Open element 2 and paste on your canvas
Resize by 80 and Sharpen
Place above the star layer and positon near the top
Open element 7 and paste on your canvas
Resize by 60 and Sharpen
Position under the frame and move towards the top of the frame
Duplicate and move down
See my tag for placement
Open a close up of your tube
click inside the frames and expand by 3
Position the close up and press delete
Move under the frames layer
Change the blend mode to Luminance Legacy
Apply Xero Radiance on the tube layers
Settings:128, 50, 128, 88
Open element 13 and paste as a new layer
Place under the frames and position on the disco ball
Duplicate and move down
Erase any sparkles that show up on your tube layers
Open element 10 and paste as a new layer
Resize by 80 and Sharpen
Position on top of the disco ball
Give everything a drop shadow
Merge layers Visible
Add correct copyright and licence numbers
Done!!
Monday, 25 April 2011
Monday, 18 April 2011
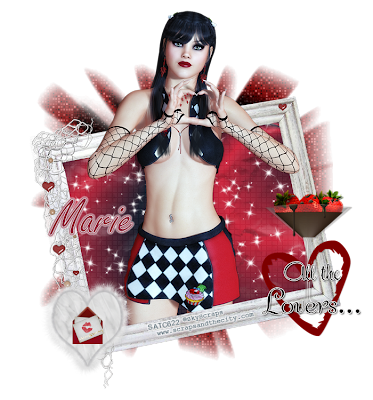
All the Lovers
I am using the gorgeous tube Sonia by Marie aka SkyScraps which you can find HERE
This is a special tube and all 100% of the proceeds will go towards Helping the Japanese after all the terrible things that has and still is happening over there
I am also using thte gorgeous PTU kit All the Lovers by Marie which you can find HERE
Font of Choice
Filters Used:
Penta - Dot n Cross - Default Settings
Open a new image 700x700
Open E44 and paste as a new layer
Resize by 80 and Sharpen
Place towards the bottom a lil
Click inside the frame with your magic wand
Modify by 3
Find 2 colours from your tube
Make a Gradient - fore and back
Make a new layer and floodfill with the gradient you have
Select None and move under the frame layer
Apply Penta Dot and Cross and press OK
Open the stars layer and paste on your canvas
Grab your magic wand and click inside
Modify by 2 and position the starts
Duplicate and place where you like
When you're happy
Selections - Invert - Delete - Select None
Move under the frame layer
Open E57 and paste as a new layer on your canvas
Resize by 30 and Sharpen
Place on the left hand side of the frame
Open E49 and paste on your Canvas
Resize by 10 - Sharpen and place in the middle of the heart you just pasted
Open the tube you are using and place on the frame
Grab your magic wand and click inside the frame
Modify by 3 and place the tube where you like
Duplicate and hide for now
Invert - Delete and move the tube under the frame layer
Un-hide your duplicated tube layer and erase any overhanging parts
Open E53 and paste on your Canvas
Resize by 50 and Sharpen
Position on the right hand side of your frame
Copy n Paste E19a and paste on your canvas
Resize by 60 and Sharpen
Place on top of the glass on the right hand side of the frame
Open E59 and paste at the bottom of all the layers
No need to resize this layer
Open E60 and paste on top of the red layer
Resize by 80 and Sharpen
Move up so you can see it a lil
Add Drop Shadows to every layer
Add correct copyright and licence numbers
Merge Visible and save as a png
Done!
Saturday, 9 April 2011
Tut Results!
Thursday, 7 April 2011
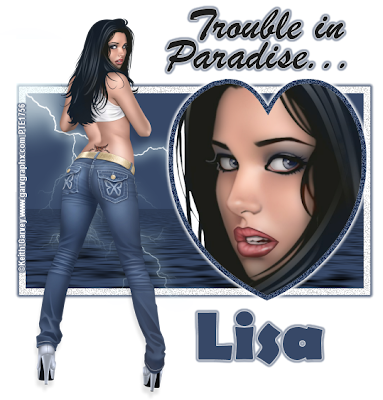
Trouble in Paradise - FTU
I am using the art of Keith Garvey which you can find HERE
This is a no scraps tut, it uses filters and your preset shapes
Feel free to adjust the settings as you wish, mine are only a guide!
This is quite a quick tutorial
Ok, filters used:
Eye Candy 4 - Gradient Glow
DSB Flux - Bright Noise
Alien Skin Xenofex 2 - Lightning
Flaming Pear - Flood
Xero - Porcelain
Open a new image 700x700
Open the tube you are using
Position to the left of your canvas
Grab your preset tool on rectangle
Make your foreground a lighter colour of your tube
and the background a darker shade from your tube
Line Style - Solid
Width - 10
Draw out a rectangle in the centre of your canvas
Use my tag as a reference
Convert to raster layer
Grab your magic wand and click inside the main frame
Add a new raster layer and floodfill using a colour from your tube
Apply Flaming Pear - Flood
Use the Default settings
Keep selected and now use your Xenofex Lightning Filter
Arc Thickness - 9
Jaggedness - 79
Leave Branching and Speed at the default settings
OK, selections, invert, delete and select none
Now grab your magic wand and click inside the lighter part of your rectangle shape
Apply DSB Flux - Bright Noise at default
Select None
Grab your preset shapes again and find a heart shape
This time reverse the colours
Foreground - lighter colour from your tube
Background - darker colour
Draw out a heart to the right hand side of the frame
convert to raster and position
Grab your magic wand and click inside the heart
Open a close up of your tube
I mirrored mine
Paste on your canvas and postion
Selections - Invert - Delete - Select None
Lower the opacity to 90
Apply Xero - Porcelain
Make sure blue is set to 0 and ok
As before grab your magic wand and click inside the darker part of your heart shape
Apply DSB Flux as before
Now apply Gradient Glow
Width 3
I used a darker colour for the rectangle and a lighter for the heart
Now for the WordArt
I made my own and when i finished writing it out
I applied gradient glow with the colour white and then again with the blue
Add your correct copyright info and licence numbers
Add your name and save!
Done!
Saturday, 2 April 2011
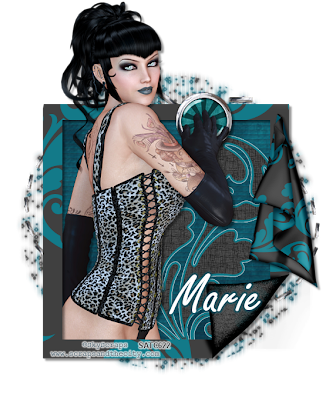
Push the Button - FTU
I am using the art of Marie, this tube is called Samy and you can find her HERE
I am using a gorgeous FTU kit by Candy's Treat's called Missy which you can find HERE
Mask of Choice
Font of Choice
This is a quick copy and paste tut, feel free to use my tut as a guide and let your mojo run free!
Open a 700x700 image
Copy and Paste Frame6 as a new layer
Resize by 95 and Sharpen
Position to the centre and move down a little bit
Click inside your frame with the magic wand
Modify by 3
Find Block1 in the paper file
Copy n Paste the paper on your canvas
Selections - Invert - Delete
Move this layer under your frame layer
Effects - Texture Effects - Blinds
W - 8 O - 30
Horizontal
Colour - Dark Grey - OK
Open Brad1 and paste on your canvas
Resize by 125 and Sharpen
Place on the top right of your frame
Open the tube you are using
Place on the left hand side of the frame
Position so that her hand is placed on the brad
If there are any overhanging bits
Duplicate and hide the tube for now
Click inside the frame with your magic wand
Modify by 3 and Invert - Delete
Move under the frame layer
Unhide the duplicated tube and erase any bits you dont want showing
Open Swirl
Copy and Paste on the paper layer
Move to the right and position
Grab your magic wand
Click inside the frame
Modify by 3 and delete on the swirl layer
Open Folded Paper1 and paste on your canvas
Resize by 50 and sharpen
Place on the right hand side on the frame
Open Circle2 and paste on your canvas
Place to the left and duplicate
Image - Mirror
Merge down
Send to the bottom
Open Paper6 and paste on your canvas
Send to the bottom and apply a mask of choice
Merge Group
I resized mine by 110 and then sharpened
Add all correct Copyright and Licence Information
Add ya name
Save as a png
Done!
Subscribe to:
Posts (Atom)