Wednesday, 25 January 2012

Chrome Bride - PTU

I am using the art of DiMary which you can find HERE This is an Exclusive tube so please make sure you have the correct licence to use it I am using the PTU Scrapkit by Heppy called Red Chrome Fantasy and you can find that HERE Mask of Choice Font of Choice Open a new image 700x700 Open Element 26 and paste as a new layer Resize by 50 and Sharpen Position in the centre of your canvas Open Element 23 and paste as a new layer Resize by 40 and Sharpen Position at the top of the frame Click inside the frame with your magic wand Modify by 4 and open Paper 5 on your canvas Resize by 60 - Sharpen - Selections - Invert - Delete - Keep Selected Open your tube as a new layer Position in the frame - When happy - Duplicate and hide for now Selections - Invert - Delete - Select None Move the paper and the tube layer under the frame Unhide your duplicated tube and use your eraser tool to erase the overhanging part Open Element 28 and paste as a new layer Resize by 50 and then by 40 and Sharpen Position on the bottom left of the frame Open Element 9 and paste as a new layer Resize by 15 and Sharpen Position on the right of the frame - Duplicate and position below See my tag for placement When happy - Duplicate and position on the left - Merge Down Move under the tube layer Open Element 14 and paste on your canvas Image - Resize by 50 and Sharpen - Position on the left Duplicate - Image - Mirror - Merge down when happy Move to the bottom Open Paper 10 and paste as a new layer Send to the bottom and apply a mask of choice - Merge group Add drop shadows to your layers - Merge Visible Apply correct copyright and licence numbers - Merge Down Save as a png - Add your name - Save again - Done

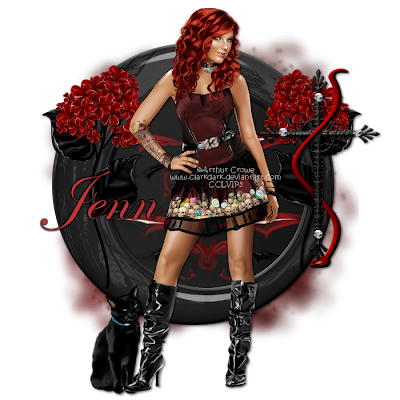
Gothic Taylor - PTU

I am using an Exclusive tube by Arthur Crowe This isnt for sale but you can find his other art HERE I am using the PTU Scrapkiy Black Romantic by Heppy which you can find HERE Mask of Choice Font of Choice Open a new image 700x700 Open Element 8 and paste as a new layer Resize by 50 and Sharpen Position in the centre of your canvas Click inside the frame with your magic wand Modify by 5 and paste Paper 3 on your canvas When happy - Selections - Invert - Delete - Keep Selected Open Element 15 and paste as a new layer Resize by 30 and Sharpen Position on the bottom of the frame Duplicate and position at the top See my tag for placement - Merge Down when happy Selections - Invert - Delete - Select None Move the paper and the element layer under the frame Open your tube as a new layer Position in the centre of your canvas Open Element 9 and paste as a new layer Resize by 20 and Sharpen Position on the right of the frame Open Element 14 and paste as a new layer Resize by 30 - Sharpen and position on the previous layer See my tag for placement Open Paper 7 and paste as a new layer Send to the bottom and apply a mask of choice - Merge Group Add drop shadows to your layers - Merge Visible Apply your correct licence number and copyright information Merge Down - Save as a png - Add your name - Save again - Done

Monday, 16 January 2012

Rock Angel - PTU

I am using the art of Arthur Crowe which you can find HERE I am using the PTU Scrapkit Don't Call Me Emo by Jay aka Bello Scarto and you can find that HERE Mask of Choice Font of Choice Open a new image 700x700 Open Element 10 and paste as a new layer Image - Resize by 225 and Sharpen More Grab your magic wand and click inside the frame Modify by 6 - Open Paper 4 and paste as a new layer Position in the frame When happy - Selections - Invert - Keep Selected Open your tube as a new layer Position in the frame - When happy - Duplicate and hide for now Selections - Invert - Delete - Select None Move both the paper and tube layer under the frame Unhide your duplicated tube and using your eraser tool - Erase the bottom bit of the tube Open Element 16 and paste as a new layer Resize by 40 and Sharpen Position on the left of the frame Open Element 8 and paste as a new layer Resize by 45 and Sharpen Position on the right of the frame Duplicate twice more and position under the original heart See my tag for placements When happy - Merge Down all 3 heart layers Open Element 4 and paste as a new layer Resize by 90 and Sharpen Send to the bottom and move to the top Open Paper 8 and paste as a new layer Send to the bottom and apply a mask of choice - Merge group Add drop shadows to your layers - Merge Visible Add your correct copyright and licence numbers Save as a png - Add your name - Save again - Done

Love - PTU

I am using the art of KT Bryan, i purchased this when she was at CDO, she isn't selling anywhere else at the moment I am using the PTU Scrapkit Valentine Love by HF-Projekte which you can find HERE Mask of Choice Font of Choice Filters Used: Xero - Porcelain - Default (Set blue to 0) Open a new image 700x700 Open Element 1 and paste as a new layer Resize by 50 and Sharpen Position in the centre of your canvas Grab your magic wand - Click inside and modify by 6 Open Paper 7 and paste as a new layer I moved the paper up so the black pattern was showing When happy - Selections - Invert - Delete - Select None Open Element 35 and paste as a new layer Resize by 40 and Sharpen Image - Rotate - Free Rotate - Left 35 - Position on the top left of the frame Open Element 13 and paste as a new layer Resize by 55 and Sharpen Send to the bottom and position Open your tube as a new layer and position on the right of the frame Open Element 31 and paste as a new layer Resize by 25 and Sharpen Position in the middle of the frame next to your tube See my tag for placement Apply Xero - Porcelain at the settings above Open Paper 9 and paste as a new layer Send to the bottom and apply a mask of choice Merge Group - Add drop shadows to your layers - Merge Visible Add your correct copyright and licence information Merge Down - Save as a png - Add your name - Save again - Done

Tuesday, 10 January 2012

Gothic Candy - PTU

I am using the art of Lix which you can find HERE
I am using the gorgeous PTU Scrapkit Hot Candy by CCO which you can find that HERE Mask of Choice Font of Choice Xero - Radiance - 128, 50, 128, 67 Open a new image 700x700 Open Element 1 and paste as a new layer Resize by 70 and Sharpen - Position in the centre of your canvas Selections - Modify - Expand by 5 Open Paper 5 - Resize by 80 and Sharpen Position in the frame - Selections - Invert - Delete - Keep Selected Open a close up of your tube - Position on the left hand side of the frame When happy - Selections - Invert - Delete - Select None Move the paper and tube layers under the frame Lower the opacity to 65 Open Element 11 and paste as a new layer Resize by 60 and Sharpen Position on the top left of the canvas Layers - Duplicate - Image - Rotate - Free Rotate - Left 90 - Merge Down Layers - Duplicate - Image - Mirror - Image - Flip - Position on the frame and merge down when happy See my tag for placement Open Element 22 and paste as a new layer Resize by 45 and Sharpen Position on the bottom left corner of the frame Duplicate - Image - Mirror - Flip - Merge down when happy Click inside the frame with your magic wand and modify by 5 Open your tube as a new layer Position on the right hand side of the frame - Layers - Duplicate and hide for now Selections - Invert - Delete - Select none and move the tube under the frame Unhide the duplicated tube and using your eraser tool - Erase the bottom overhanging parts of the tube Apply Xero Radiance at the settings above to both the tube layers Open Paper 6 and paste as a new layer Move to the bottom and apply a mask of choice - Merge Group Add correct copyright and licence information - Merge Down Save as a png - Add your name - Save again - Done

Hard Candy - PTU

I am using the art of Arthur Crowe which you can find HERE I am using the gorgeous PTU Scrapkit Hot Candy by CCO which was made to match the tube, and you can find that HERE Mask of Choice Font of Choice Filters Used: Xenofex - Constellation - Default - Keep original image checked Xero - Radiance - 128, 50, 128, 43 Open a new image 700x700 Open Element 1 and paste as a new layer Image - Rotate - Free Rotate - 90 Left - Resize by 70 and Sharpen Position in the centre of your frame Click inside with your magic wand - Modify by 5 Open Paper 7 and paste as a new layer Position in the frame - Selections - Invert - Delete - Keep Selected Open a close up tube onto your canvas Position in the frame - When happy - Selections - Invert - Delete - Select None Move the paper and tube layers under the frame Change the Blend Mode of the tube to Luminance Open Element 13 and paste as a new layer Resize by 30 and Sharpen Position on the bottom right corner of the frame Open Element 14 and paste as a new layer Resize by 25 and Sharpen Position on the left of the previous layer Open Element 17 and paste as a new layer Resize by 20 and Sharpen Position underneath the previous layer and move to the right Layers - Duplicate - Resize by 80 and position to the left of the original See my tag for placement Open Element 21 and paste as a new layer Resize by 70 and Sharpen - Send to the bottom Open your main tube as a new layer Position to the left of the frame - Apply Radiance at the settings above Open Paper 1 and paste as a new layer Send to the bottom and resize by 80 - Sharpen Apply a mask of choice - Merge Group Layers - Duplicate - Resize by 80 Selections - Select all - Float - Defloat - Layers - New Raster - Floodfill with a colour that matches your tube - Select None Delete the duplicated mask layer - Merge the two mask layers together Apply Xenofex Constellation at the settings above Add drop shadows to your layers - Merge Visible Add your correct copyright and licence numbers - Merge Down Save as a png - Add your name - Save again - Done
Dark Valentine - PTU

I am using the art of Ismael Rac which you can find HERE I am using the PTU Scrapkit Black Romantic by HF-Projekte and you can find that HERE Font of Choice Filters Used: Alien Skin Xenofex - Sparkle - Default and remember to check the keep original image Open a new image 700x700 Open Element 8 and paste as a new layer Resize by 50 and Sharpen - Position in the centre of your canvas Click inside with your magic wand Selections - Modify - Expand by 3 Open Paper 6 and paste as a new layer - Resize by 80 and Sharpen Position in the frame - Selections - Invert - Delete - Keep Selected Open your tube and position in the centre of the frame Duplicate when happy with positioning Selections - Invert - Delete - Select None Move the paper and tube layer under the frame Apply Xenofex Sparkle to the paper layer Unhide your duplicated tube and using your eraser tool - Erase the bottom overhanging part of the tube Open Element 10 and paste as a new layer Resize by 35 and Sharpen Position on the right hand side of the frame Open Element 20 and paste as a new layer Image - Mirror - Image - Resize by 35 and Sharpen Position on the left of the frame Open Element 16 and paste as a new layer Resize by 30 and Sharpen Position to the top left of the frame Move to the bottom when happy with the positioning Open Element 5 and paste as a new layer Resize by 50 and Sharpen Send to the bottom and arrange to your liking Apply drop shadows to your layers - Merge Visible Add your correct copyright and licence numbers - Merge Down Save as a png - Add your name - Save again - Done

Monday, 9 January 2012

Pink Fae - FTU

I am using another gorgeous Exclusive tube by Arthur Crowe You can find Arthur's other artwork HERE I am using the FTU Scrapkit Sweet Dreams by Twinky and you can find this HERE Mask of Choice Font of Choice Open a new image 700x700 Open Doodle Frame 2 and paste as a new layer Image - Resize by 80 and Sharpen Position in the centre of your canvas Click inside all parts of the frame using your magic wand Selections - Modify - Expand by 6 - Open Paper 17 and paste as a new layer Position in the frame - Selections - Invert - Delete - Keep Selected Open your tube as a new layer Resize if necessary and position in the frame When happy - Layers - Duplicate and hide for now Selections - Invert - Delete - Select None Move both the paper and tube layers under the frame Unhide your duplicated tube and erase the overhanging parts Open Element 5 and paste as a new layer Image - Resize by 20 and Sharpen Position next to the flower on the left hand side of the frame Layers - Duplicate - Position next to the original - Merge Down Layers - Duplicate twice - Image - Mirror and position on the right hand side The other duplicate - Move to the top of the frame Merge Down when happy Open Butterfly 2 and paste on your canvas Image - Resize by 30 and Sharpen Position on the top right hand corner of the frame Using your deform tool - Angle it to fit the frame - See my tag for placement Layers - Duplicate - Image - Mirror - Merge Down Open Wordart 1 and paste as a new layer Resize by 60 and Sharpen Position on the top left hand of the frame Open Paper 18 as a new layer Send to the bottom and apply a mask of choice - Merge Group Duplicate and resize by 80 Selections - Select all - Float - Defloat - New Raster Layer Floodfill with white - Select None Delete the copied original mask layer Apply drop shadows to your layers - Merge Visible Add correct copyright and licence numbers - Merge Down Save as a png - Add your name - Save again - Done

Candy Girl - PTU

I am using the gorgeous Exclusive tube by Arthur Crowe You can find Arthur's other artwork HERE I am using the PTU Scrapkit Smooches by CCO which you can find HERE Mask of Choice Font of Choice Filters Used: Xero - Radiance - 173, 203, 21, 85 Open a new image 700x700 Open Element 42 and paste as a new layer Resize by 110% - Sharpen - Position in the centre Grab your magic wand and click inside the frame Modify by 3 - Open Paper 15 onto your canvas - Position in the frame - I mirrored mine Selections - Invert - Delete - Keep Selected Open your tube onto your canvas Resizing if necessary - Position in the centre of the frame When happy - Duplicate and hide for now Selections - Invert - Delete on the tube layer - Select None Move both the paper and tube layer under the frame Unhide the duplicated tube and making sure its the top layer Grab your eraser tool and erase the overhanging parts of the tube Apply Xero Radiance to both the tube layers at the settings above Open Element 78 and paste as a new layer Resize by 50 and Sharpen Position on the top left of the heart frame Using your deform tool - Angle it so it fits the frame See my tag for placement - When Happy Layers - Duplicate - Image - Mirror - Merge Down - Move under the tube layer Open Element 59 and paste as a new layer Position above the paper layer and move to the right of the frame Layers - Duplicate - Image - Mirror - Merge Down Click inside the frame with your magic wand Modify by 3 - Selections - Invert - Press Delete - Select None Open Element 76 and paste as a new layer Resize by 60 and Sharpen Image - Rotate - 45 - Left - Layers - Duplicate - Image - Mirror - Position and Merge Down Open Element 79 and paste as a new layer Image - Resize by 60 and Sharpen Position on the lolly sticks - See my tag for placement Duplicate - Image - Mirror - When happy - Merge Down Grab your eraser tool and erase the bottom of the lolly sticks Open Paper 18 and paste as a new layer Send to the bottom - Apply a mask of Choice Merge Group - Apply drop shadows to your layers - Merge Visible Add your correct copyright and licence information - Merge Down Save as a png - Add your name - Save again - Done