Tuesday, 29 September 2009

Delicate Black n White Garv

I am using the art of Keith Garvey which you can find HERE I am using the gorgeous PTU kit Coconut Creme which you can find HERE Font of choice Open new image 500x500 Copy n Paste frame2 on your canvas Image - Resize by 60 Adjust - Sharpness - Sharpen Copy and Paste your tube If you are using the same one you need to resize her by 80 Layers - Duplicate and move under the frame Grab your eraser tool and erase any overhanging bits Get your magic wand and click inside the frame - Modify by 2 Open paper2 - Resize by 50 Copy n paste on your canvas Selections - Invert - Delete - Selections - Select none Move this under your frame and tube Open up flower1 Image - resize by 50 and then 80 Open up flower 2 and resize by 20 Place on top of flower1 Duplicate and place on the bottom right hand side Open up butterfly1 Image - Resize by 50 Place on the side of the frame - Layers - Duplicate - Image - Mirror Open up bow4 Resize by 50 and post on the top right hand side of the frame Open up heart2 and resize by 50 Place on the bottom left hand side of the frame Ok, place any more elements of choice Add all correct copyright and licence info Give all layers a drop shadow Merge all layers together Crop if necessary n thats it!! Done x

Pretty Rac

I am using the fab art of Ismael Rac which you can find HERE I am using the gorgeous PTU kit by Ivory Designs called Coconut Creme which you can get HERE Font of choice Open new image 500x500 Open frame3 and paste on your canvas Image - resize by 90 Grab your magic wand and click inside Selections - Modify - Exland by 4 Open up paper1 - Selections - Invert - Delete - Selections - Select none Open up your tube of choice and grab your magic wand again Click inside frame again and expand by 4 Place your tube on the frame then selections - invert - delete on the tube layer Move this underneath the frame Give the frame and the tube a drop shadow Open up dragonfly2 Reisize by 50 I used my deform tool to put this at an angle Place on the top left hand side - Drop shadow Open up star2 Resize by 50 Layers - Duplicate and resize by 70 - Duplicate again and resize by 70 again I arranged these and then merged them together Drop shadow them Layers - Duplicate - Image - Mirror - Image - Flip Add all correct copyright n licence numbers Add your name Merge visible Crop if necessary Done!!

Monday, 28 September 2009

Dotty Chatzoudis - 3rd tut of the day lol

I am using the art of Elias Chatzoudis which you can find HERE I am using the gorgeous FTU kit by Marta called Dotty which you can find HERE I am using wslmask241 which you can find HERE Font of choice - I used Comic Sans for the writing in the stud Open new image Copy and Paste paper3 onto the canvas Layers - new mask from Image - Merge group Open wire1 - Image - Resize by 90 Place over the mask Open the tube you are using and place on the left hand side Open up flower3 and Copy n Paste on the canvas Image - resize by 50 and then 70 Place on the top right hand side of your tag Repeat with flower2 and place just over flower2 Open up stud2 Place in the middle of your tag I wrote Girl's Rule on it but it's up to you! Give everything a drop shadow Put your name on it Place all correct licence number and copyright Merge Visible Crop if necessary Done!!

Another tut!! - Witchy Garv

I am using the sexy art of Keith Garvey which you can find HERE I am using the fab PTU kit called A Lil Witch O Gold by the talented Stina which you can find HERE Font of choice Open new image 500x500 Copy n Paste paper2 as new layer Get the tube you are using and place on the left hand side Resize if necessary Open up teddyglobe and paste on your canvas Resize by 50 and then 90 Place on the right hand side Open up couldron1 and paste on your canvas Image - Resize by 50 and then 70 Place above the teddyglobe Open up boo1 Resize by 40 and tehn by 80 Place at the top of your canvas Open spiderweb2 Resize by 50 and place under the boo sign I erased the web bit under the o so it looks as if its holding the boo sign up Open up bat1 Resize by 20 and place above your tube and below the boo sign Give everything a drop shadow Put all correct copyright and Licence numbers on your tag Merge all Crop if necessary Thats it!

New Tut - Goth Girl Grieves

I used the work of Deborah Grieves which you can get HERE Scrapkit of Choice Font of choice Mask of choice Open new image 500x500 Get your tube n copy n paste on canvas I resized mine by 90 Give it a drop shadow Open paper7 Image - Resize by 80 Copy n Paste at the bottom of the canvas Open a mask of choice - Layers - New mask from image - Merge group Copy n Paste wire 2 above the mask Drop shadow it Copy n Paste glitz - Image - Resize by 90 Place above the mask layer but below the wire layer Copy n Paste bow Image - Resize by 50 Duplicate twice n place on the wire Merge these layers n drop shadow Add any more embellishments of choice Add all correct copyright n licence numbers Add your name - I used inner bevel on mine Merge layers Crop if necessary n thats it!

Sunday, 27 September 2009

New Tut - Howard Blue n Pink

I am using the fab work of Justice Howard which you can get HERE Scrapkit of Choice Font of choice Open new image 500x500 Open wrapped frame1 Copy n Paste on your canvas Image - Resize by 50 - Adjust - Sharpness - Sharpen Grab your magic wand and selections - Modify - Expand by 3 Grab the tube you are using - Resize if needed and place in the frame Selections - Invert - Delete - Selections - Select none Move this under the frame Copy the tube again onto your canvas and place directly over the tube thats on there Erase any over hanging bits - i erased the bottom of her dress Give the bottom tube and frame a drop shadow Click on the frame layer again Selections - Modify - Expand by 5 Copy n Paste a paper of choice, I used paper22 and resized it by 50 Selections - Invert - Delete - Selections - Select none Move to the bottom of your canvas Open flowerpendant 4 Copy n Paste on canvas - Image - Resize by 50 Place under the frame and erase any overhanging Adjust - Sharpness - Sharpen more Give it a drop shadow Open up wax seal4 Copy n Paste n resize by 50 3 times Place on top right hand side - Adjust - Sharpness - Sharpen more - Drop shadow Open butterfly 4 - Image - Resize by 40 n then 60 Image - Mirror n place over the bow on the frame - Drop shadow Open flower4 n copy n paste on the canvas Image - Resize by 20 Place on left hand side of frame - Layers duplicate and place underneath - Drop shadow Merge all layers visible Add all correct copyright and licence numbers Add your name Crop if necessary Thats it!

Friday, 25 September 2009

The Devil Becomes Her

I am using the art of Michael Dipascale which you can get HERE I am also using Spooky Hallow a beautiful PTU kit from TootyPup Scraps which you can get HERE Mask of Choice Font of Choice Grab your tube and place on you canvas Open up moon1 - Image - Resize by 80 Place on the top right hand side of your canvas Get paper1a Copy n Paste at the bottom of the canvas Image - Resize by 80 twice Layers - New mask from image - Merge group Open bonesinpot2 Image - Resize by 80 and place on the bottom right hand side of your canvas Grab your Font tool, click on the moon and write "The Devil Becomes Her" or a saying of choice Convert to raster layer Give all layers a drop shadow I used V&H4 Opacity30 Blur30 Merge all layers together Add all correct copyright and licence numbers Merge Visible Add ya name All done Another easy one!

Thursday, 24 September 2009

Gadd's Kat's Eye's

You will need an image of choice - I used the gorgeous work of Maxine Gadd which you can get HERE A fantastic PTU Halloween kit from the very talented Tootypup called Spooky Hollow which you can get HERE Font of choice - I used Scribe font, it's a PTU font from Wiescher Design Open new Image - 500x500 Open frame1 and resize by 70 Grab your image or tube of choice Copy n Paste under the frame erasing any over hanging parts Open doodle3 - Image - Resize by 80 Copy n Paste under the frame - Duplicate 3 times and place one under the other Merge these layers together Crop if necessary Add all copyright info and licence numbers Merge all Thats it lol See very very very quick!!!

Wednesday, 23 September 2009

Made from a TagBack

I just added a tube and the name of the talented person who made this tagback, she is Stacey of StaceyDesigns! Hope you like it x

Garv Say What!

I am using the artwork of Keith Garvey which you can get HERE
Using the awesome PTU Say What kit which you can find at the links on the below tut! Mask of Choice Font of Choice Open up frame5 Image resize by 80 Open paper14 - Image - Rotate by 90 (either way!) Grab the magic wand, click inside the frame - Selections - Modify - Expand by 2 Copy n Paste the paper - Selections - Select none - Move under the frame Get your tube and place her in the frame Give frame drop shadow - I used V n H4 - Opacity30 - Blur3 Repeat this but VnH -4 Open bottlecap2 - Image - Resize - 50 - Place on the top right hand of the frame Effects - 3d effects - Dropshadow 3 - 3 - 30 - 3 Adjust - Sharpness - Sharpen Get paper 17 n paste on the canvas at the bottom Grab mask of choice n go to layers - New mask layer from image - Select then merge group Grab heart pendant - Image - Resize by 80 and place on the left hand side on bow - Drop shadow Get flower8 n resize by 50 and place on top left hand side Open bow6 - Image - Resize by 50 Place in the middle right hand side of the frame Sharpen n drop shadow thats it!! Add all copyright info Licence number Crop if needed Merge Layers Done!!

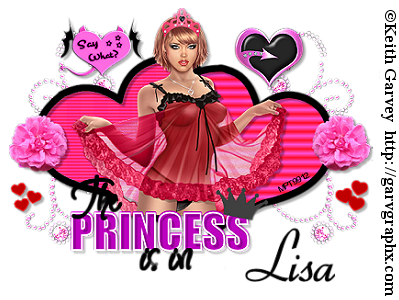
The Princess is in the Building!

I'm using the gorgeous art of Keith Garvey which you can get HERE I'm using the fab PTU kit Say What by Schnegge's designs which you can get HERE Template is no longer available Mask of choice Font of choice Open the template Delete copyrite layer Get your tube and place on the template Move all the wordart to the top Erase the tubes legs (if using the same tube as me) Open paper9 - resize by 80 Click on raster5 Selections - Select all - Float - Defloat Selections - Modify Expand by 3 Copy n Paste the paper as new layer - Selections - Invert - Delete Delete raster 5 Click on first copy of vecter 1 Selections - Select all - Float - Defloat - Selections - Modify - Expand by 2 Layers - New raster layer Grab your floodfill tool - Black Fill the heart outline Delete copy of vecter 1 Repeat with the other vecter 1 and then delete Click on merged Selections - Float - Defloat - Modify by 2 Add new raster layer Grab floodfill tool -Red - Fill the layer Delete merged Repeat with the copy of merged Open paper2 - Image - Resize 80 Click on raster 2 - Selections - Modify - Expand by 3 Copy n paste the paper - Selections - Invert - Delete Delete raster2 Effects - Texture effects - Blinds Width 2 Opacity 80 Horizontal and light from left to top both ticked - Colour red On raster 3 - i selected a bit of the dress on my tube and copy n pasted that into the layer Click on the wordart layer (the in) - Selections - Modify - Expand by 2 Layers - New raster layer - Floodfill black - Delete the wordart On the princess wordart - Selections - Modify - Expand 3 Fill it with red and then delete the layer Open swirlbling - Image - Resize by 80 - Image - Rotate - Free rotate 35 - left Layers Duplicate - Image - Mirror Merge these 2 layers down Open heart3 and resize by 50 Place on the top right hand side Adjust - Sharpness - Sharpen Open devilheart1 Imgae - Resize by 50 Copy n paste as new layer - Put it top right hand side Copy n paste flower5 - Image - Resize by 50 Place on the template - Duplicate - Image - Mirror Give it all a drop shadow Merge layers visible Crop if necessary Add all correct copyright

Sunday, 20 September 2009

Chatzoudis Love over Hate

I am using the art of Elias Chatzoudis which you can get HERE I am using the fabulous FTU kit Love over Hate by Marta which you can find HERE Mask of choice Font of choice Open new image 600x600 Copy and Paste frame4 on the canvas Image - Resize - 80 Adjust - Sharpness - Sharpen Grab the tube you are using and place on top of the frame Layers - Duplicate and move to the bottom Erase any bits you like - i erased the bottom so it looks as if she is coming out of the frame Give the bottom tube and frame a drop shadow Get your magic wand and click inside the frame - hold down shift to click inside both parts Selections - Modify - Expand by 5 Open up paper3 - Image - Resize 80 Copy and Paste on your canvas - send to the bottom Open heart1 Image - Resize by 50 - Place on the top right hand corner of the frame Drop shadow it Open bow4 Image - Resize by 50 and place it in the middle of the left hand side of the frame Drop shadow it Layers - Duplicate - Image - Mirror Open paper7 Copy and Paste as new layer - Send to bottom Grab your mask of choice - Merge group Get the green flower - Image - Resize by 50 twice Place on the top left hand corner of the frame under the tube Give it a drop shadow Add all correct copyright and licence numbers Add your name Merge all layers Crop if necessary And thats it!

Saturday, 19 September 2009

Been invited to be a CT member

Marta of DragonFlyMaidenDidIt has very kindly invited me to be a member of her CT. I will be using her FTU scraps and other things, can't wait to get going!!! If you haven't already visited her blog, please do, she has something for everyone!

Rac Star Grunge

Photobucket This is a fairly quick tut I am using the art of Ismael Rac which you can get HERE I purchased this tube when he sold tubes with MPT If you would like to use the same tube then please visit AMI Scrapkit i am using is Grungy Love by Missy Lynn which you can find HERE I used Mask84 from weescotslass which you can find HERE Ok, let's go Open a new canvas 500x500 Copy n Paste frame1 on your canvas Image - Resize by 80 Adjust - Sharpness - Sharpen Get your magic wans - Selections - Modify - Expand by 3 Get your tube and place where you think is best Selections - Invert - Delete - Selections - Select None Move this under your frame Get the tube again and copy n paste on the canvas Delete the bottom part of the tube and make sure that both tubes matches up Give the first tube a drop shadow Open up paper5 Image - Resize by 70 Click inside the frame with your magic wand again Selections - Modify - Expand by 3 Copy n Paste the paper on canvas - selections - invert - delete Send to the bottom of the layers Give the frame a drop shadow Copy n Paste paper11 at the bottom of the canvas Layers - new mask from image - use mask of choice - merge group Copy n Paste doodle4 - image - resize by 90 Adjust - Sharpness - Sharpen Open guitar and paste on your canvas Image - Resize by 50 Grab your deform tool and place where you think is best Give it a drop shadow Open up wings - resize by 50 n then 40 - Copy n paste on your canvas Place on the top right hand side Use you deform tool to angle it Give it a drop shadow n sharpen it Place all your copyright and licence info on your tag Add your name Crop if needed Merge Visible n save!

New Tut - Grungy Cano

This tut is not available due to Photobucket eating my tag :(

Sunday, 13 September 2009

Another tag with Stacey's Kit

Photobucket Another tag made by me using the fantastic kit Spookable by the ever talented Stacey!

Friday, 11 September 2009

Tag using the same kit below

Made this using the same kit as before, love it and love Halloween!! Photobucket

Halloween Tut - Chatzoudis Spookable

Photobucket I am using the art of Elias Chatzoudis which you can find HERE I'm using the fantastic Spookable PTU kit by Stacey of Stacey's Designs which you can find HERE Also Mask136 by WeeScotsLass which you can find HERE Open up a new image 600x600 (we can crop later if necessary) Open up tripleframe Image - Resize - 80 Copy and paste this on your canvas Grab your magic wand and click in all 3 of the frames (hold down shift) Selections - Modify - Expand by 3 Copy n paste paper5 Image - Resize by 80 Selections - Invert - Delete - Selections - Select None Move under the frame Open up the happy halloween button Paste as a new layer on the canvas Image - Resize by 50 and then again at 80 Place on the first frame Get the tube you are using and place on top of the frame Give the tube a drop shadow Also give the paper and the frame the same drop shadow Open a new raster layer and place it at the bottom of the canvas Copy and paste paper 11 on the canvas Layers - new mask layer from image Select mask136 Merge Group And thats it! Add all correct copyright and your licence number Merge all layers visible Done!!

New tags

Well i made these 2 kits using the gorgeous kit Angelic Passions by Missy Lynn which you can find HERE This Kit is amazing n i loved it! Here are my tags I was going to tut them but got carried away making the tags that i forgot lol Photobucket Photobucket

Monday, 7 September 2009

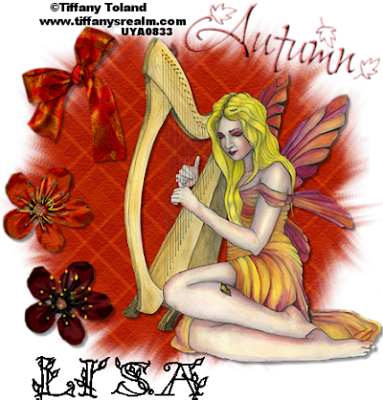
Fall Fairy - FTU

OK, the above is what we will be making! I am using the gorgeous art of Tiffany Toland which you can find HERE Tube is called Beyond Time Summer TA0021 which you can find HERE My UYA licence number is UYA0833 I am using a Freebie add-on kit called Falling for Fun which you can get HERE (scroll down a little!) Also using Mask241 from WeeScotsLass which you can find HERE WordArt is from HERE (You will need to register to get this) Font of Choice OK, a short n sweet tut! Open a new Image 600x600 (we can crop later) Copy n Paste paper18 from the kit as a new layer Open up your mask Layers - New mask from Layer - select mask241 - click ok - merge group Add your tube where you think is best - resize if necessary Give your tube a Drop Shadow I used V&H4 - Opacity40 - Blur - 3 Open up bow5 Copy and paste on your canvas Image - Resize - 50 and then Resize again - 80 Place this at the top left hand corner of your canvas or where you think is best Add the same Drop-Shadow as before Open up blossom6 Image - Resize - 40 Place under your bow Add the same Drop-Shadow as before Open up blossom5 Repeat the above steps Open up the WordArt Image - Resize - 10 Selections - Select all - Float - Defloat Layers - New Raster Layer Grap your fill tool Foreground: #B52B2B - Background - None Fill the WordArt - Selections - Select None Copy and Paste this on your canvas Place where you think is best - I put mine above my tube Effects - 3d Effects - Inner Bevel Crop if necessary Merge All Add the correct Copyright and licence number for the tube you are using All done!!

Tuesday, 1 September 2009

Another new tag!

Well this tag i made using Stacey's Tranquility Kit which is a gorgeous PTU kit which you can get here